
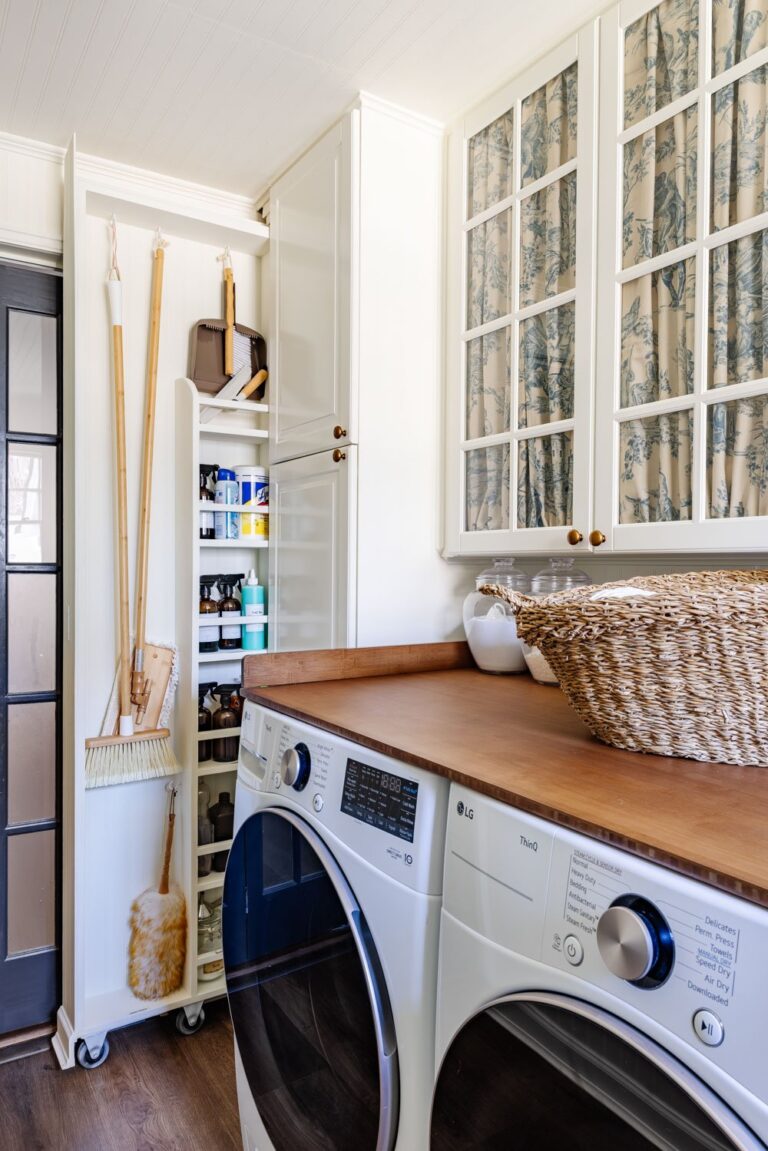

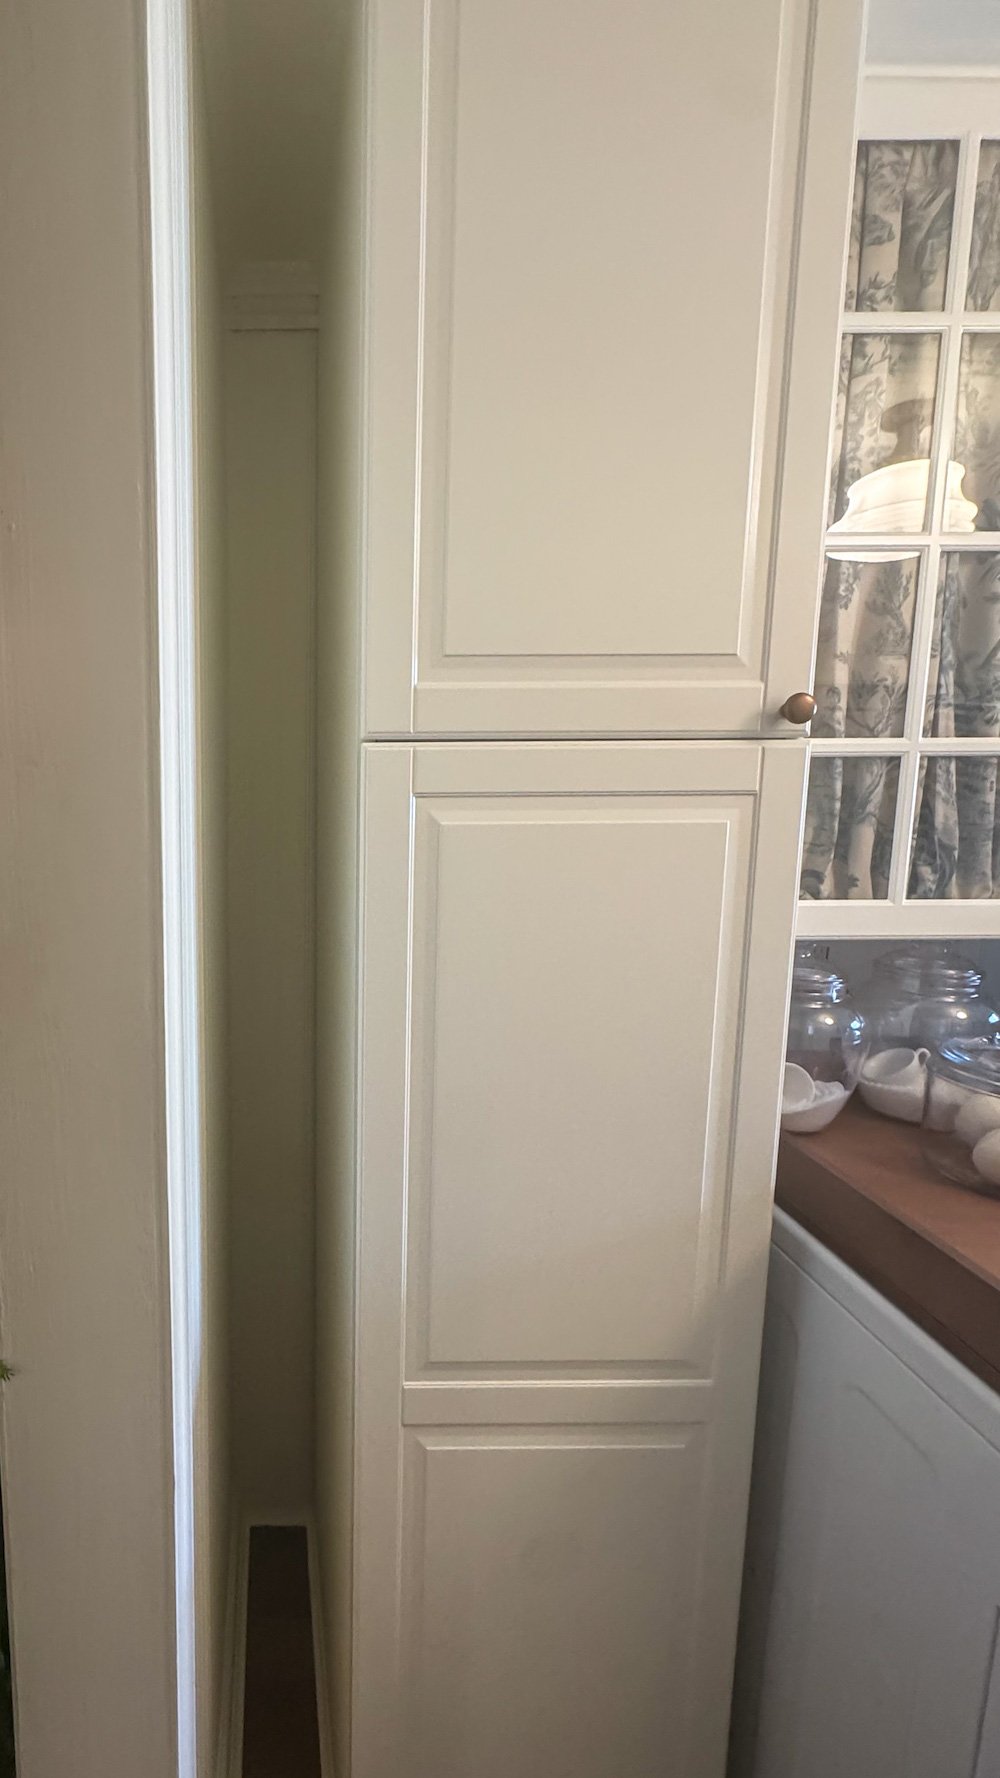
If there’s one thing I love, it’s finding sneaky little ways to add storage where you least expect it. Our laundry room is hardworking but narrow, and every inch counts. So when I realized we had a tiny 6″ gap between our cabinet and the wall, I knew it had potential.

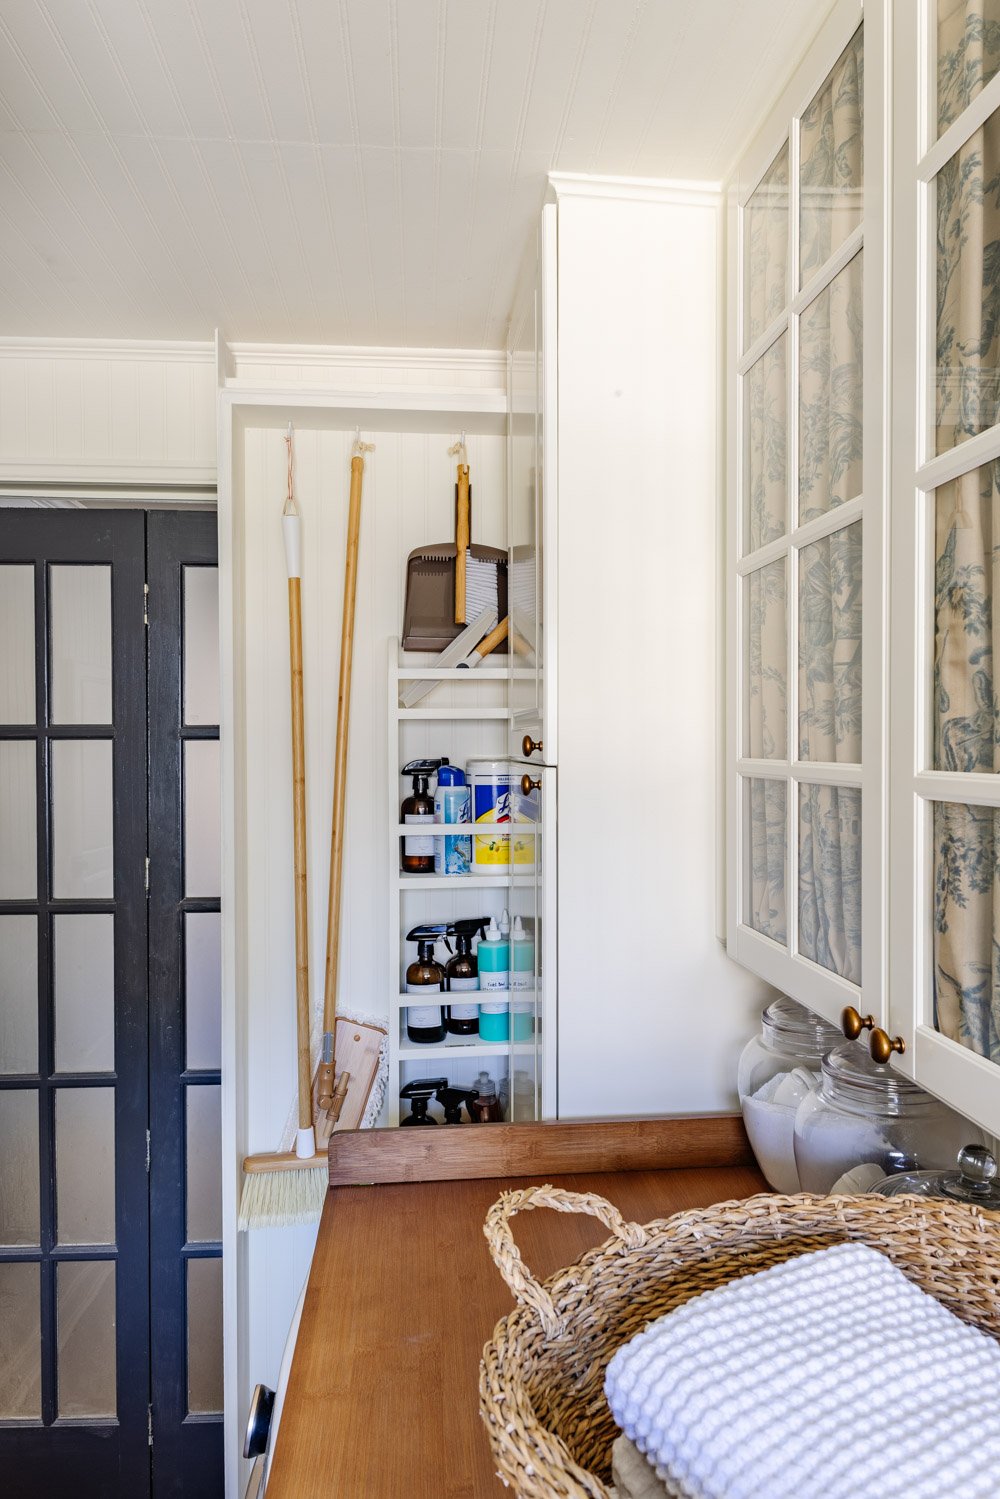
That little sliver became one of my favorite functional details in the room: a hidden broom cupboard that slides out when we need it and disappears when we don’t.
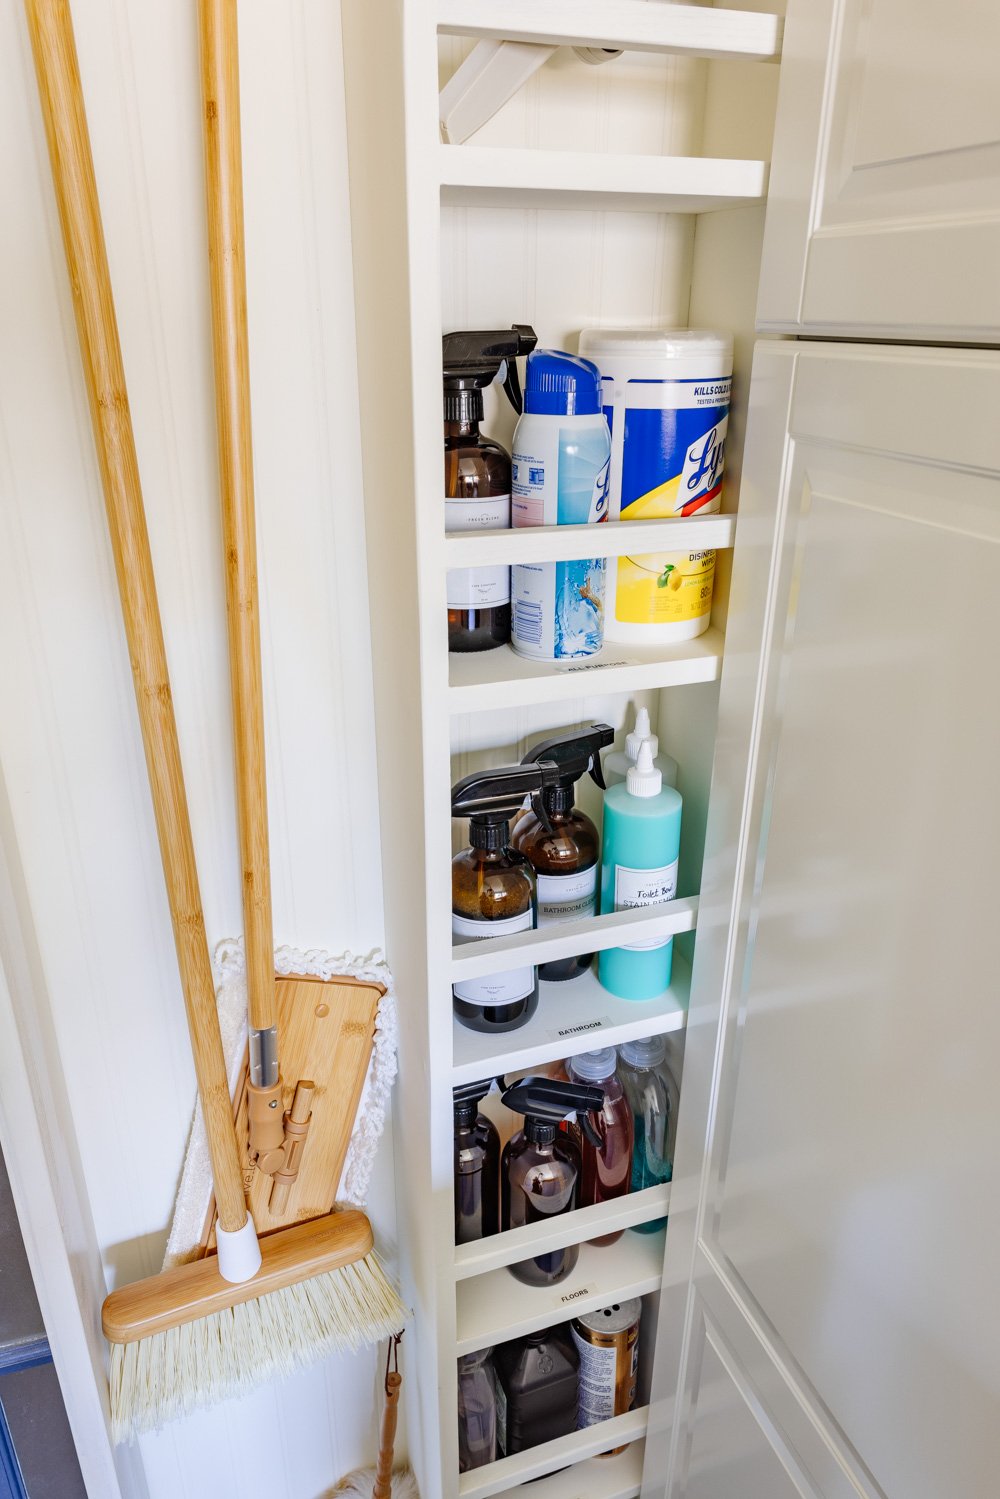
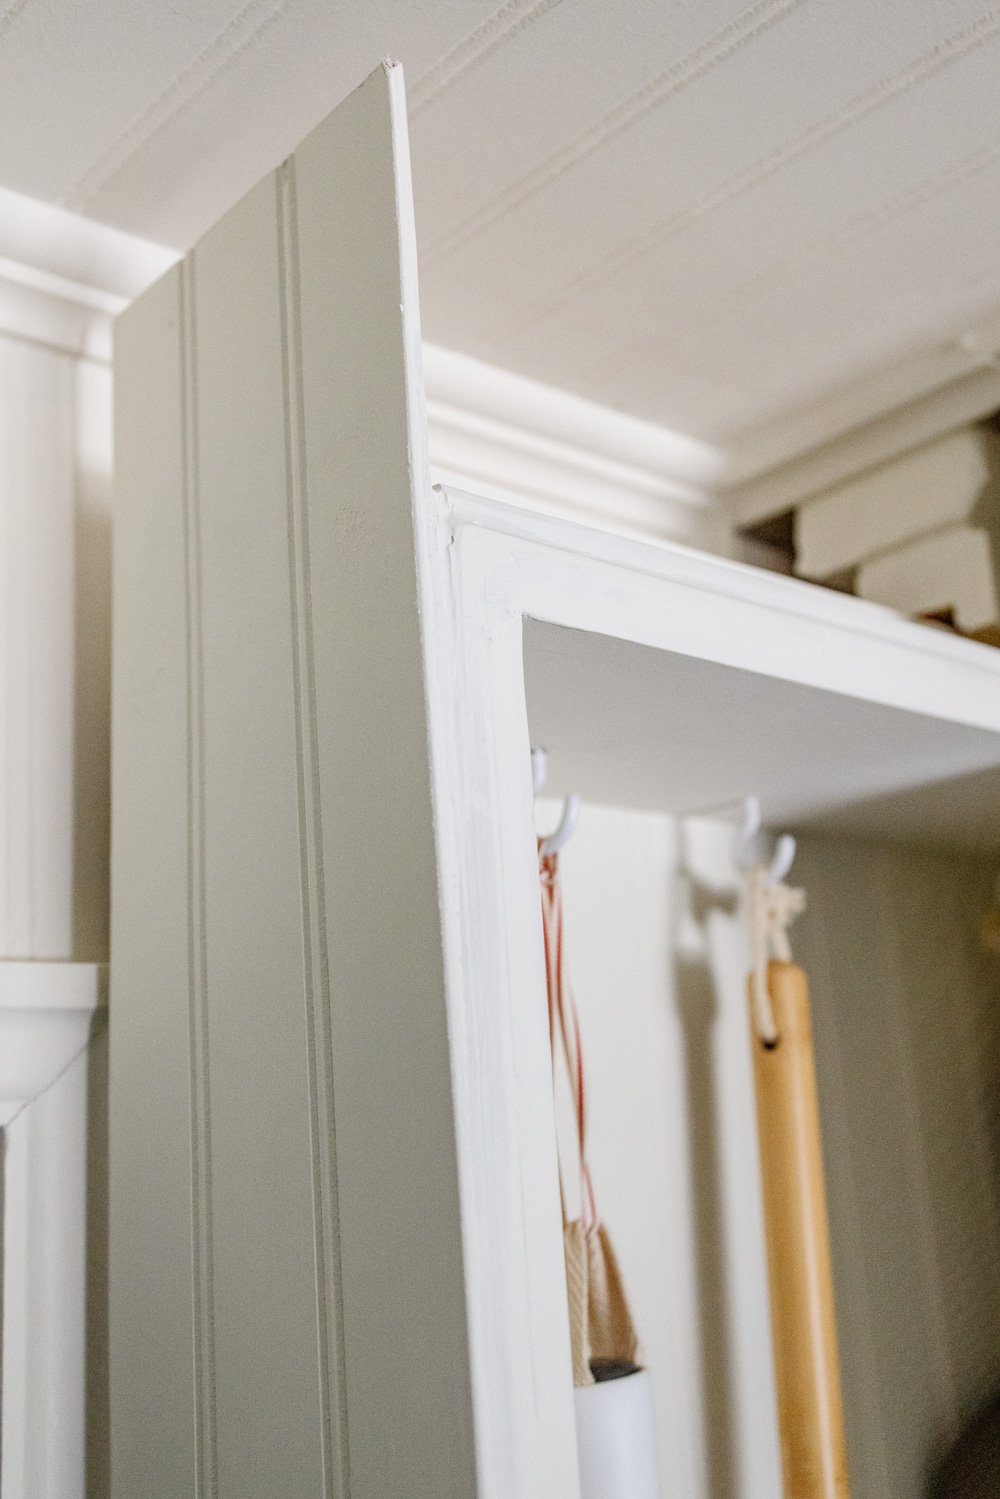
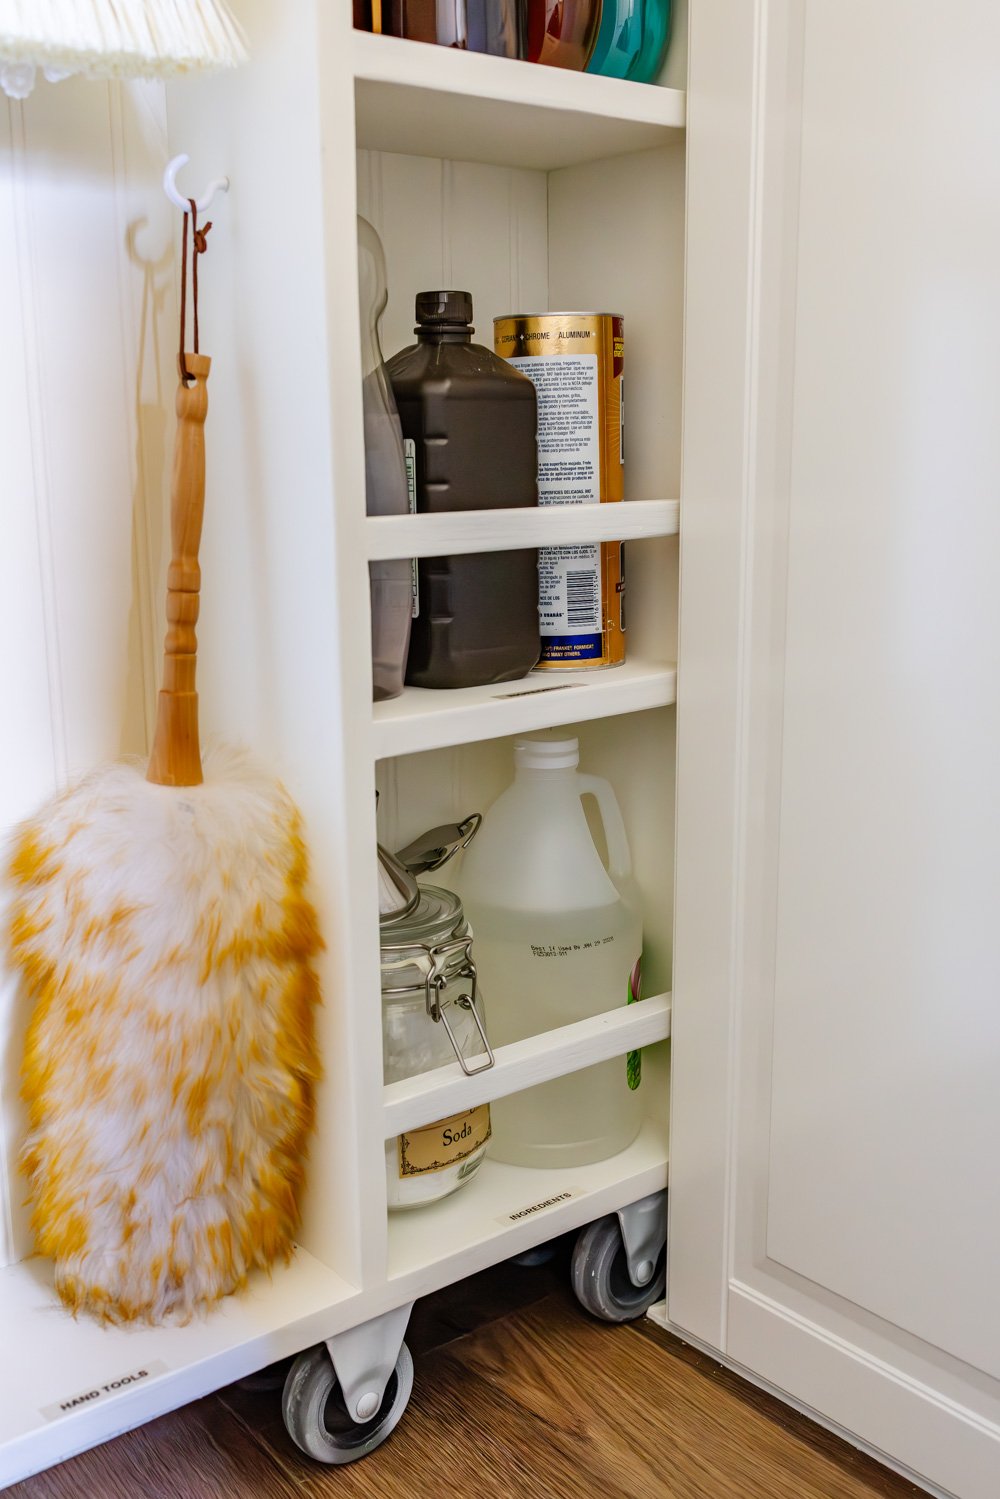
At first glance, it looks like part of the wall. No super-visible handle. No obvious door. Just clean lines and beadboard that blends right in. But pull it out, and it neatly stores our broom, mop, and cleaning supplies without stealing valuable space.
We used building plans from Renovate108.com as our starting point (they have a fantastic tutorial), but because our laundry room cabinets were already installed, we had to get a little creative. I’ll walk you through exactly how we adapted their design and built our own custom broom cabinet step by step.
Why Build a Hidden Broom Cupboard?
Before we get into the how, let’s talk about the why.
- No more leaning brooms in a corner
- No bulky utility closet taking up space
- Messy looking cleaning tools stay hidden but easily accessible
- It looks custom and built-in (even though it isn’t)
This is one of those projects that makes a room feel thoughtfully designed even though it’s really just smart storage.
Our Custom Adjustments (Compared to the Original Plans)
The Renovate108 plans use a wall-mounted track system, but that wasn’t an option for us since our laundry room cabinets were already secured in place. So we made a few key changes to make it work in our space:
- Built a custom ceiling-mounted pull-out track in a 6″ gap (We literally just built it using scrap wood from an old pallet we happened to have.)
- Mounted the cupboard frame on casters so it rolls smoothly
- Added beadboard to the front so it blends into the wall
- Hid the caster wheels with baseboard trim
- Installed a pocket door pull to keep everything nearly invisible
All of these tweaks helped the broom cupboard feel seamless and intentional like it was always meant to be there.
Step-by-Step: How We Built Our Hidden Broom Cabinet
Step 1: Measure the Space (Down to the Last Inch)
Because this broom cupboard was designed to fit into a very tight gap, precise measurements were critical. We measured:
- The width of the gap between the cabinet and wall
- The depth available without interfering with the cabinet doors
- The ceiling height for tall cleaning tools
If you’re attempting something similar, measure more than once; this project has zero room for error.
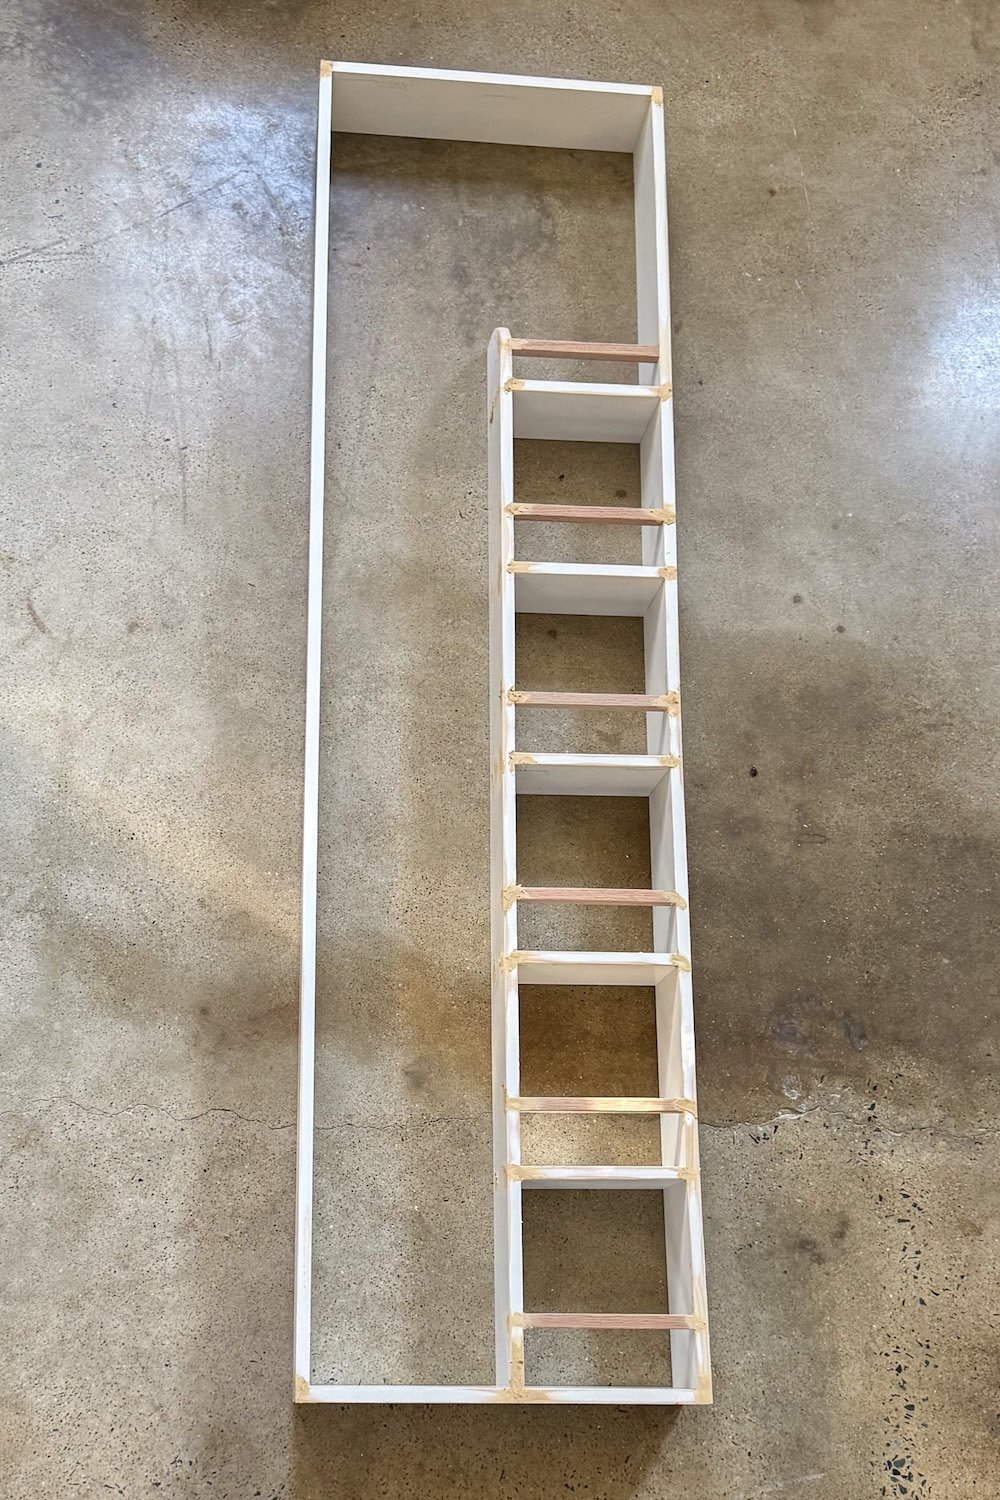
Step 2: Build the Broom Cupboard Frame
Using the Renovate108 plans as a base, we built a tall, narrow cabinet frame sized specifically for our space. This included:
- A sturdy rectangular frame
- Horizontal supports for stability
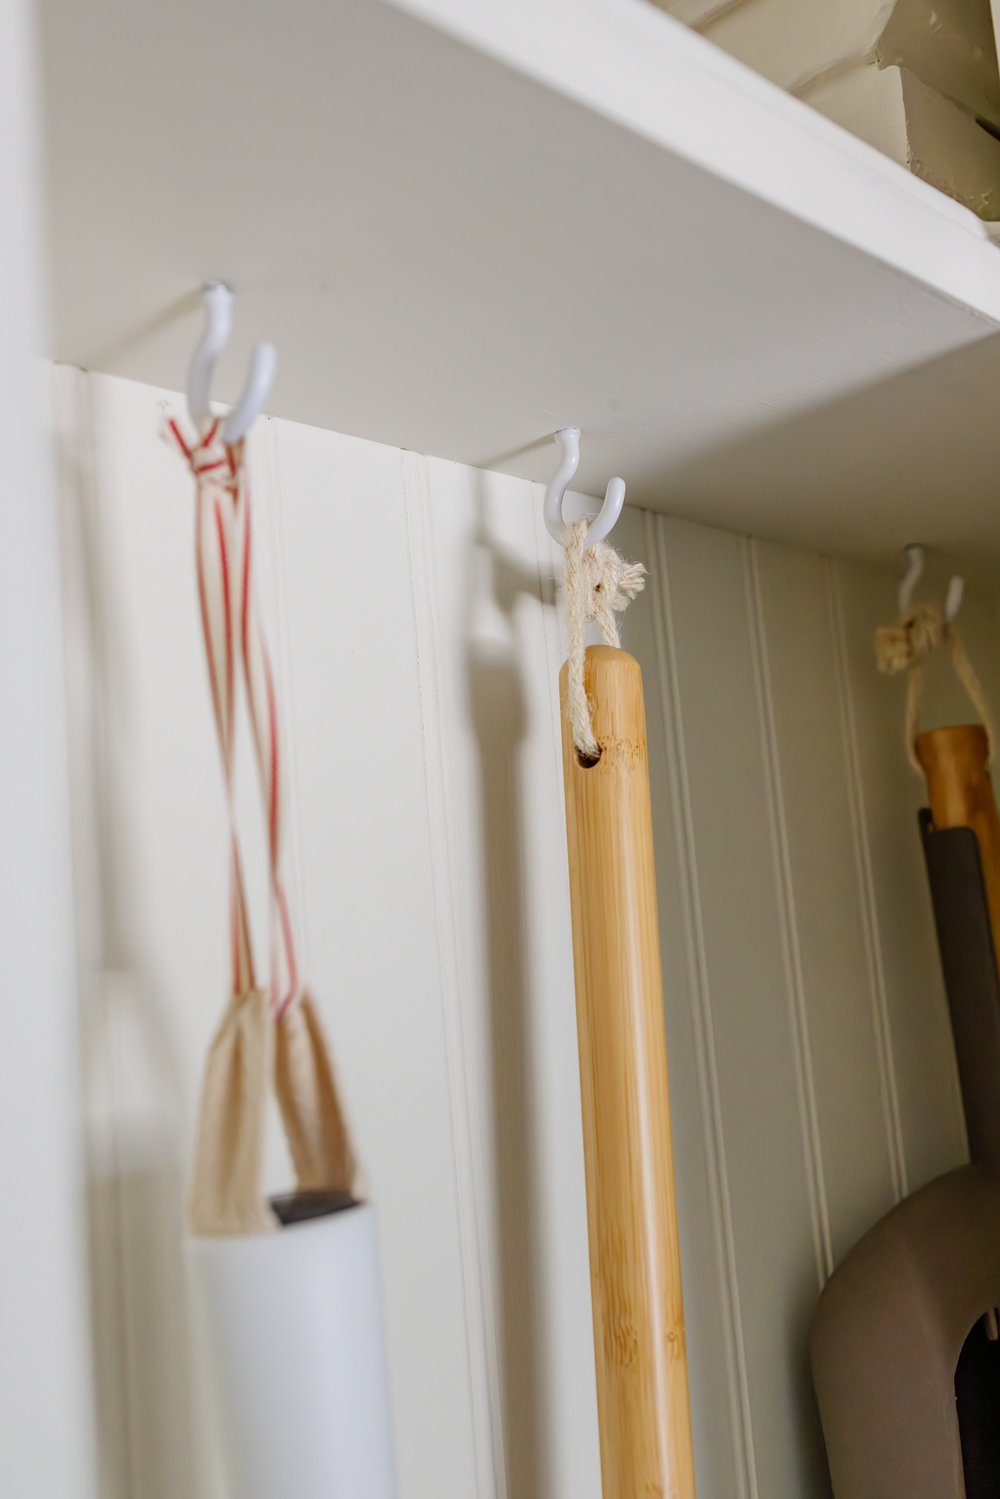
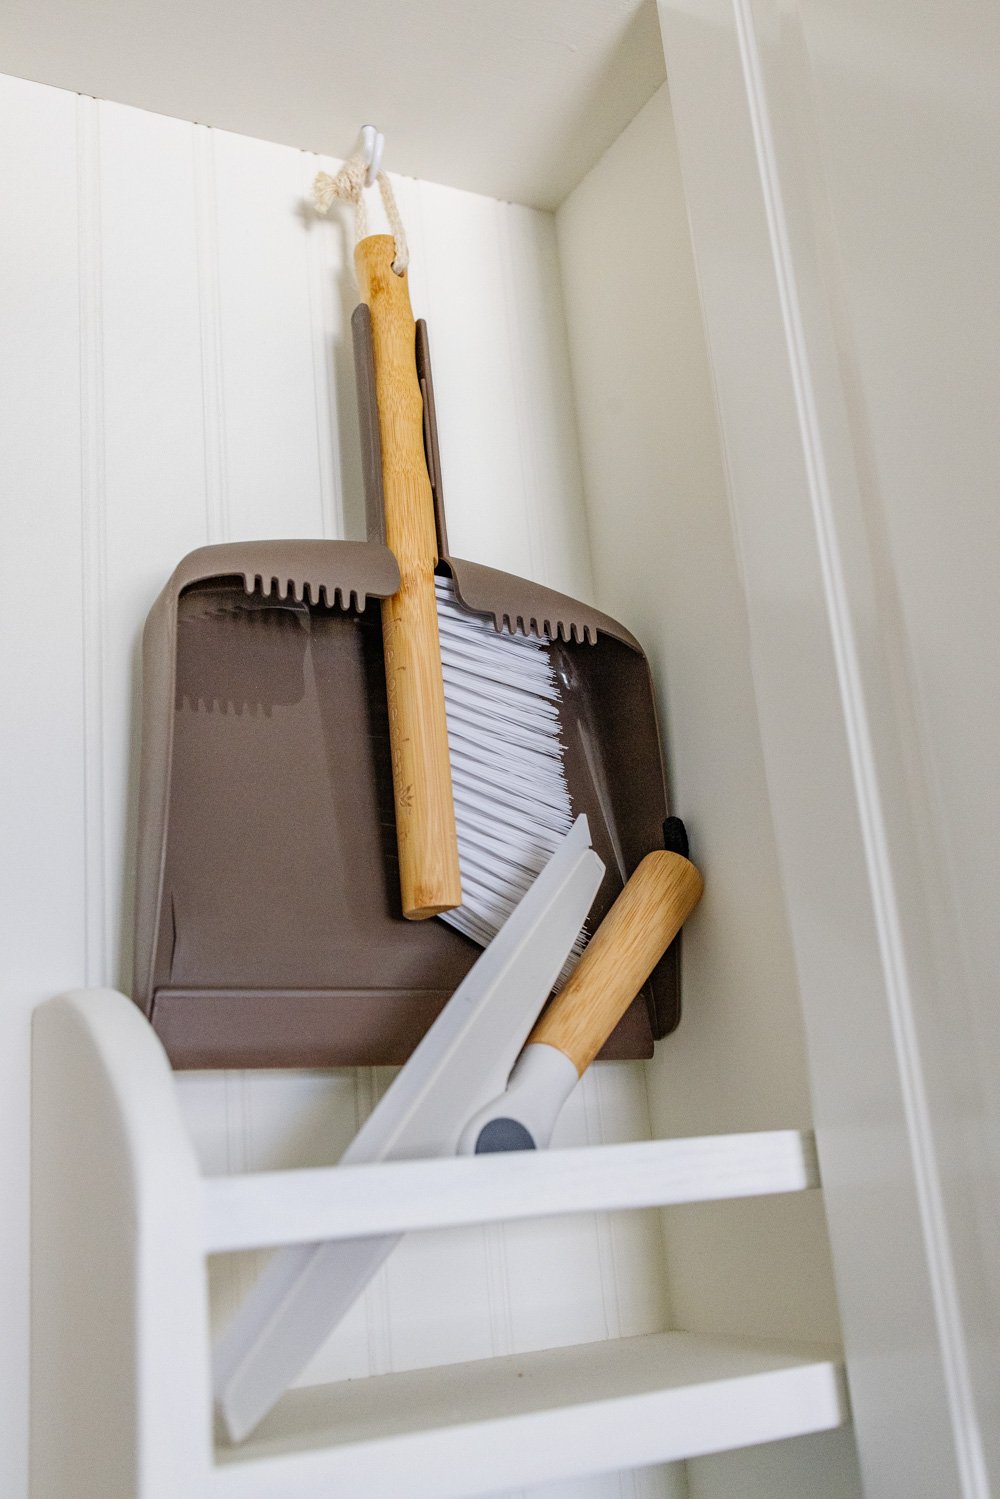
- An open interior sized to hold a broom, mop, and duster
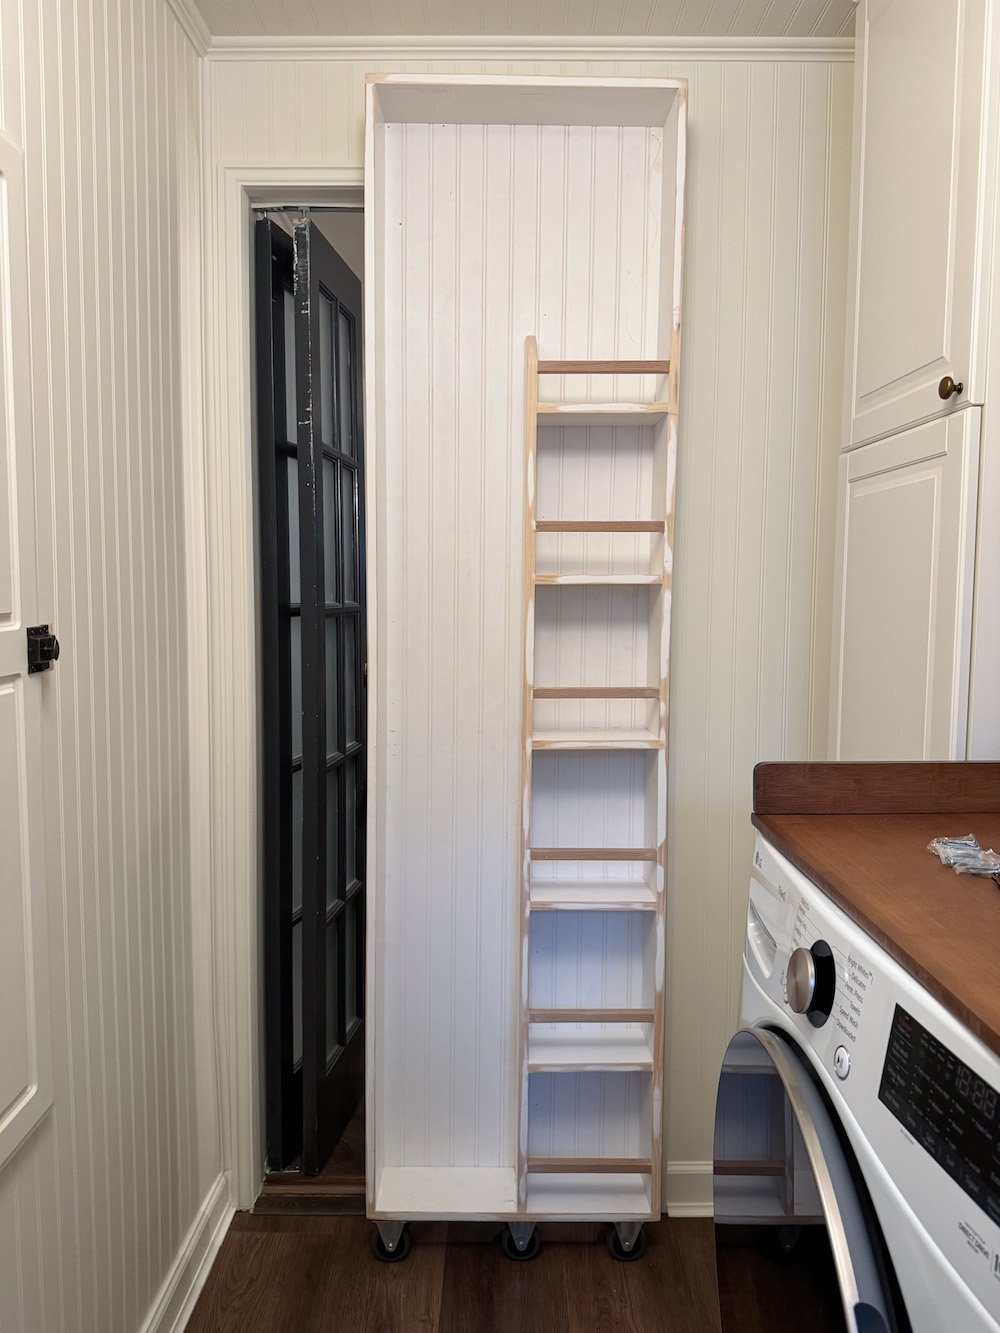
At this stage, it looks very much like a tall, skinny box and not very exciting yet.
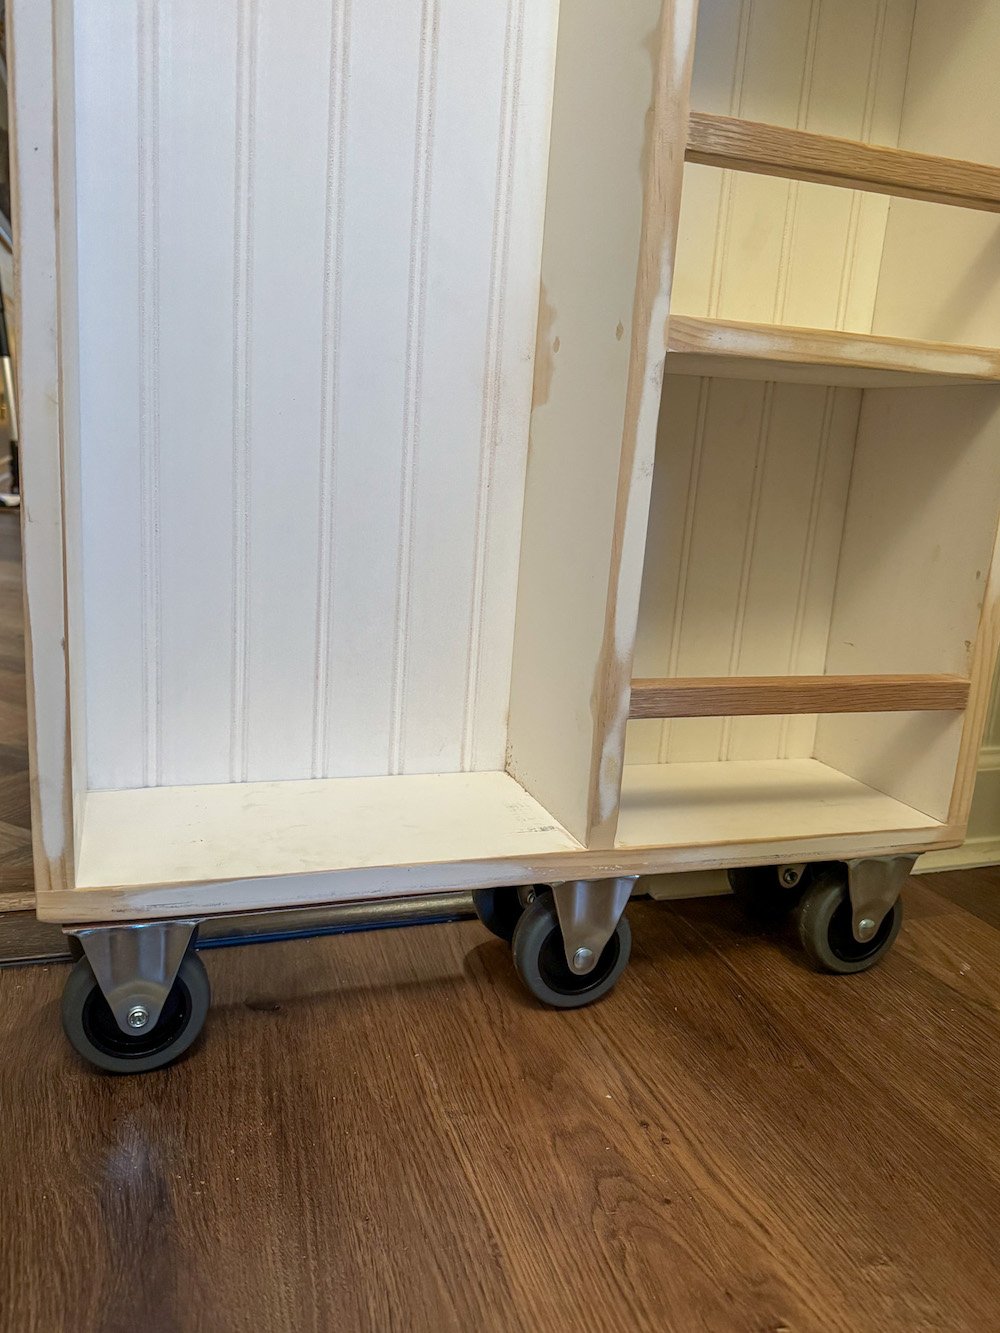
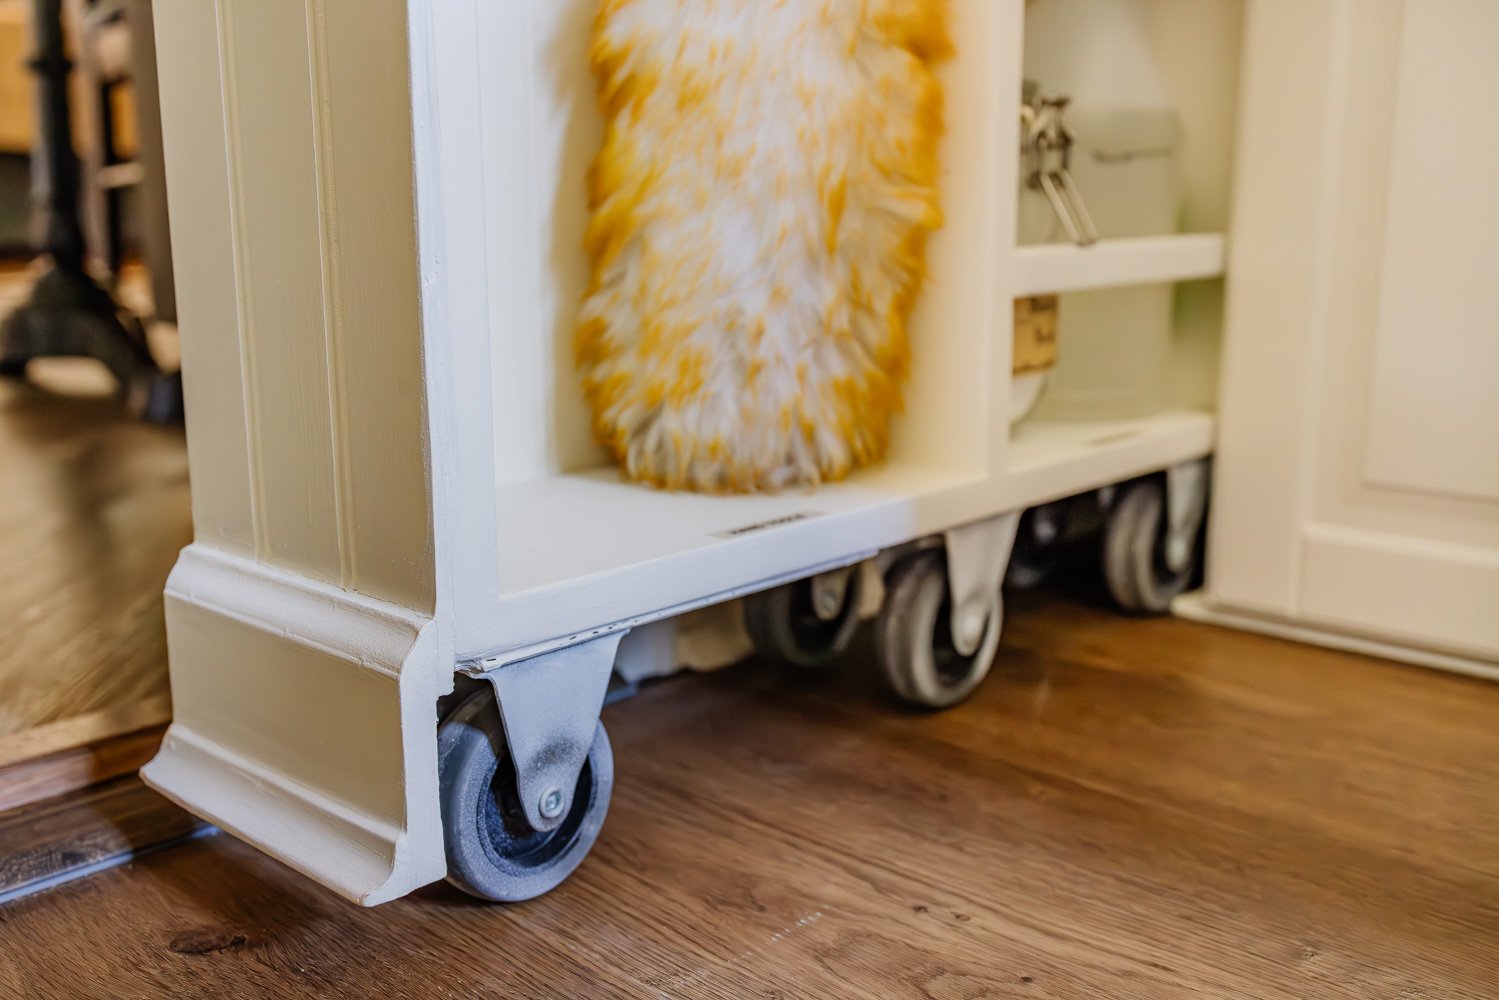
Step 3: Add Casters for Smooth Sliding
Since we couldn’t use a wall-mounted track, we mounted casters to the bottom of the frame so the entire broom cabinet could roll out easily.
This made a huge difference. The cupboard slides smoothly with very little effort, even when fully loaded with cleaning tools.
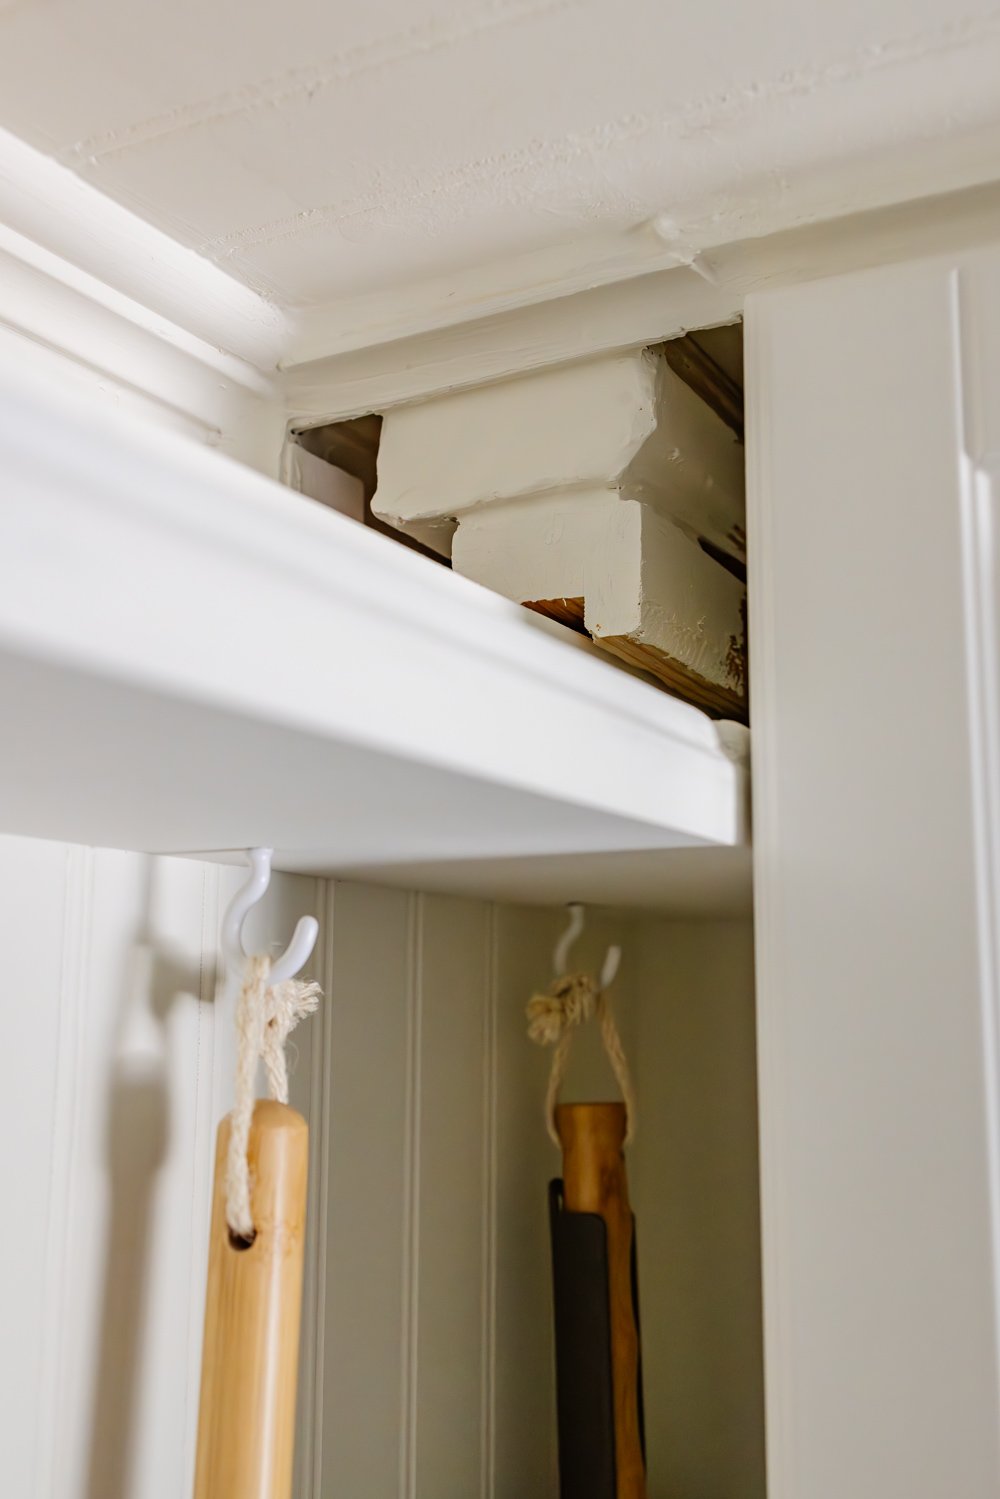
Step 4: Build a Custom Ceiling Track
To keep the broom cupboard from tipping or wobbling, we created a simple ceiling-mounted guide track.
This was installed in the small 6″ gap between the cabinet and the wall and helps keep the cupboard moving straight as it slides in and out. It’s hidden from view but does all the hard work behind the scenes.
Step 5: Add Beadboard to the Front
This is where the magic happens.
We applied beadboard to the front of the broom cupboard so it visually matches the rest of the laundry room walls. Once painted, it looks like wall paneling, not a cabinet door.
If you want a truly hidden broom cupboard, this step is key.
Step 6: Hide the Casters With Baseboard
To make the bottom look finished, we attached a piece of baseboard trim to the front of the cupboard.
- It hides the caster wheels completely
- It lines up with the existing baseboard on the wall
- It helps the cabinet look flush and built-in
This small detail makes a big visual difference.
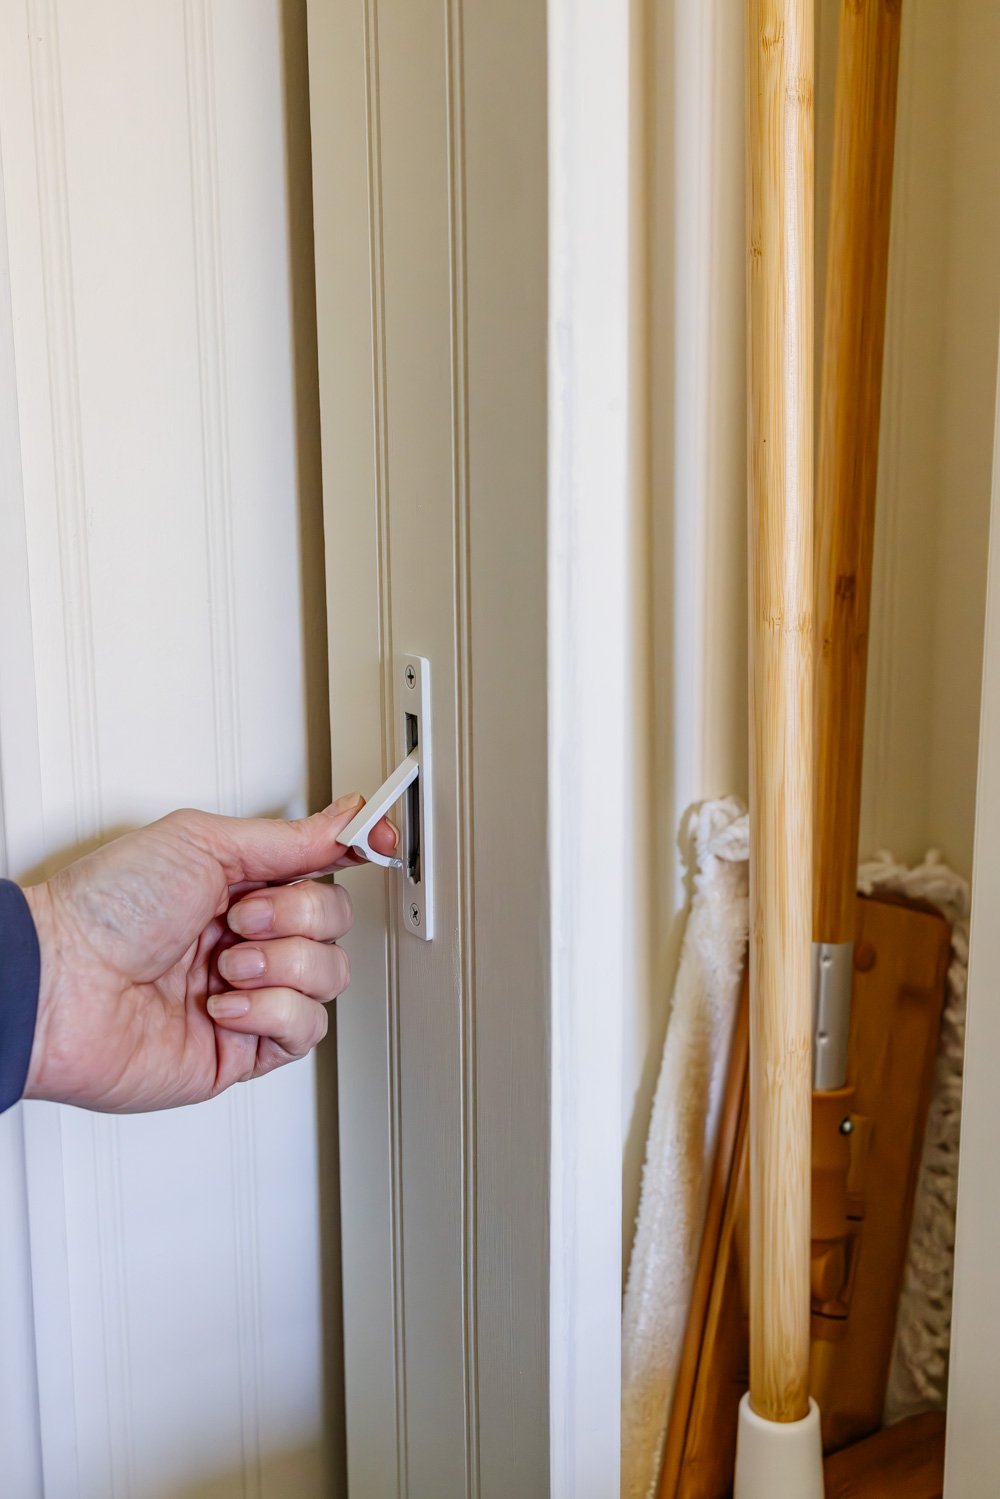
Step 7: Install a Pocket Door Pull
Instead of a traditional cabinet knob, we installed a flush pocket door pull so the broom cabinet stays nearly invisible when closed.
It’s easy to grab when you need it, but disappears into the design when you don’t. This is one of my favorite details of the whole project.
The Finished Hidden Broom Cupboard
Once everything was painted and slid into place, the broom cupboard blended right into the laundry room wall. If you didn’t know it was there, you’d walk right past it.
- Our brooms are stored upright
- Everything has a designated place
- The room feels cleaner and more intentional
This is one of those projects that quietly makes everyday life easier and those are always my favorites.
This hidden broom cabinet proves that even the smallest spaces can work harder with a little creativity. I actually can’t wait to organize all of the other cabinets and drawers in this laundry room so that every household item has a place and can be easily found in here.
If you have an awkward gap, unused sliver of wall, or a constant broom-in-the-corner situation, this might just be the solution you didn’t know you needed.
And honestly… there’s something deeply satisfying about storage that hides in plain sight.
More Home Organizing Ideas
