
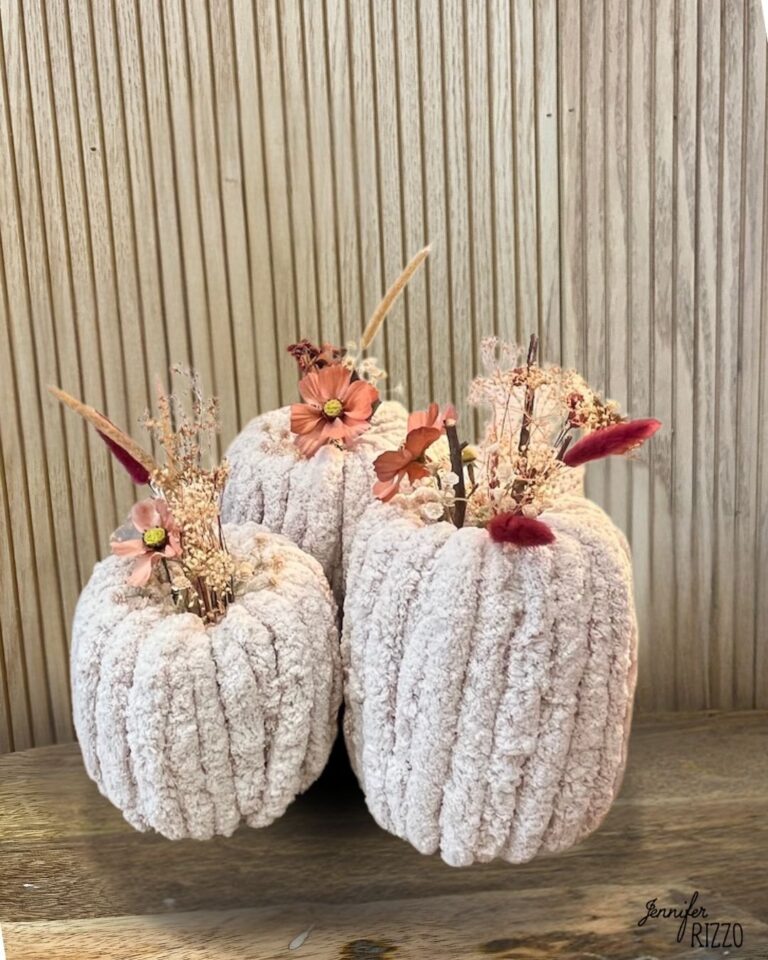
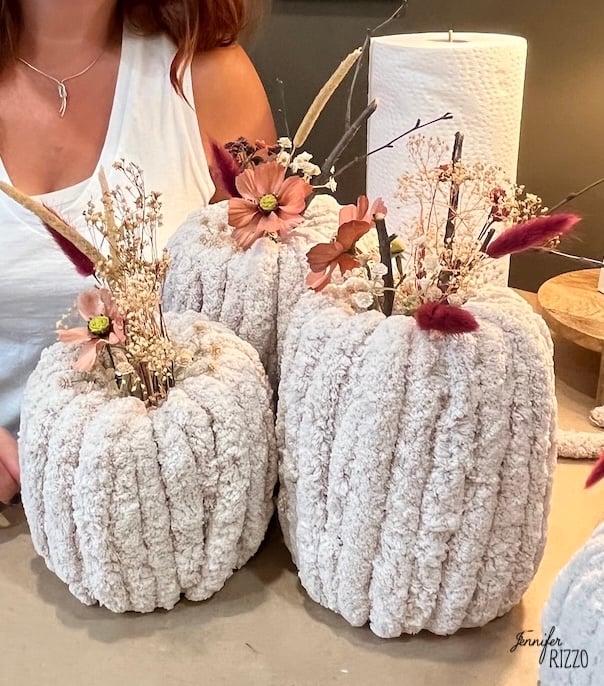
Chenille pumpkins are not only super cute but really easy to make! They can be made to not only any size desired but color as well! The best part is this version is completely no sew and no crochet and use chunky blanket yarn to create a cute and soft pumpkin. And, it’s a great way to recycle and use your cardboard delivery boxes. We just led this workshop in the Lisle studio and they were such a cute project!
this post contains affiliate links. See our sponsor and affiliate disclosure here.
Supplies to Make A DIY Chenille Pumpkin
Find the Supplies here at Michaels
Chunky blanket bulky chenille yarn(from Michaels)
Recycled cardboard boxes
Low temp. hot glue gun and hot glue
Dried or faux flowers
Small stick or branch for the stem

Cut Out the Cardboard Pieces
Using an old cardboard box, cut out two to three long rectangles. For a small pumpkin cut one piece 3 inches tall by 15 inches long, and for a larger pumpkin cut the piece 6 inches tall by 20 inches long. At the end of each piece of cardboard, cut the corners off to make a point. This will be your “tab” to glue the pumpkin together when its completed.

Pre-Roll the Cardboard Pieces
This step is important to not miss to get that full and round pumpkin look. Starting at the and opposite of the tab, fold over the end of the cardboard onto itself and then continue to roll the cardboard on itself
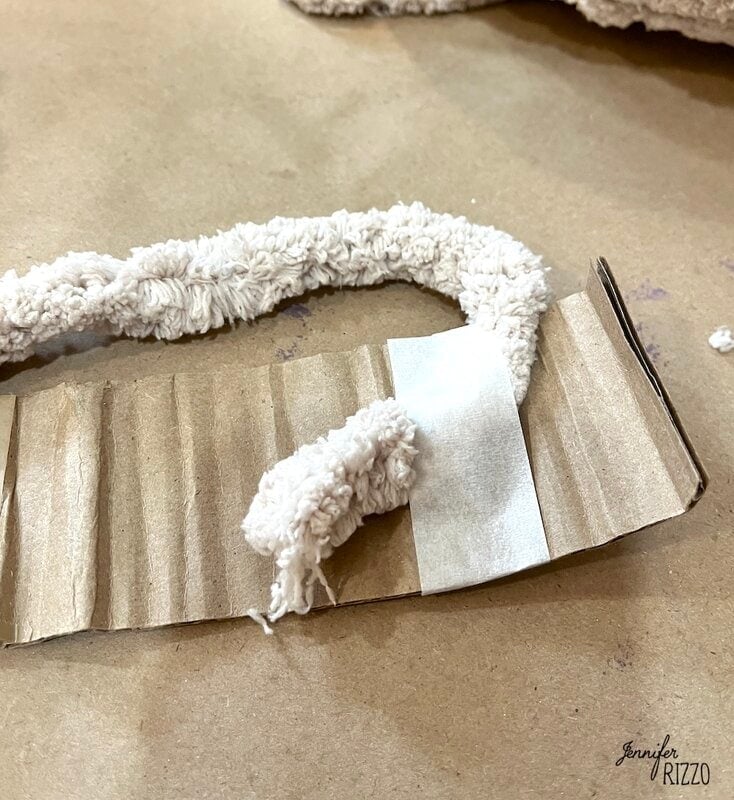
Tape the Chenille to the Cardboard
Tape the end of the chenille yarn to what would be considered the inside of the pumpkin at the end opposite of the “tab.”
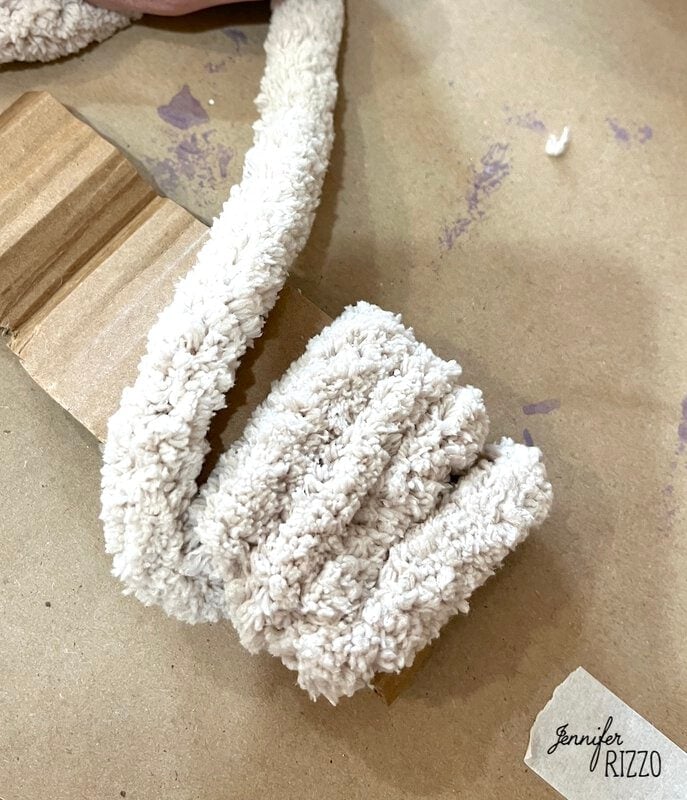
Start wrapping the Yarn Around the Cardboard
Start wrapping the chenille yarn around the cardboard moving down the cardboard until the tab is reached and then wrap back toward the starting point. Do NOT wrap over the tab. Repeat this process until the yarn covers the cardboard. It will probably take 3-4 wraps of the yarn. When an end it reached, bring both ends together and make sure the pumpkin will close. If both ends don’t touch, then some of the yarn needs to be unwound. Use the tail end of the yarn top tie a knot on the “inside” of the pumpkin before closing.
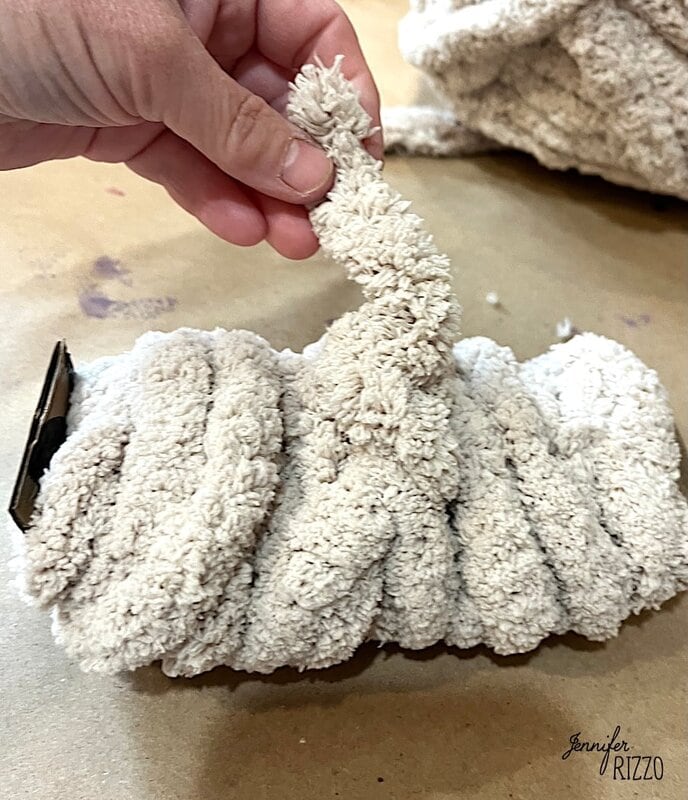
Use the Hot Glue to Bring the Pumpkin Together
When gluing the chenille pumpkin with the hot glue gun, it’s important to make sure that the hot glue gun doesn’t ever touch the yarn, otherwise it could melt. The hot glue should only be applied to the cardboard. To glue the pumpkin together, apply the low temperature hot glue to the inside of the cardboard tab and close the pumpkin, sliding it between the cardboard and yarn on the opposite side. Press the two pieces of cardboard together and hold, being careful to not touch any of the hot glue with fingers. Once the glue is set pressure can be removed from the cardboard. Slide some of the chenille yarn over the glued cardboard to hide it.

Add the Stem and Flowers
A simple stick from the yard works well as a rustic stem. Grab one that is free of pests and is long enough to go into the center of the pumpkin and look kind of fun and cool. Add a few drops of hot glue to the end of the stick before pushing in to the center of the pumpkin to help keep it in place.
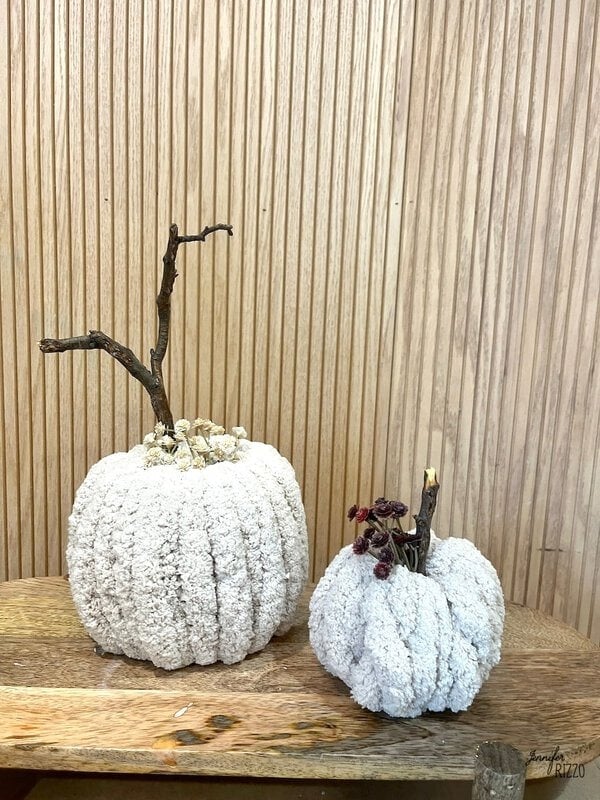
Once the stem is set, add various dried flowers and faux flowers to create a pretty fall pumpkin that can be left out until the holiday decorations come out!
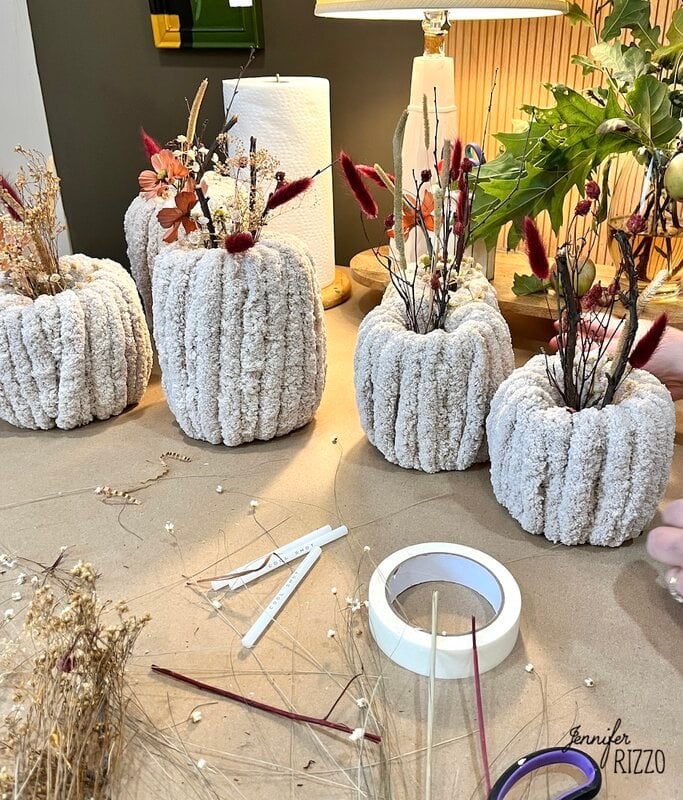
These are so much fun to make in various sizes and shapes as well. Just vary the height and length of the cardboard and start wrapping making cute DIY chenille pumkpins! For more fux pumpkin decorating ideas, see how to make this air dry clay decorative pumpkin.

