
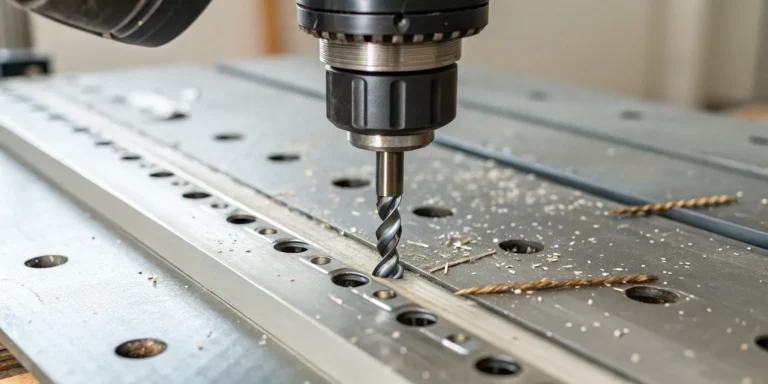
As a professional, your power drill is one of the most versatile tools in your truck. With the right accessory, it can do so much more than just drive screws. If you work with sheet metal, one of the smartest additions you can make to your kit is a sheet metal nibbler drill attachment. This compact tool turns your drill into a powerful metal cutter, capable of handling complex curves and corrugated panels that would challenge other tools. It’s a practical and efficient solution that saves you from buying a separate, dedicated machine. In this article, we’ll explore how these attachments work, review the top models on the market, and share tips to help you get professional-grade results.
Key Takeaways
- Know the Right Job for Your Nibbler: A nibbler is your best tool for cutting curves, circles, and corrugated panels without warping the metal. Save it for these intricate jobs and use shears for long, straight cuts to get a cleaner edge and extend your nibbler’s life.
- Prioritize Precision and Safety: Achieve flawless straight lines by clamping a guide to your workpiece. A steady speed and consistent pressure are crucial for a smooth finish, and always wear safety glasses and gloves to protect yourself from sharp metal chips.
- A Little Maintenance Goes a Long Way: Keep your nibbler cutting like new by regularly cleaning it and replacing the punch and die as soon as they get dull. This simple habit prevents poor results, protects your drill, and ensures your tool is always ready for the next job.
What is a Sheet Metal Nibbler Drill Attachment?
If you’ve ever needed to cut sheet metal, you know how tricky it can be to get a clean, precise line without warping the material. That’s where a sheet metal nibbler drill attachment comes in. Think of it as a clever accessory that transforms your standard drill into a specialized metal-cutting machine. It’s a practical and efficient solution for making intricate cuts that other tools might struggle with. Whether you’re working on roofing, HVAC, or auto body projects, this attachment can make your job much easier by providing clean, accurate cuts every time.
How Does a Nibbler Work?
The name “nibbler” is pretty descriptive of what the tool actually does. It works by “chewing” its way through the metal. The attachment uses a punch and die mechanism that rapidly punches out tiny, crescent-shaped pieces of metal as you guide it along your cut line. This process is different from shears, which cut by slicing. Because the nibbler removes material instead of displacing it, you get a clean, burr-free edge without any distortion or warping of the sheet. This makes it one of the go-to metal cutting tools for jobs that require precision, especially on thinner gauge metals where warping is a common headache.
The Pros and Cons of Using a Nibbler
Like any tool, a nibbler has its strengths and weaknesses. On the plus side, it’s fantastic for cutting corrugated sheets and complex shapes. If you need to make tight curves or follow an intricate pattern, a nibbler operates a lot like a jigsaw for metal, giving you excellent control. The biggest advantage is the clean, distortion-free cut it produces. However, the main drawback is the mess. All those tiny metal chips it punches out have to go somewhere. They are sharp and can easily scratch finished surfaces or get into other equipment if you’re not careful. You’ll need to factor in some extra time for cleanup.
Types of Nibbler Attachments
Nibbler attachments are designed to be versatile, and you’ll find they can connect to most standard drills, whether they’re battery-powered, corded electric, or even air-powered. The type of drill you use will influence the tool’s power and portability on the job site. Beyond the power source, different nibbler heads are designed for specific tasks. Some are built for making perfectly straight cuts, while others excel at cutting circles and curves. This versatility means you can handle a wide range of metalworking jobs, from straight roofing panels to custom ductwork fittings, with just one attachment. It’s a great companion to other metal bending tools in your kit.
How to Choose the Right Nibbler for the Job
Picking the right nibbler attachment isn’t just about finding one that fits your drill. It’s about matching the tool to the materials you work with and the kind of cuts you need to make day in and day out. A little thought upfront can save you a lot of frustration on the job site. When you’re evaluating your options, think about the thickness of the metal you typically handle, the power source you prefer, and the durability you expect from a professional tool. A nibbler that works perfectly for light-duty HVAC ductwork might not hold up to the demands of cutting standing seam roofing panels. Let’s walk through the key factors to consider so you can invest in a tool that works as hard as you do.
Check Material and Cutting Capacity
Before you look at any other feature, your first step is to verify the nibbler’s cutting capacity. Every nibbler is rated for a maximum material thickness, usually measured in gauge. It’s crucial to check how thick of a material each nibbler can cut, as this varies significantly between models. Trying to cut a metal that’s too thick will not only give you a poor-quality cut but can also damage the attachment and your drill. Check the manufacturer’s specifications and make sure they align with the materials you use most often, whether that’s steel, aluminum, or copper. Choosing a nibbler with the right capacity ensures clean, efficient cuts and a longer life for your tool.
Match the Nibbler to Your Drill
Your drill is the heart of the operation, so the nibbler attachment needs to be a good match. If you already have a collection of reliable cordless drills, a drill attachment is an affordable and practical choice that adds versatility to your existing kit. However, if you find yourself doing a ton of cutting, you might consider a dedicated corded or battery-powered nibbler. Think about your workflow. Do you need the grab-and-go convenience of a cordless setup, or will you be working near a power source where a corded tool’s consistent power is an advantage? Make sure the attachment you choose is compatible with your drill’s chuck size and RPM range for optimal performance.
Look for Quality and Durability
On a professional job site, tools need to be tough. When it comes to a nibbler, look for signs of quality construction, like a hardened steel cutting die and a sturdy housing. Features like a 360-degree rotating head can make a huge difference, allowing you to easily change cutting direction and handle complex curves without repositioning the entire drill. This maneuverability is essential when you’re in a tight spot or making intricate cuts. Investing in well-made metal cutting tools from a reputable brand means less downtime and better results, which ultimately impacts your bottom line.
Factor in the Price
While it’s tempting to go for the cheapest option, price should be weighed against performance and durability. For a professional, a tool is an investment. A low-cost nibbler might save you money initially, but if it wears out quickly or produces sloppy cuts, it will cost you more in the long run through replacements and wasted material. Consider the total value—how long will the tool last, and how well will it perform? While many sellers offer good prices, focus on finding a tool that meets your professional standards. A quality nibbler that can withstand daily use is a far better investment than a budget model you’ll have to replace after a few jobs.
Our Top Picks: The Best Sheet Metal Nibbler Attachments
When you’re on the job, the right tool isn’t just a preference—it’s a necessity. Choosing the best sheet metal nibbler attachment can feel like a tough decision, especially with so many options on the market. You need something that delivers clean, precise cuts without warping the metal, whether you’re fabricating custom flashing or trimming panels to size. A good nibbler saves you time, reduces material waste, and ultimately helps you produce higher-quality work. That’s why we’ve put together this list of top-performing nibbler attachments.
We looked at several factors to narrow down the field. Performance was key; we focused on tools that can handle the gauges and materials you work with every day. Durability is another major point—your tools need to withstand the demands of the job site. We also considered user feedback from professionals who rely on these attachments day in and day out. This list features standout options from trusted brands, each with its own strengths. Whether you prioritize seamless integration with your existing power tools or need a heavy-duty workhorse for tough materials, you’ll find a solid contender here. Think of this as your shortlist for the best metal cutting tools to add to your arsenal.
Stortz Metal Nibbler
The Masc Nibbler, available from Stortz, is a fantastic all-around performer known for its efficiency and user-friendly design. It’s built to give you clean, burr-free cuts, which is critical for professional-grade sheet metal work. This attachment can handle up to 24-gauge steel, making it versatile enough for a wide range of roofing and fabrication tasks. Professionals appreciate how much time it saves compared to using hand snips, especially on long, straight cuts. If you’re looking for a reliable and precise tool that gets the job done without any fuss, this nibbler is an excellent choice. It’s a durable piece of equipment that provides consistent results, helping you maintain a high standard of quality in your work.
VEVOR Metal Nibbler
If you’re looking for a powerful attachment that doesn’t break the bank, the VEVOR Metal Nibbler is worth a serious look. It’s known for its robust construction and ability to slice through tough materials with surprising ease. This tool is a workhorse, designed to handle various types of metal effectively, making it a great option for both seasoned pros and those just starting to build their toolkit. Its powerful cutting action ensures smooth operation and precise results, even on more demanding jobs. For its price point, the VEVOR nibbler offers impressive performance and durability, making it a smart investment for anyone who needs a reliable cutting tool without a premium price tag.
DEWALT Nibbler Attachment
For contractors already invested in the DEWALT ecosystem, this nibbler attachment is a no-brainer. It’s designed to integrate perfectly with standard DEWALT drills, turning a tool you already own into a specialized metal cutter. True to the brand’s reputation, this attachment is built for durability and efficiency on the job site. It allows you to make intricate cuts with control and precision, which is perfect for detailed work around vents or complex roof lines. The convenience of not needing a separate, dedicated tool is a huge plus, saving space in your truck and money in your pocket. It’s a reliable and practical solution for professionals who value performance and system compatibility.
Milwaukee Nibbler Tool
While most of our picks are drill attachments, the Milwaukee Nibbler Tool deserves a spot on this list for those considering a dedicated unit. This standalone tool stands out for its exceptional power and ergonomic design. It’s engineered to cut through heavy-gauge materials that might challenge a standard drill attachment. Milwaukee is known for creating tools with user comfort in mind, and this nibbler is no exception—it provides excellent control and reduces fatigue during extended use. If your work frequently involves cutting thicker metals or you simply prefer the performance of a dedicated machine, this nibbler is one of the best in its class and a top choice for serious metalworking professionals.
Malco Nibbler Attachment
The Malco Nibbler Attachment is another top-tier option that turns your drill into a powerful sheet metal cutter. It’s designed to fit most standard drills and features a lightweight yet remarkably durable construction. Users often praise its ability to deliver clean, precise cuts without distorting the metal, making it ideal for everything from HVAC fabrication to metal roofing installations. Malco has a strong reputation for producing high-quality, specialized tools for trade professionals, and this nibbler attachment lives up to that standard. It’s a valuable, versatile, and dependable addition to any toolkit, helping you work more efficiently and accurately on any project that comes your way.
How to Use Your Nibbler Safely
A nibbler attachment is a powerful tool, but it demands respect. Working with sheet metal always involves sharp edges and flying debris, so prioritizing safety is essential for keeping your project on track and yourself in one piece. Following a few straightforward protocols will protect you from injury and help you get the clean, precise results you’re looking for. Before you start any cut, take a moment to prepare yourself and your workspace.
Essential Safety Gear
First things first: gear up. All metal cutting methods can leave behind dangerously sharp edges and burrs, so a good pair of work gloves is non-negotiable. They’ll protect your hands from cuts while you handle the material. Just as important are safety glasses or goggles. A nibbler works by punching out tiny pieces of metal, and you do not want one of those flying into your eye. Depending on the job and the noise level of your drill, ear protection might also be a smart move. Don’t ever skip the basics; the right gear is your first line of defense.
Set Up Your Nibbler Correctly
A clean cut starts with a proper setup. Before you begin, measure and mark your cut line on the sheet metal. Most nibbler attachments come with an adjustable guide to help you maintain a consistent distance from the edge. Set this guide to your desired measurement. Once it’s locked in, place the guide firmly against the straight edge of your material before you start the drill. This simple step is key to achieving an accurate cut right from the start. Taking a moment to properly prepare your metal cutting tools makes all the difference in the final product.
Follow Safe Operating Techniques
Once you start cutting, your technique matters. Try to maintain a constant speed and steady forward pressure as you guide the nibbler along your cut line. This consistency helps produce a straighter, cleaner result. Be aware that the tool is not very forgiving; a small wobble or mistake can quickly become a larger error in the cut. It’s better to go slow and steady than to rush and ruin your workpiece. Practice on a scrap piece of metal first to get a feel for the tool’s speed and handling before moving on to your main project.
Manage Metal Chips and Your Workspace
Unlike shears that create a continuous curl of waste, a nibbler creates thousands of tiny, sharp metal crescents or “chips.” These little pieces can get everywhere, creating a hazard for your workspace and your skin. Before you start cutting, lay down a drop cloth or position a bin to catch the majority of the chips. After the job is done, a shop magnet or a magnetic sweeper is an excellent tool for cleaning them up quickly and safely. Keeping your work area tidy isn’t just for looks—it’s a critical part of workshop safety.
Keep Your Nibbler in Top Shape: Maintenance and Care
Your nibbler attachment is an investment, and like any good tool, it needs some care to perform its best. A few minutes of maintenance after a job extends your tool’s life and ensures you get clean, precise cuts every time. A well-cared-for nibbler is a reliable partner on the job site, saving you from the frustration of a tool that jams or a cut that goes awry. Proper care is straightforward and boils down to keeping it clean, knowing when to swap out parts, and handling common hiccups.
Clean and Store It Properly
First, manage the mess. A nibbler creates a shower of tiny, sharp metal crescents, so it’s smart to prep your area to catch these chips before you even start cutting. This simple step keeps your workspace safe and prevents debris from getting into your drill or the nibbler’s mechanism, where it can cause real damage. A shop magnet is your best friend for cleanup. Afterward, give the nibbler a quick wipe-down with a dry cloth to remove any lingering dust or metal fragments. When you’re done, store it in a dry place, preferably in its original case, to protect it from moisture and accidental drops. This is the easiest way to prevent unnecessary wear and tear.
Know When to Replace the Blade
Even the best tools wear down. Your nibbler’s blade, or punch and die, will eventually get dull. If you find yourself pushing harder to make a cut, or if the edges of your metal look ragged instead of clean, it’s time for a replacement. Working with a dull blade produces sloppy results and puts extra strain on your drill and other metal cutting tools. Remember, nibblers excel at cutting curves; using them for long, straight cuts can wear out the blade faster. Keeping a spare on hand means you won’t have any downtime when you need to make a quick swap.
Troubleshoot Common Problems
Struggling to get a perfectly straight line? This usually comes down to inconsistent speed and pressure. Any hesitation can get magnified in the final cut. For detailed work, try this pro-tip: mount your drill with the nibbler under a small workbench with a hole in it. This setup lets you guide the metal over the cutting head, giving you much better precision. If your tool jams, stop immediately. It’s often caused by a dull blade or built-up metal chips, so clean it out and check the blade’s condition before you start again.
Master Pro-Level Cutting Techniques
Once you have your nibbler set up and your safety gear on, it’s time to cut. Like any tool, a nibbler attachment takes a bit of practice to master, but with the right approach, you can achieve clean, professional results every time. Moving beyond the basics means focusing on control, precision, and using the tool’s unique strengths to your advantage. These techniques will help you handle everything from long, straight cuts to complex curves with confidence.
How to Cut Straight Lines
Achieving a perfectly straight line with a freehand tool can be tricky. While other metal cutting tools like a cut-off wheel or a circular saw are often the go-to for long, straight cuts, a nibbler can certainly get the job done. The key is consistency. Try to maintain a constant speed and steady pressure as you guide the tool across the metal sheet. Be mindful that this method requires a stable hand, as any small waver or hesitation can be magnified in the final cut. For the best results, especially on larger projects, pairing your nibbler with a guide is the most reliable way to ensure your lines are flawlessly straight.
How to Cut Curves and Circles
This is where a nibbler truly shines. Its unique design allows it to “chew” through metal by punching out tiny, semicircular chips, an action that makes it incredibly effective for cutting curves and intricate shapes. This capability is especially useful when working with corrugated or trapezoidal sheet metal, where other tools might struggle or deform the material. Whether you’re creating a circular opening for a pipe or following a complex pattern, the nibbler’s maneuverability gives you the control needed for precise, smooth curves without warping the edges of your workpiece.
Use Guides for Precision Cuts
For cuts that demand absolute precision, don’t rely on your eye alone. Using a guide is a simple and effective way to guarantee accuracy. You can easily create a guide by clamping a straight piece of wood, like a 2×4 or a strip of plywood, onto the metal sheet. Then, just run the edge of the nibbler along the guide for a perfectly straight line. Here’s another pro tip: instead of drawing your exact cut line, try marking a parallel line for the edge of the nibbler’s head to follow. This can make it much easier to stay on track and get the exact cut you need.
Control Your Speed and Pressure
The secret to a clean, burr-free cut is a smooth, uninterrupted motion. Applying consistent speed and even pressure is crucial. If you move too fast, you risk jamming the tool or creating a jagged edge. If you go too slow, you might create unnecessary heat or an uneven finish. Find a comfortable, steady pace and stick with it from start to finish. Remember, while consistency is key to a great cut, it also means that any mistakes will be more obvious. Practice on some scrap pieces to find the right rhythm before moving on to your final workpiece.
Common Nibbler Mistakes (And How to Avoid Them)
Even the most seasoned pros can fall into bad habits or make a simple mistake. When you’re working with a tool as specific as a nibbler, small errors can lead to wasted material, a sloppy finish, or even a safety risk. The good news is that most of these slip-ups are easy to correct. Knowing the common pitfalls is the first step to avoiding them entirely, ensuring your work is clean, precise, and professional every time.
Getting a great result with your nibbler attachment comes down to using it for the right job, operating it correctly, and keeping it in good shape. Let’s walk through some of the most frequent mistakes I see and cover the simple fixes that will make a huge difference in your work. By sidestepping these common errors, you’ll work more efficiently and produce higher-quality cuts that you can be proud of.
Choosing the Wrong Material
One of the most common frustrations with a nibbler comes from asking it to do a job it wasn’t designed for. Nibblers excel at cutting curves, circles, and complex shapes. While they can cut straight lines, they aren’t the best tool for long, straight runs. Forcing a nibbler to do this often results in a wavy, uneven edge that looks unprofessional. For those long, straight cuts across a panel, you’ll get a much cleaner result with a dedicated pair of metal cutting tools like snips or shears. Save your nibbler for its specialty: navigating the tricky contours and tight corners that other tools can’t handle.
Common Operating Errors
A nibbler is a precision tool, and your technique matters. A frequent mistake is trying to freehand a cut that needs to be perfectly straight. This rarely works out well. To get a truly straight line, clamp a guide—like a sturdy 2×4 or a straight piece of plywood—to your workpiece. Run the side of the nibbler along the guide for a flawless cut. Another common error is inconsistent speed and pressure. Pushing too hard or too fast can cause jagged edges or stall the tool. Practice on a piece of scrap metal to find a steady, constant pace that allows the tool to do the work without being forced.
Skipping Essential Maintenance
Your tools are your livelihood, and a little maintenance goes a long way. A nibbler’s cutting performance depends entirely on its punch and die. Continuing to work with a dull or worn-out punch is a major mistake. It will struggle to cut through the metal, can deform your material, and puts a ton of unnecessary strain on your drill’s motor. Make it a habit to regularly inspect the punch and die for signs of wear, like rounded edges or chipping. Keep the attachment clean and free of metal debris, and always follow the manufacturer’s guidelines for replacing parts to keep your nibbler cutting like new.
Overlooking Safety Rules
This one should be obvious, but it’s too important to ignore. The small metal crescents produced by a nibbler are incredibly sharp, and so are the edges of the metal you just cut. Working without proper personal protective equipment (PPE) is a recipe for a nasty injury. Always wear safety glasses to protect your eyes from flying metal chips. It’s also crucial to wear suitable gloves to protect your hands from sharp edges. Keep your workspace tidy and clean up the metal chips frequently to prevent them from becoming a hazard for you or anyone else on the job site.
Get the Most Out of Your Nibbler
Having a quality nibbler attachment in your toolbox is a great start, but knowing the little tricks to use it effectively is what separates the pros. Mastering your tool isn’t just about getting the job done; it’s about working with precision, saving time, and minimizing material waste. A few small adjustments to your setup and technique can make a huge difference in the quality of your cuts and the lifespan of your equipment. Think of it like this: the tool provides the potential, but your skill brings it to life. The following tips are all about helping you work more efficiently, from setting up your space to making the final cut. By incorporating these practices into your routine, you’ll get cleaner results, extend the life of your nibbler, and finish your projects with greater confidence and professionalism.
Organize Your Workspace for Efficiency
A clean workspace is a safe and efficient workspace, especially when you’re using a nibbler. The tool works by punching out tiny, crescent-shaped metal chips, and they can get everywhere. Before you start cutting, lay down a tarp or a large piece of cardboard to catch the debris. This makes cleanup much faster. Once you’re done, a magnetic sweeper is your best friend for picking up any stray metal bits from the floor. Taking a minute to prepare your area prevents these sharp chips from getting tracked around the job site, saving your boots, your vehicle’s tires, and preventing potential injuries. It’s a simple habit that keeps your workflow smooth and your environment safe.
Extend Your Tool’s Lifespan
Your nibbler attachment works hard, and a little maintenance goes a long way in keeping it in top condition. The cutting action relies on a sharp punch and die. Just like a dull drill bit, a worn-out punch has to work much harder, which puts unnecessary strain on both the attachment and your drill. This can lead to sloppy cuts and cause the tool to wear out faster. Get in the habit of inspecting the punch before each use. If it looks rounded or is struggling to cut cleanly, it’s time for a replacement. Keeping the tool clean and free of debris also helps it operate smoothly. You can find a replacement punch and die to ensure your nibbler is always ready for the job.
Improve Your Cutting Accuracy
Achieving a perfectly straight line freehand can be a challenge. For ultimate precision, use a guide. You can easily create one by clamping a straightedge, like a level or a piece of 2×4, onto the sheet metal. Then, simply run the side of the nibbler along the guide for a flawless cut every time. Here’s another pro tip: instead of drawing your cut line and trying to follow it directly, draw an offset line. Mark the line where the edge of the nibbler’s head should run. This gives you a much clearer sightline, making it easier to follow the path without the tool obscuring your mark. These simple techniques give you greater control and help you produce professional-quality work with all your metal cutting tools.
Work Faster and Smarter
The key to working efficiently is using the right tool for the specific task at hand. While shears are fantastic for long, straight cuts on flat stock, a nibbler truly shines when dealing with complex shapes. Its design allows it to effortlessly move over the contours of corrugated or ribbed panels, a task that would be slow and difficult with other tools. The nibbler is also your go-to for cutting tight curves, circles, and intricate patterns, performing with an agility similar to a jigsaw. By understanding the unique strengths of your nibbler, you can choose it for the jobs it was designed to excel at. This not only saves you time and frustration but also ensures a cleaner, more accurate result on all your metal roofing projects.
Related Articles
Frequently Asked Questions
What’s the real difference between using a nibbler and a pair of shears? Think of it as punching versus slicing. Shears slice through metal, which can sometimes cause the edges to bend or warp, especially on thinner sheets. A nibbler works by punching out tiny pieces of metal, which removes material instead of displacing it. This process gives you a clean, distortion-free edge, making it the superior choice for curved cuts and corrugated panels where warping is a major concern.
Can I use my nibbler attachment on thicker gauge steel, like for structural work? It’s best to stick to the manufacturer’s specifications. Most nibbler attachments are designed for thinner gauge sheet metals, typically up to 24-gauge steel or slightly thicker aluminum. Pushing the tool beyond its rated capacity will not only produce a poor-quality cut but can also damage the punch and die, or even burn out your drill’s motor. For heavy-duty cutting, a dedicated tool with a higher capacity rating is a much safer and more effective option.
Is a dedicated, standalone nibbler a better investment than a drill attachment? This really depends on your workflow. If you only need to make intricate cuts occasionally, a drill attachment is a fantastic, cost-effective solution that adds versatility to a tool you already own. However, if you find yourself cutting sheet metal every day, a dedicated nibbler is a worthwhile investment. These standalone units typically offer more power, better ergonomics for extended use, and are built to withstand constant professional demands.
My cuts are looking ragged and I have to push harder. What’s the most likely cause? The first thing you should check is the punch and die. Just like any blade, these components wear down over time. A dull punch will struggle to make clean cuts and requires a lot more force to move through the material, resulting in a jagged edge. This also puts a lot of unnecessary strain on your drill. Keeping a spare punch and die on hand is a smart move so you can swap it out and get back to work without any downtime.
What’s the most effective way to clean up all the tiny metal chips? Dealing with the mess is the biggest drawback of a nibbler, but it’s manageable with a little prep. Before you start cutting, lay down a drop cloth or a large piece of cardboard to catch the majority of the debris. When you’re finished, the easiest way to get the rest of the sharp little chips is with a shop magnet or a magnetic sweeper. This picks them up quickly and safely without you having to touch them.