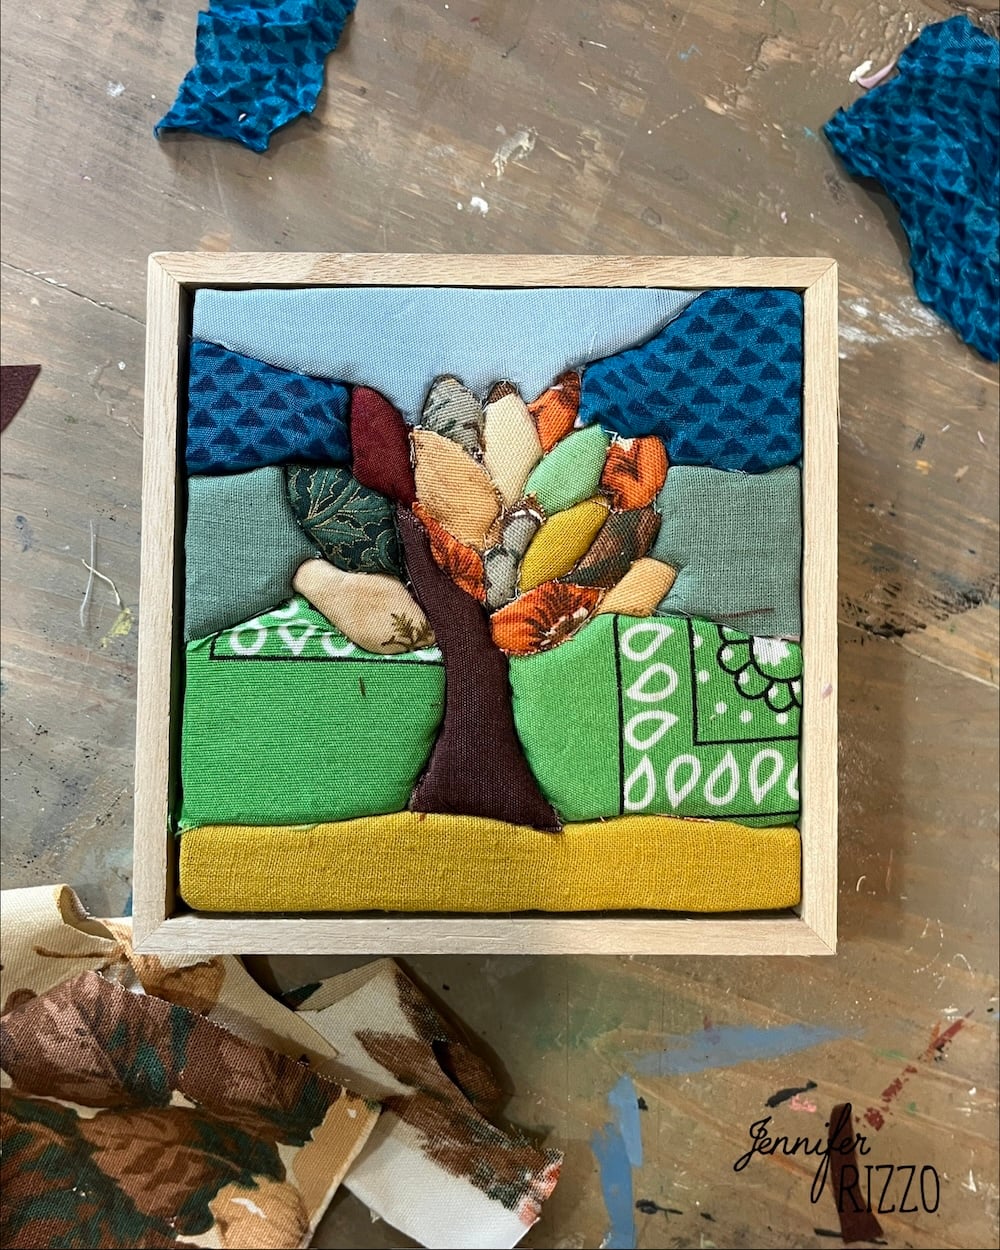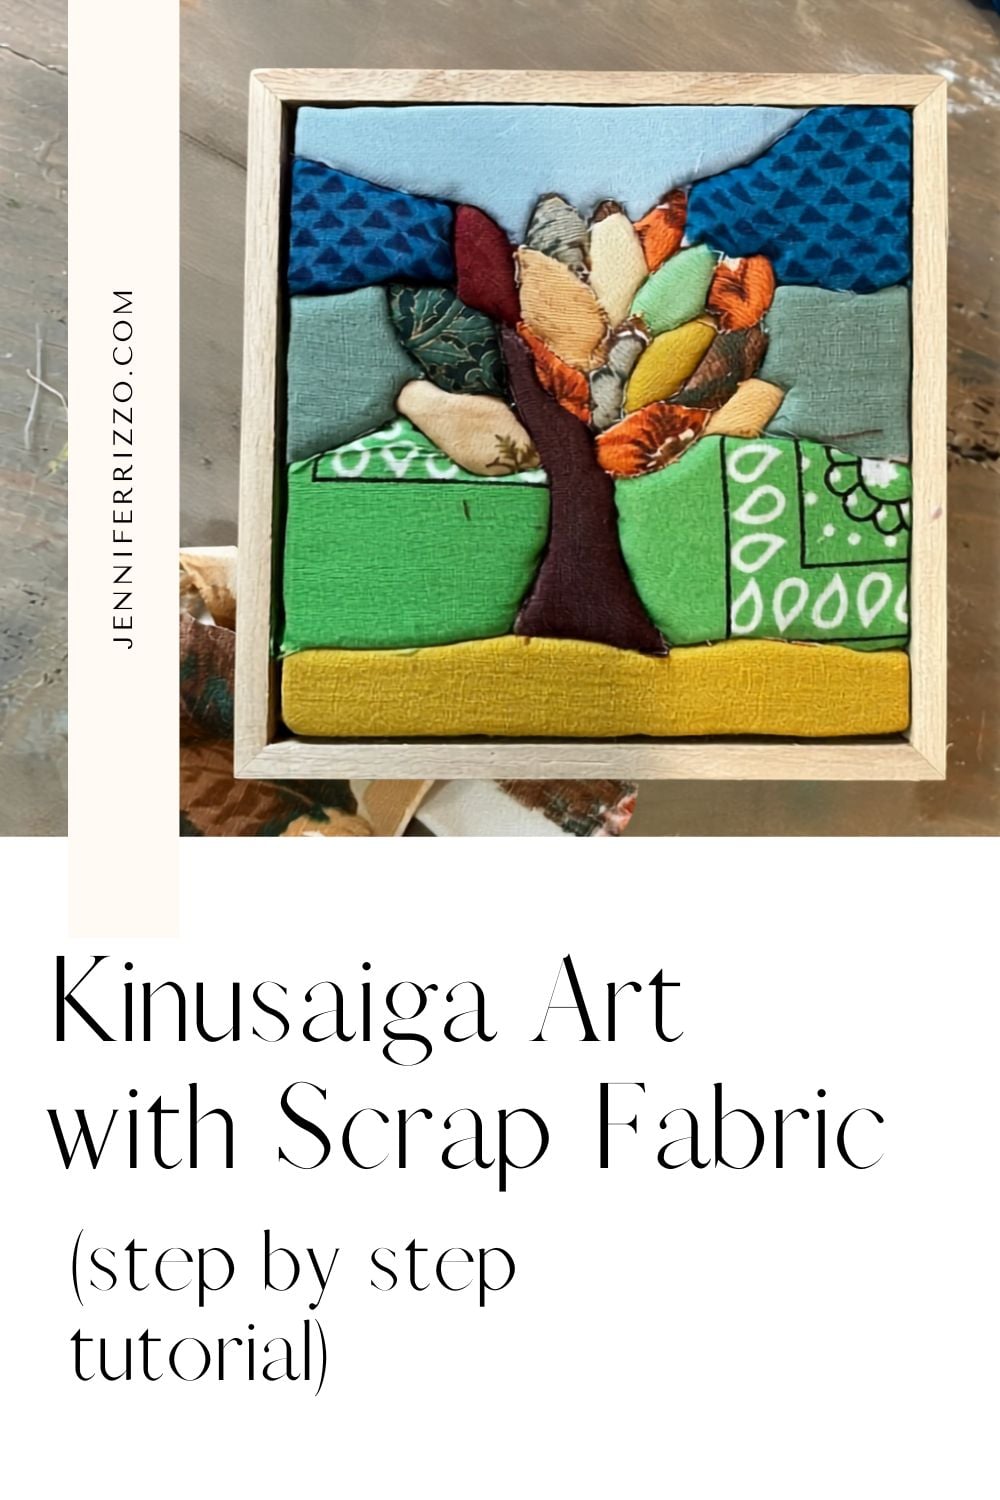
Kinusaiga art was developed in Japan in the 1980’s as a way to use scrap fabric to create art. Also known as “quilting without thread” it is an easy and approachable project and you can actually use quilting patterns! This is even easy enough for kids to do the “quilting” part,if an adult does the prep and pattern cutting. This can be customized and created in any size desired and it’s fun to use all kinds of fabric colors and patterns to create this unique art medium. We hope this art tutorial inspires you to make your own Kinusaiga art!

This post contains affiliate links. See out sponsor and affiliate disclosure here.
We are offering this workshop in our art studio in Lisle, so if you want to try it hands on with the materials included, you can find out more about the workshop, registration and our studio here.
Supplies for Kinusaiga Art
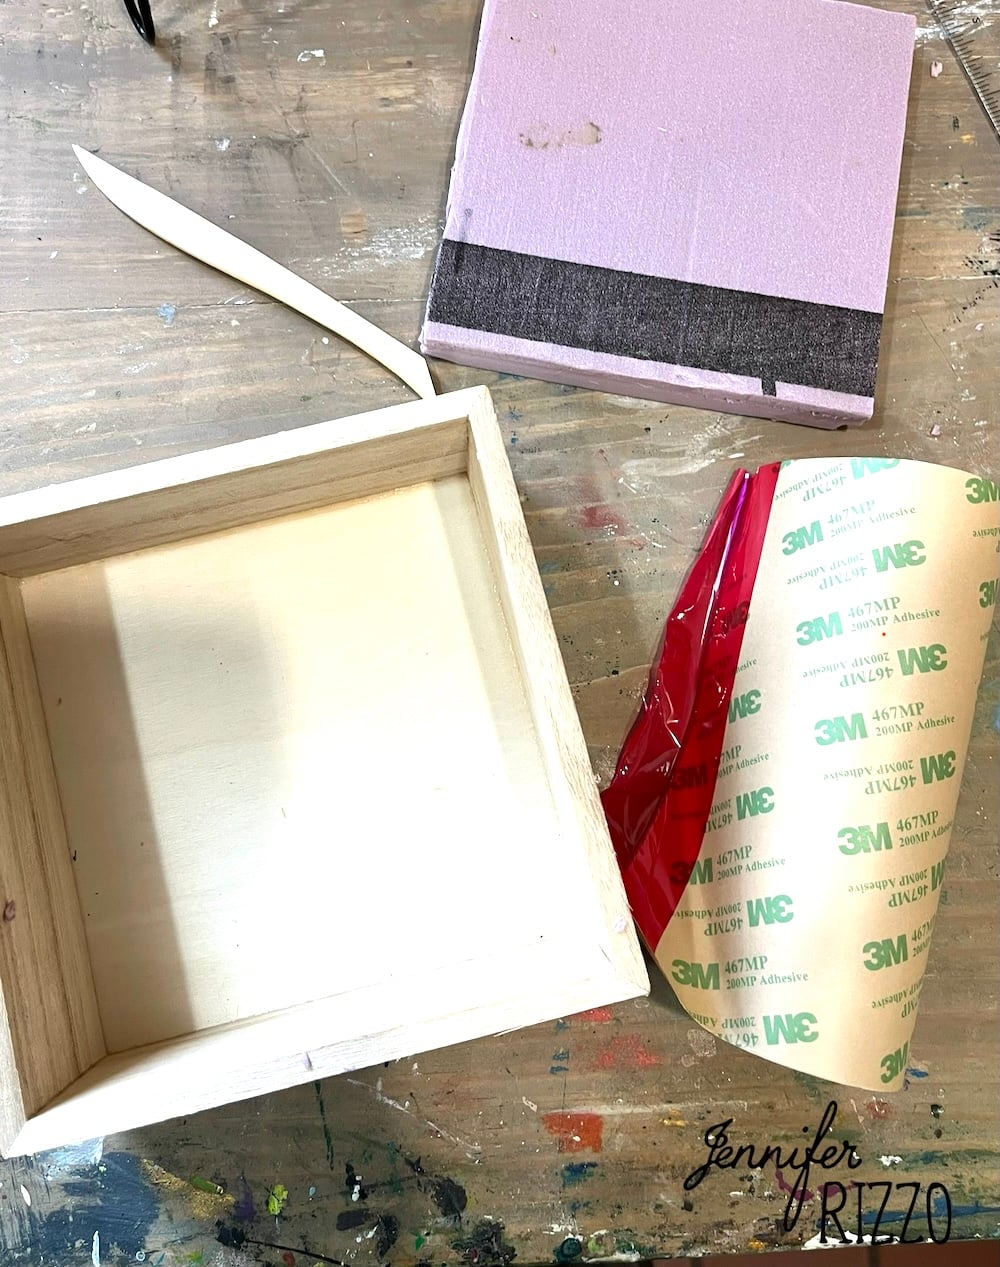
-Foam board. We used 1/2 inch pink foam board
-Double Stick tape (or 3M double sided sheet adhesive)
-Fabric Scraps
-Pattern
-Marker
-Craft knife
-Wood clay tool with a flat end or Popsicle stick for kids
-Scissors
-Wood Box (8×8)
-White craft glue
Before Starting Kinusaiga
A few things to know before starting Kinusaiga. This is a slow craft. You’re meant to work section by section and take your time cutting and adding. This isn’t something to be rushed though. Enjoy all of it! Selecting the fabric, removing the adhesive and placing it. Start with simpler patterns with mostly straight lines. This is fun, relaxing and as your skill level improves, you can move to more complicated patterns. Enjoy the process!
Decide on a Pattern
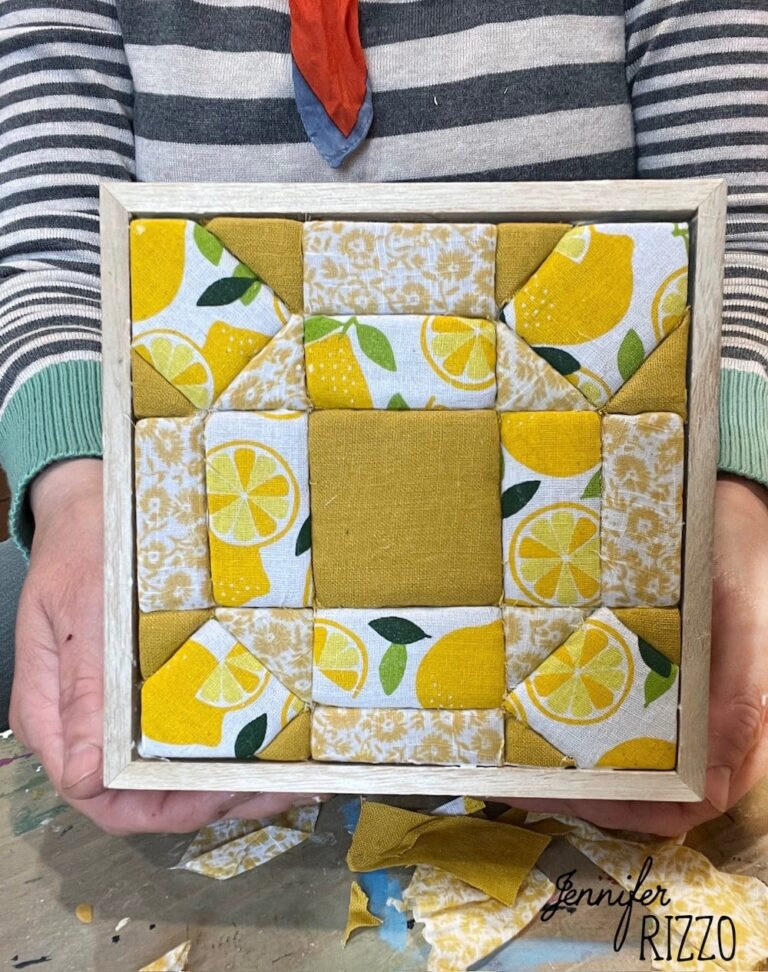
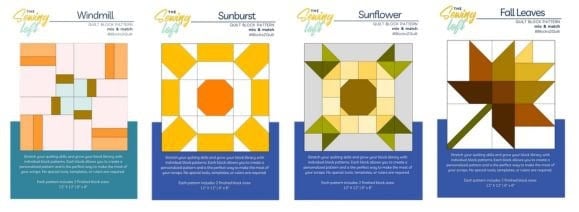
When starting out using a simpler quilt pattern is a little easier. We used patterns from The Sewing Loft to create our projects. Not only are they great for quilters, but they work well for this project too. They have mostly straight lines and little curves which is great for beginners. Here are a few patterns that would work well
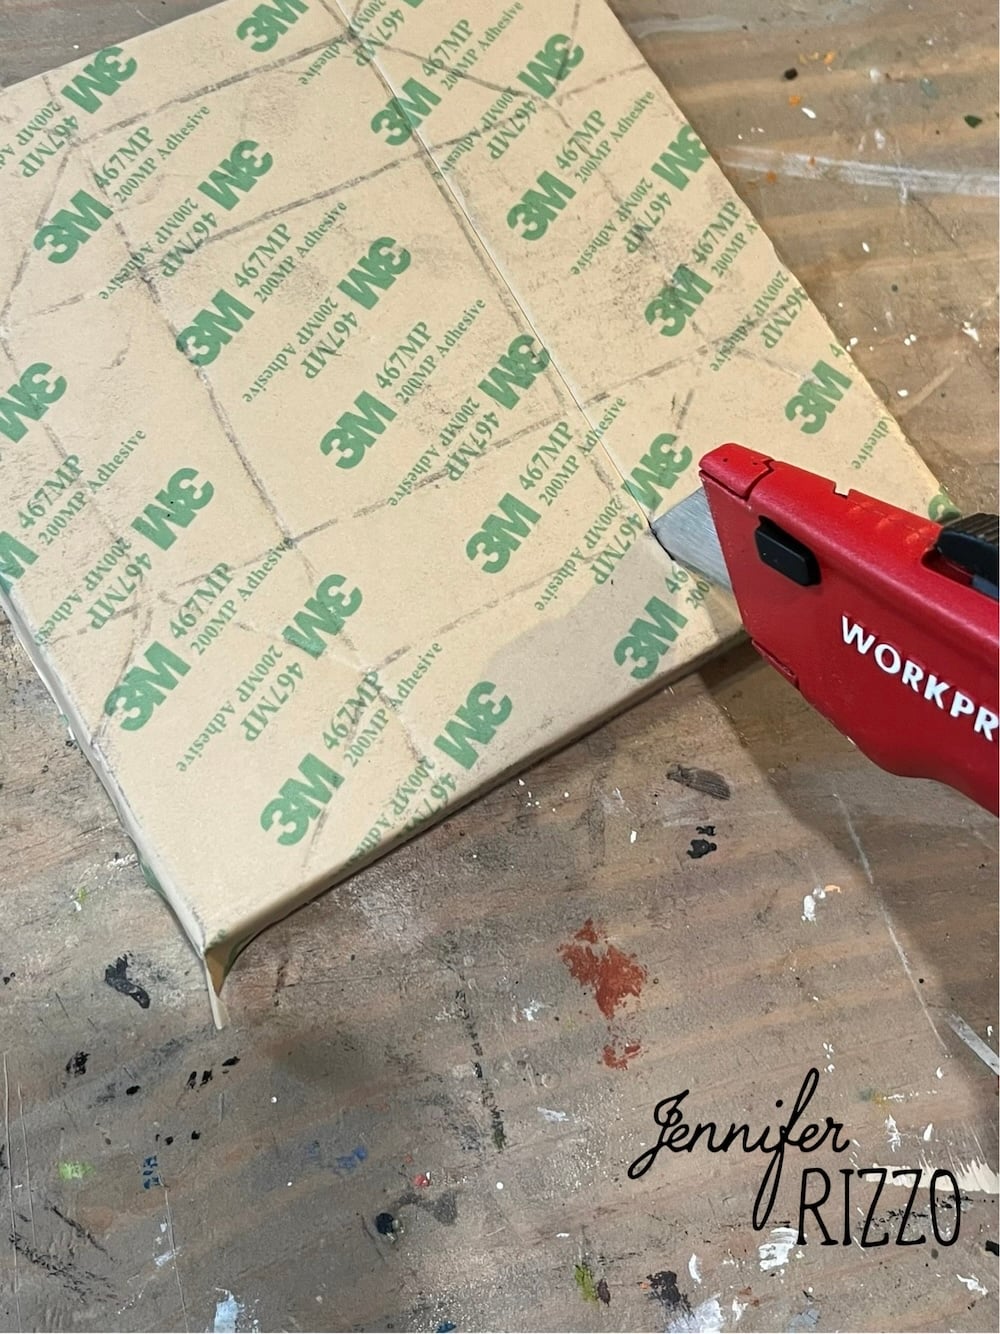
Cut the Foam Board to Size
We decided we wanted to mat ours in an 8 x8 wood frame, but these can be custom cut to any size desired. Using a pre-cut wood box made it easy to just pop it in a glue it to hold it in place. Measure and cut the foam board to size so it just fits into the wood box frame.
Add the Adhesive Sheet
Cover the foam board with the double-sided adhesive film, leaving the top layer on. Make sure to wrap the edges in the tape sheet as well.
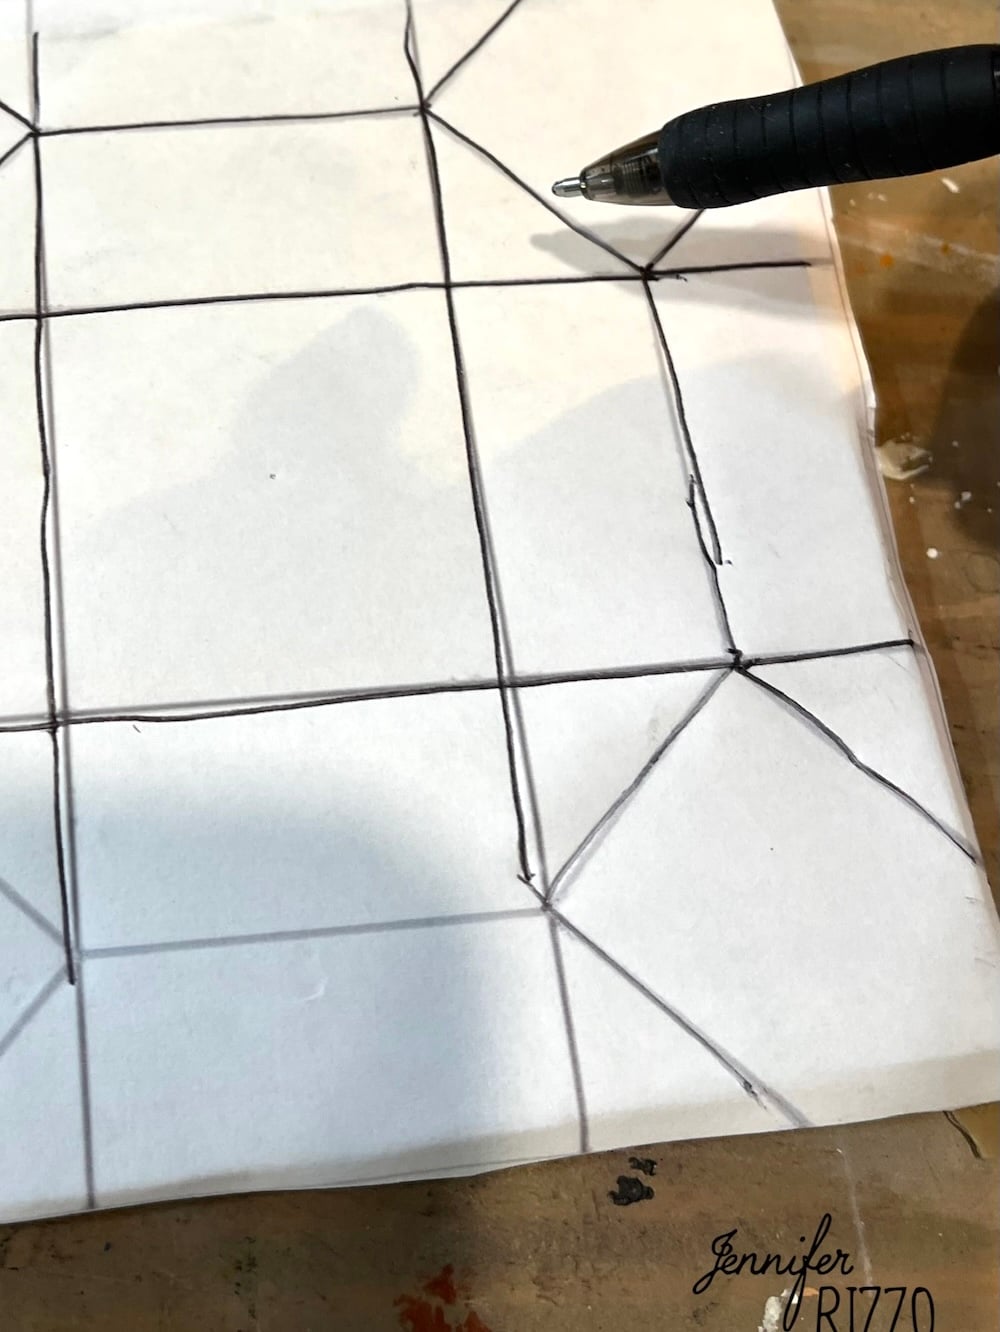
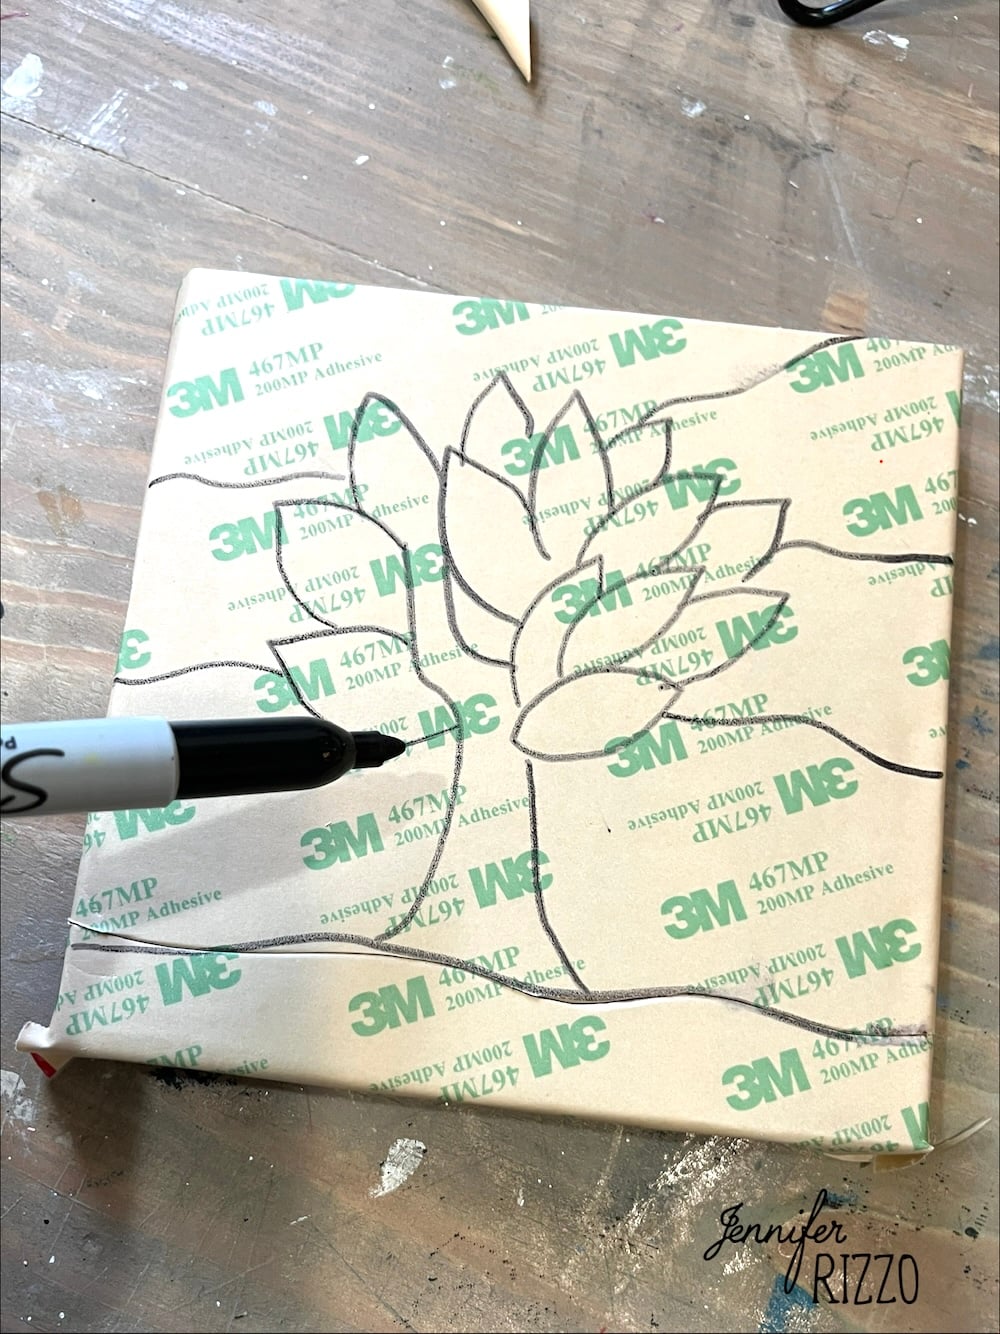
Transfer the Pattern to the Foam Board
There are several ways you can transfer the image to the top of the foam broad covered int he adhesive sheet. This can be done using transfer paper where the image is traced over the top and the carbon paper transfers the design. Or, a pin or other sharp tool can be used to make pin pricks along the pattern lines. This method takes a pretty long time and transfer paper is faster. Darken the lines with a black marker so they are easily seen. We used two designs. One that we hand drew and another we used the Sunburst pattern from The Sewing Loft.
Cut Along the Lines
Use a craft knife to carefully cut along the transferred lines, making sure to leave the top layer of paper on the adhesive. This won’t get removed until section by section when the fabric is ready to be added.
Plan the Fabric Layout
This is a good time to sort through and layout the fabric before cutting, especially when working with scraps. Once you have your fabric set, it’s time to start creating! Jelly roll quilting fabric packs work well for this because there is a nice variety of fabrics to choose from without having to buy a ton of yardage.
Cut the Fabric for the Kinusaiga Art
This project works one piece at a time. Cut a piece of fabric slightly larger than piece to be worked on. This is important so that the raw edges can be tucked into the foam to hide them. If it’s too small, it won’t cover the section and if it’s too large the fabric will be too bulky to tuck all of it into the foam.
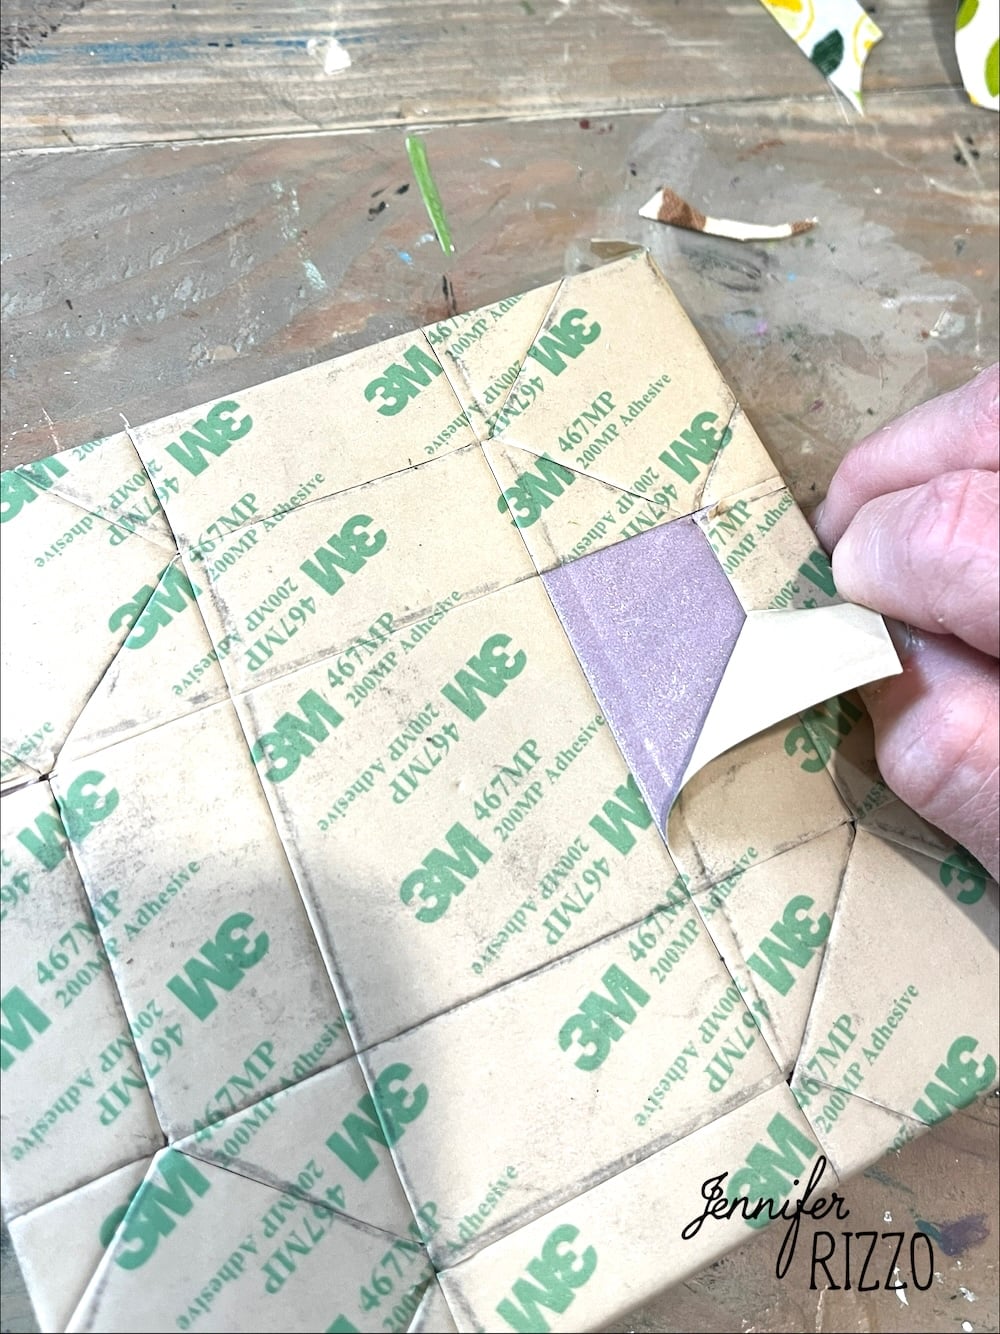
Start Removing the Paper on One Adhesive Section
Pick and cut a piece of fabric for the section to start on. Remove the paper off that adhesive section. The paper should pull away easily and the adhesive should be left on your block.
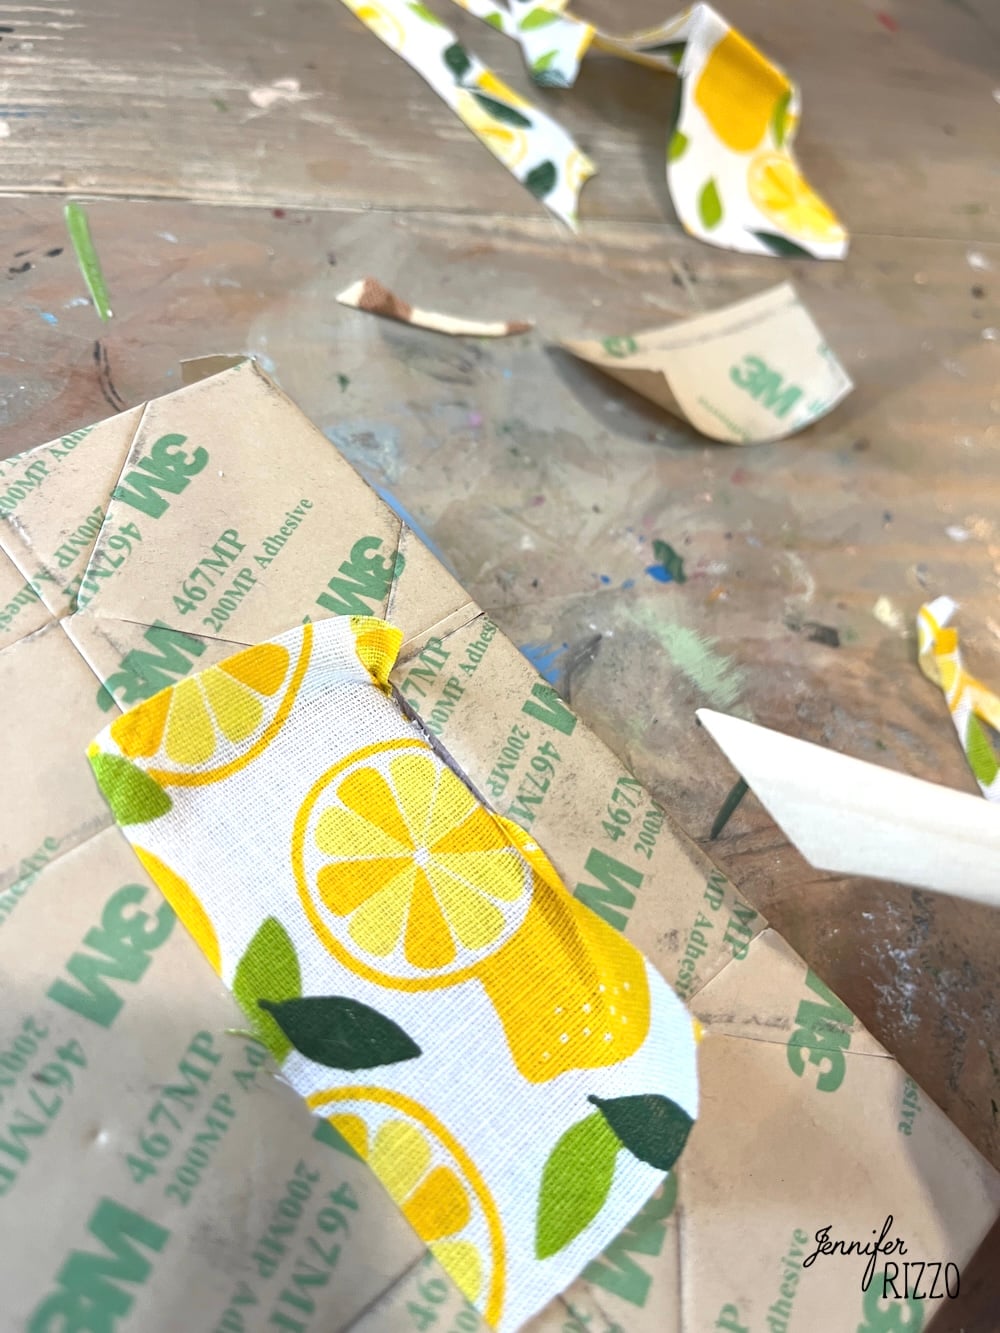
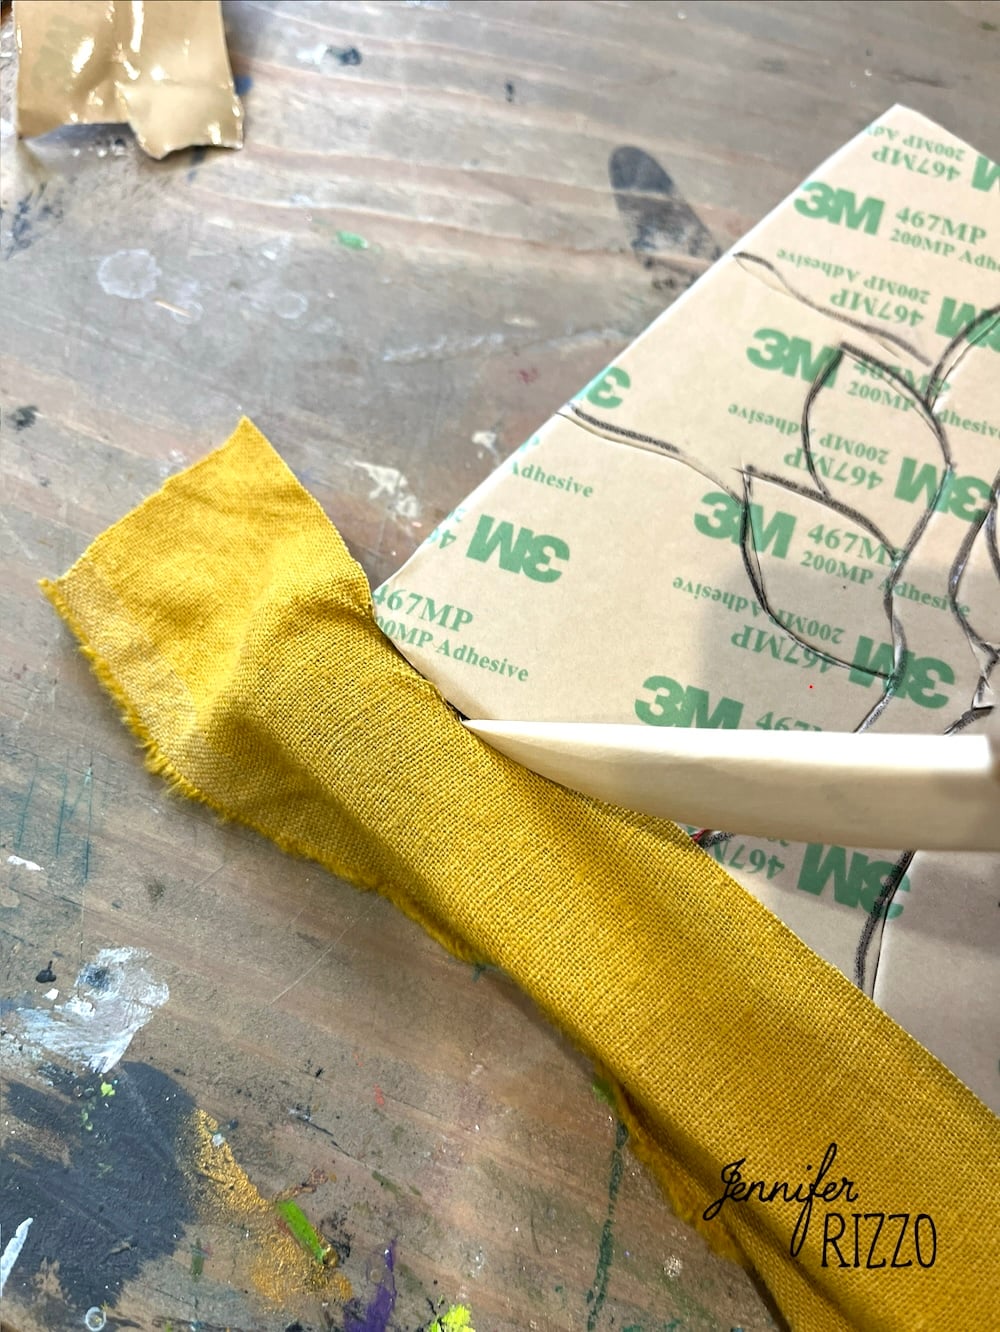
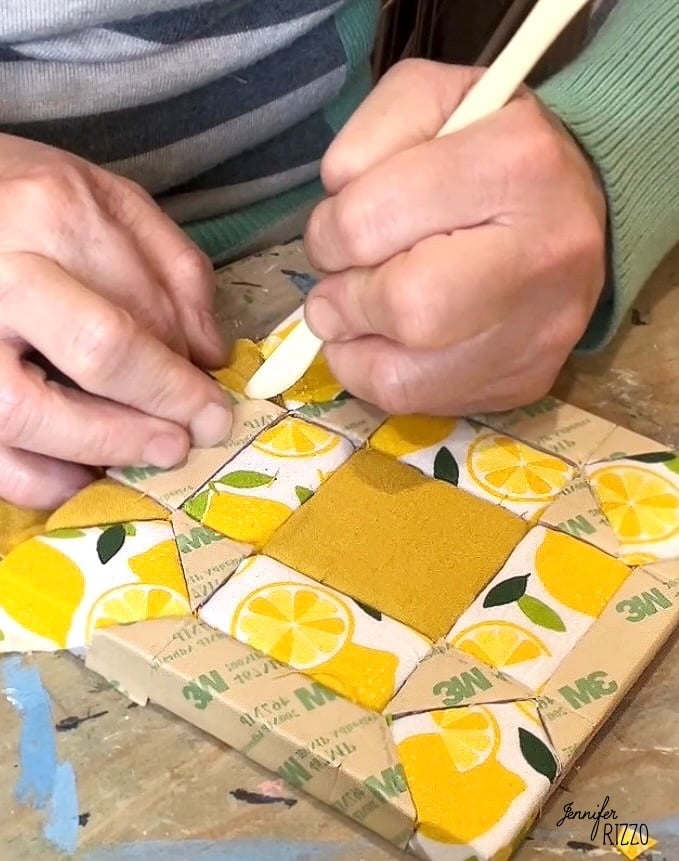
Press the Fabric onto the Adhesive
Press and smooth the fabric onto that section of the adhesive and then use the clay tool to press the edges into the foam until it’s all tucked in. Move section by section repeating the same steps. The clay tool we used is nice because it has a flat edge and a curved edge which worked well to tuck the edges in.
Tuck the Fabric Edges Around the Outside
Once the pattern is completed, tuck the edges around the outside and wrap to the back, taping down as needed. Don’t worry if they are a little short, they won’t show when popped into the wood box.
Add Glue to the Box to Frame
Add a small amount of glue to the inside of the box towards near where the bottom of the Kinusaiga piece will sit. This will make sure it is glued in the back and doesn’t mess up the front of the fabric.
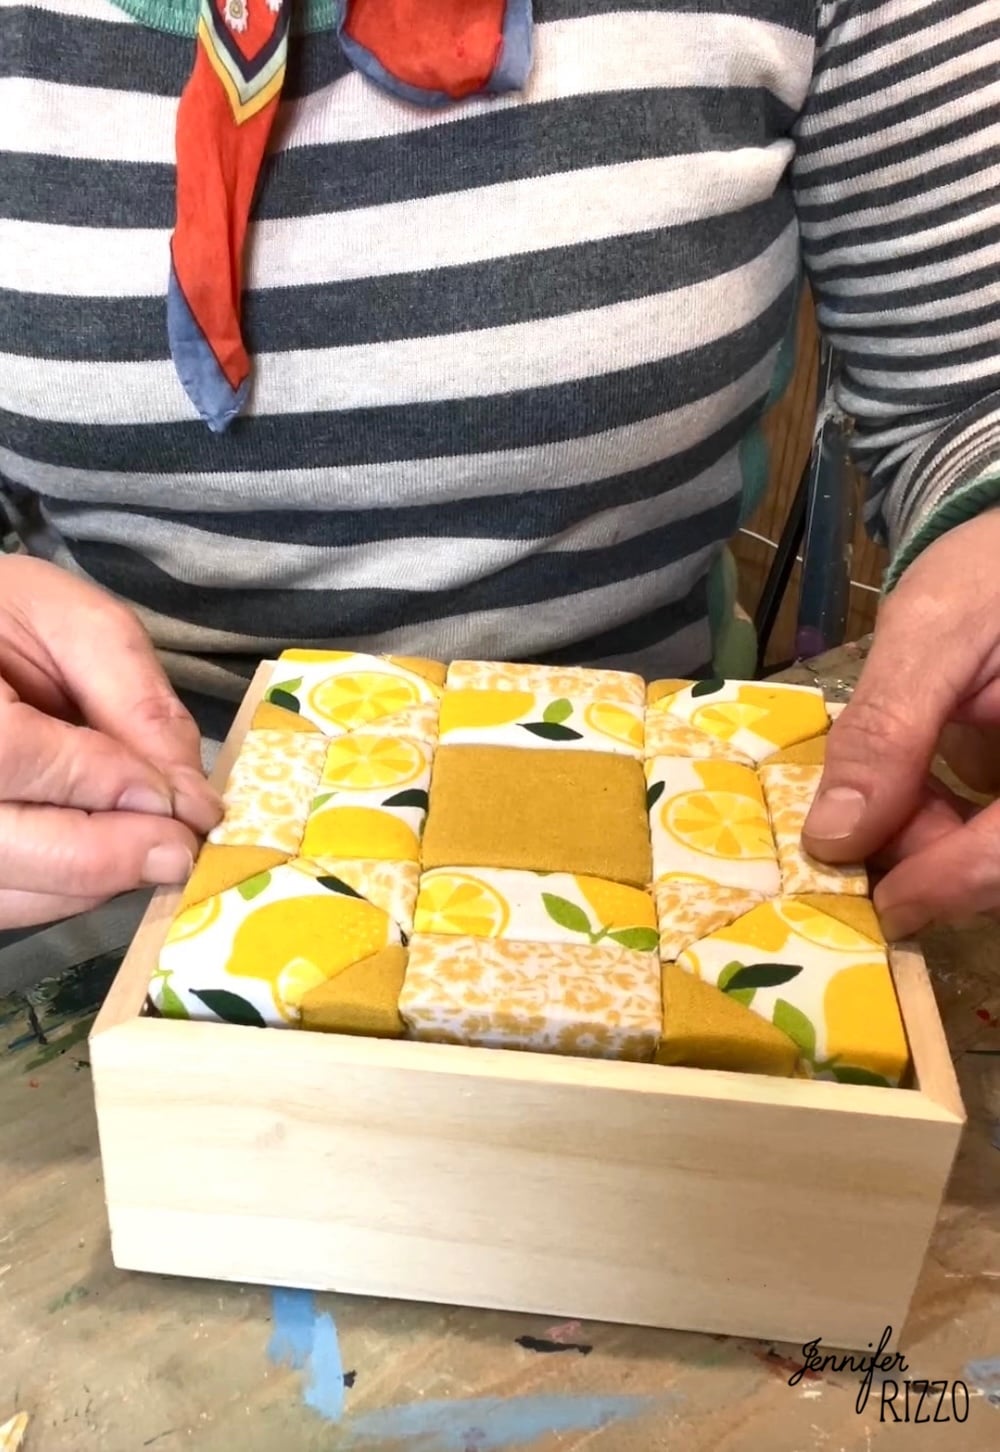
Hang and enjoy your artwork! It’s fun to plan out the different fabric colors and patterns. I think you’ll find this becomes addictive and fun to make! Come take a workshop with us!