
Every roofer knows the frustration: you make a perfect cut on a downspout, only to find it’s the same size as the piece you need to connect it to. The solution is simple but requires the right technique. Learning how to crimp a downspout allows you to create a factory-style tapered end that slides smoothly into the next section for a secure fit. This prevents the leaks and water damage that lead to callbacks. Whether you’re training a new crew member or just refining your own skills, this guide provides the clear, actionable steps for a perfect crimp.
Key Takeaways
- Master the Crimp for Leak-Proof Connections: Crimping is the essential technique for resizing a cut downspout end so it fits snugly into another piece. This creates a secure, directional flow that prevents water from escaping at the seams and protects the building’s foundation.
- Use the Right Tool for a Professional Finish: A dedicated hand crimper is your best bet for creating uniform, factory-style crimps. This ensures a snug fit without damaging the metal—a result you can’t get with pliers. Always test the connection before you fasten it.
- Think Beyond the Crimp for Lasting Results: A perfect connection won’t save a poorly planned system. Always ensure proper downspout alignment, use high-quality sealant on every joint, and plan your cuts to preserve factory-crimped ends whenever possible to save time and effort.
What Is Downspout Crimping?
At its core, downspout crimping is the process of making the end of a downspout section slightly smaller so it can fit neatly inside another downspout or a fitting, like an elbow. Think of it as creating a “male” end that slides securely into a “female” end. This simple-sounding step is fundamental to creating a functional and long-lasting gutter system. When done correctly, it ensures that water flows downward through the connections without leaking out at the seams, which is the entire point of a gutter system in the first place.
A proper crimp creates a tight, professional seal that directs water away from a building’s foundation, preventing costly water damage over time. While you might get by with a pair of needle-nose pliers in a pinch, the result is often uneven and less secure. A dedicated crimping tool creates uniform, clean indentations that guarantee a better fit and a more durable connection. For any professional roofer or sheet metal worker, mastering this technique is non-negotiable. It’s the difference between a quick fix that might fail in the next big storm and a quality installation that will stand up to the elements for years. Having the right gutter tools on hand makes all the difference in achieving that clean, leak-proof result that keeps clients happy and protects your reputation.
Why Crimp Your Downspouts?
The main reason to crimp a downspout is to create a secure, directional connection. Factory-made downspouts come with one end already crimped for you. The problem starts when you need to cut a downspout to a custom length. That freshly cut end will have the same diameter as the piece you’re trying to connect it to, making it impossible to join them properly.
By crimping the cut end, you reduce its circumference, allowing it to slide smoothly into the wider, uncrimped opening of the next section. This ensures water continues its journey down and away from the house, rather than finding an escape route at the seam. It’s a critical step for preventing leaks that can lead to siding stains, rot, and foundation issues.
When to Crimp Your Downspouts
You’ll need to crimp a downspout anytime you cut a section and need that cut end to fit into another piece. This is a common task in almost every gutter installation, since homes rarely conform to standard downspout lengths. However, you can sometimes work smarter to avoid extra crimping.
Here’s a pro tip: whenever possible, plan your cuts to preserve the factory-crimped end. If you need to shorten a vertical downspout, try to cut the top end instead of the bottom. This leaves the pre-crimped end at the bottom, ready to slide perfectly into the elbow. You’ll need to break out your crimpers when you can’t avoid cutting off the factory end or when you’re fabricating complex runs with multiple custom pieces.
Gather Your Tools and Safety Gear
A clean, professional job starts long before you make the first crimp. Getting your tools and safety equipment organized ahead of time means you can work efficiently and safely without stopping to search for something you need. Having everything within arm’s reach lets you focus on the task and deliver high-quality work. Think of it as setting up your workshop for success, whether you’re on the ground or on-site.
Essential Crimping Tools
The star of the show is, of course, the downspout crimper. For creating the clean, uniform, factory-style crimps that allow sections to slide together perfectly, a 5-blade hand crimper is your go-to tool. Look for one made from hardened steel with comfortable, ergonomic grips to reduce hand fatigue during repetitive tasks. A quality crimper provides consistent results and is built to last through years of daily use. While a standard crimper works for most jobs, you may want to explore other specialized gutter tools for unique downspout profiles or heavier gauge metals.
Must-Have Safety Gear
Working with sheet metal demands respect for the material. The edges of a cut downspout are incredibly sharp, so a good pair of cut-resistant gloves is non-negotiable. They provide the dexterity you need to handle the tool while protecting your hands from serious cuts. You’ll also want to wear safety glasses or goggles. Crimping can sometimes send small, sharp fragments of metal or sealant flying, and protecting your eyes is always a top priority. These simple pieces of gear are essential for staying safe on the job and preventing unnecessary injuries.
Other Supplies You’ll Need
Beyond the crimper, a few other items are necessary to complete the installation properly. You’ll need a measuring tape and a fine-point permanent marker or a scribe to mark your crimping depth accurately. Have a drill or driver ready with the appropriate bits for your fasteners. Speaking of which, always use high-quality, corrosion-resistant screws or rivets to secure the downspout sections. This prevents rust streaks and ensures a long-lasting connection. Finally, keep a tube of professional-grade gutter sealant on hand to apply to the joint before connecting the pieces, guaranteeing a watertight fit that can withstand the elements.
How to Crimp a Downspout, Step by Step
Crimping a downspout is a fundamental skill for any roofer or sheet metal worker. It’s all about creating a clean, tapered end that fits snugly into the next section, ensuring a leak-proof and professional-looking gutter system. Whether you’re working with aluminum, steel, or copper, the principles are the same. A proper crimp prevents water from escaping at the seams and protects the building’s foundation from water damage. Following these steps will help you get a perfect fit every time, whether you’re replacing a damaged section or installing a completely new system. With the right technique and tools, you can create durable, reliable connections that stand up to the elements. This process might seem simple, but attention to detail is what separates an amateur job from a professional one. A well-crimped downspout not only functions better but also contributes to the overall clean lines and curb appeal of a building. It’s a mark of quality craftsmanship that clients will notice. Before you begin, make sure you have a clear workspace and all your tools within reach. This preparation will make the entire process smoother and more efficient, letting you focus on getting the crimp just right.
Step 1: Measure and Mark
Accuracy is everything. Before you make any cuts, measure the length of the downspout you need. Use a tape measure and a pencil or marker to clearly mark your cut line. Remember that when you cut a downspout to a custom length, you’ll likely remove the factory-crimped end. This pre-crimped section is slightly narrower to allow it to slide into an elbow or another piece of downspout. Your goal is to replicate this tapered end on your freshly cut piece. Double-check your measurements before you grab your metal cutting tools to ensure you don’t waste material or time. A straight, precise cut is the foundation for a good crimp, so take your time on this initial step.
Step 2: Prep the Downspout
Once your downspout is cut to the correct length, it’s time to prepare the end for crimping. Make sure the cut is clean and free of any burrs or sharp, jagged edges. If needed, use a file or deburring tool to smooth the edge. A clean surface ensures your crimper can make uniform indentations without catching or tearing the metal. This small step makes a big difference in the quality of the final connection and prevents potential snags when you fit the pieces together. Taking a moment to prep the material properly sets you up for a much smoother crimping process and a more professional result that will last for years.
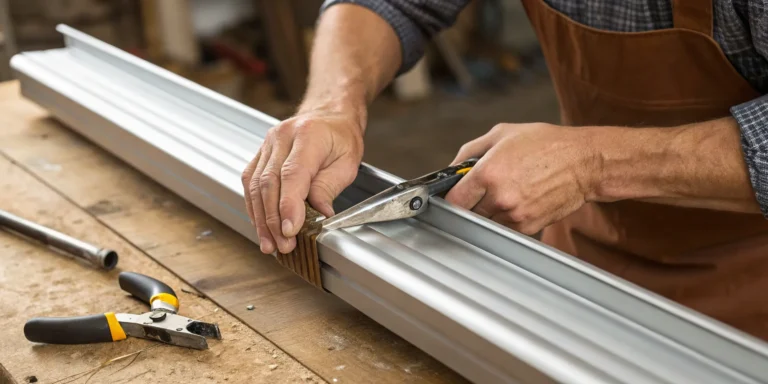
Step 3: Make the Crimp
With your downspout prepped, grab your hand crimper. Start at one corner of the downspout and insert the tool about an inch to an inch-and-a-half deep. Squeeze the handles firmly to create the first indentation. Move the tool over slightly and repeat the process, working your way around the entire circumference of the downspout. The key is to create a series of uniform, evenly spaced crimps. This methodical approach ensures the end is consistently tapered, allowing it to slide easily into the next section. Using quality gutter tools will give you the leverage and precision needed for a clean job without damaging the metal or straining your hands.
Step 4: Test the Fit
The final step is to check your work. Take the crimped end of your downspout and test-fit it into the connecting piece, whether it’s an elbow or another straight section. It should slide in smoothly with minimal force but still feel snug and secure. If it’s too tight or won’t go in, you may need to make your crimps slightly deeper. If it’s too loose, your crimps might be too shallow. Make any necessary adjustments, checking the fit after each change. A proper fit is crucial for a watertight seal that won’t leak or come apart over time. This quality check ensures the integrity of the entire gutter system and prevents future problems.
Master Your Crimping Technique
Once you have the right tools, the next step is perfecting your technique. A clean, effective crimp isn’t just about force; it’s about precision and understanding how the metal needs to behave. A well-executed crimp ensures a secure, leak-proof connection that will stand up to the elements for years. It’s the kind of detail that separates a quick fix from a professional installation. While the basic idea is to shrink one end of a downspout to fit into another, mastering the nuances for different materials and situations is what truly makes a difference.
Whether you’re a seasoned pro looking to refine your process or you’re training a new member of your crew, focusing on these fundamental techniques will improve the quality and efficiency of your work. Having the right gutter tools is half the battle, but knowing exactly how to use them to handle tricky angles or different metals is what ensures a perfect result every time. Let’s get into the specifics of how to create clean, durable crimps on any job.
Crimping Different Materials
The main goal of crimping is to reduce the diameter of a cut downspout so it can slide neatly into an elbow or another downspout section. Regardless of whether you’re working with aluminum, steel, or copper, the principle is the same: create a series of small, even indentations. For a secure fit, grab about an inch of the cut end and create a small, uniform crimp. While you can use needle-nose pliers in a pinch by twisting them along the edge, a dedicated hand crimper will give you the consistent, professional finish you need for a long-lasting, leak-free seal.
Handling Tricky Angles
Job sites rarely offer perfect, straight connections. When you encounter a tricky angle, you’ll need to manipulate the metal to create a custom fit. To create a slight bend or taper, use your hand seamer or pliers near one of the downspout’s corners. Gently squeeze and bend the metal inward to create a tapered end. This allows the piece to slide more easily into the wider opening of the connecting section without buckling or warping. This technique is especially useful for creating offsets or navigating around architectural features. For more complex jobs, having a variety of metal bending tools on hand can make all the difference.
How to Check Your Work
A job isn’t finished until you’ve confirmed everything is secure and functional. Once you’ve fitted the crimped piece into the next section, fasten it with at least one screw to ensure it won’t pull apart over time. Use screws designed for sheet metal that will hold the pieces together firmly. After securing the connection, it’s a good idea to test your work. If you can, run some water through the gutter system to check for leaks at the new joint. Keep an eye on it during the next rainfall—if you see water overflowing from the gutter above, it could indicate a clog or a poor connection that’s impeding flow.
Choose the Right Crimping Tool
Selecting the right crimping tool is about more than just getting the job done—it’s about efficiency, precision, and the quality of your finished work. Your choice will likely come down to the scale of your project, your budget, and your personal preference for control versus speed. Whether you prefer the hands-on approach of a manual tool, the rapid results of a power attachment, or the unmatched precision of a specialized crimper, there’s a perfect option for your toolkit. Let’s break down the main types so you can pick the best tool for your next gutter installation.
Manual Hand Crimpers
For roofers who value control and cost-effectiveness, manual hand crimpers are a toolbox staple. These tools give you a direct feel for the metal, allowing you to make precise, controlled crimps exactly where you need them. While you could technically use needle-nose pliers in a pinch to create small, twisted crimps around a downspout’s edge, a dedicated hand crimper is essential for a professional, uniform finish. Using the right tool ensures the downspout fits snugly into the elbow without damage. Investing in quality gutter tools provides the leverage and jaw design needed for clean, consistent results on every job.
Power Tool Crimpers
When you’re facing a large project with multiple downspouts, efficiency is key. This is where power tool crimpers shine. These attachments fit directly into a conventional power drill, turning a repetitive manual task into a quick, automated process. They are fantastic for saving time and reducing hand fatigue on big jobs. Instead of squeezing a handle for every crimp, the drill does the work for you, creating a clean and consistent pattern around the downspout. This method is not only faster but also produces a sleek, uniform look that speaks to high-quality craftsmanship, especially when working with materials like half-round gutters.
Specialized Crimping Tools
For the best possible fit and a truly watertight seal, nothing beats a specialized crimping tool. These tools are engineered for one purpose: to downsize downspouts perfectly. Options like 3-blade or 5-blade downspout crimpers are designed to create multiple crimps at once, ensuring an even, secure connection that prevents leaks and stands up to the elements. They are built for durability and performance, making them a reliable choice for professional roofers who can’t compromise on quality. If your work demands flawless, leak-proof connections every time, adding a specialized crimper to your arsenal is a smart move.
Troubleshoot Common Crimping Issues
Even with years of experience, you can run into frustrating issues on the job. A bad crimp or a sudden leak can throw a wrench in your workflow. The key is knowing how to spot these problems early and fix them efficiently. Getting your crimping technique right is crucial for a gutter system that not only looks professional but also functions perfectly for years. Let’s walk through some of the most common hiccups and how to handle them so you can keep your project moving forward without a hitch.
Common Mistakes to Avoid
Two frequent missteps can undermine an otherwise solid gutter installation: misaligned elbows and skipped sealant. When downspout elbows are set at poor angles, water can back up or spill over the sides instead of flowing away from the foundation. Always double-check your angles to ensure a smooth, downward path for water. Another critical error is forgetting to seal the joints. It might seem secure at first, but unsealed connections will almost certainly leak over time, especially under the pressure of heavy rainfall. Taking a few extra moments to apply a quality sealant to every joint is a simple step that prevents callbacks and protects your reputation.
How to Prevent Leaks
The best way to deal with leaks is to prevent them from happening in the first place. During any installation or maintenance check, keep an eye out for small gaps or cracks in the downspout material itself, as these are early signs that a section may need replacement. Overflowing gutters are another red flag, often pointing to a blockage or damage in the downspout that needs immediate attention. Regular inspections with the right gutter tools allow you to catch these issues before they cause significant water damage. A proactive approach ensures the entire system remains secure and leak-free.
Fixing a Bad Crimp
If you’ve ever cut a downspout to size, you know you’ve also cut off the factory-crimped end. That slightly smaller, recessed end is designed to slide neatly inside the next piece, like an elbow or another downspout section. Without it, you can’t get a secure fit. The fix is straightforward: you need to recreate that crimp on the cut end. Using a hand crimper, you can make the opening smaller so it fits snugly into the adjoining piece. This is where having quality metal bending tools makes all the difference, allowing you to create a clean, tight connection that prevents leaks and looks professional.
Maintain Your Gutter System
A perfect crimp is a critical detail, but it’s only one part of a high-functioning gutter system. Proper, consistent maintenance is what ensures your entire setup—from the roof edge to the downspout outlet—does its job of protecting the building from water damage. Neglecting the system can lead to clogs, leaks, and costly repairs down the line. By making inspections and seasonal clean-outs a regular part of your workflow, you can catch small issues before they become major headaches for you or your client.
Your Regular Inspection Checklist
Regular inspections are your first line of defense against gutter failure. When you’re on-site, take a few minutes to look for the tell-tale signs of a clog. Overflowing gutters during a rainstorm are the most obvious clue, but other signs can appear even on a dry day. Listen for gurgling sounds from the downspouts, which can indicate trapped water and air. Also, look for water pooling around the foundation, sagging gutters pulling away from the fascia, and water stains on the siding directly below the gutter line. Catching these early helps you address a simple clog before it causes real damage.
Warning Signs That Call for Maintenance
Some issues go beyond a simple cleaning and signal that repairs are needed. If you see eroded landscaping or trenches forming in the mulch beneath a downspout, it means water isn’t being directed away from the building properly. Pay close attention to the downspout itself—visible gaps, cracks, or rust spots are clear indicators of failure. You might also find loose screws or nails on the ground below. This is a sign that the fasteners are failing and the system is coming loose. These problems can lead to significant water damage to the siding and foundation if left unaddressed.
Seasonal Care Tips
Proactive, seasonal maintenance is the key to a long-lasting gutter system. At a minimum, gutters and downspouts should be thoroughly cleaned twice a year—once in the late spring and again in the late fall after most of the leaves have dropped. For properties with heavy tree cover, more frequent cleanings might be necessary. Having the right gutter tools on hand makes this routine task faster and safer. This simple habit prevents the buildup of debris that causes clogs, ice dams, and unnecessary weight stress on the entire system.
Know When to Replace Parts
While cleaning and minor repairs can solve many problems, it’s important to recognize when a component is at the end of its life. If a section of the gutter is severely bent, cracked, or has extensive rust, a simple patch won’t be a lasting solution. Similarly, if you’re constantly clearing the same clog in a downspout, the issue might be a dent or internal damage that requires replacement. Being proactive and replacing worn-out parts maintains the integrity of the entire drainage system and prevents a single failing component from causing a cascade of problems.
Pro Tips for Complex Installations
Even seasoned pros run into tricky situations on the job site. From stubborn materials to awkward angles, complex installations demand a bit more finesse and know-how. Here’s how to handle those challenging gutter jobs with confidence and ensure your work stands the test of time.
Working with Different Gutter Materials
Whether you’re working with aluminum, steel, or copper, the goal is always a clean, watertight fit. The type of crimper you use can make a significant difference. While a 3-blade crimper gets the job done, a 5-blade tool creates a deeper, more compressed crimp that provides a tighter seal, much like a factory finish. This is especially important for ensuring a secure, leak-proof connection on various material gauges. Investing in high-quality gutter tools designed for professional use will help you create a perfect crimp every time without damaging the downspout, saving you from frustrating callbacks.
Solutions for Challenging Installations
Misaligned elbows and poor angles are common culprits for water backups and spills. Here’s a simple trick for a smoother fit: when you need to shorten a downspout, always try to cut the top end. This preserves the factory-crimped end at the bottom, which will slide into the next section or elbow much more easily. Of course, a clean cut is essential, so having reliable metal cutting tools is non-negotiable. Finally, don’t skip the sealant. Even a perfect fit needs to be properly sealed at every joint to prevent leaks during heavy rain. Taking an extra minute to get the angle right makes all the difference.
Factoring in the Weather
Your best work can be undone by bad weather, so timing your installation is key. Always aim to apply sealants and cements on a clear, dry day, as moderate temperatures allow them to cure properly. For metal systems, a permanent seal often requires more than just caulk. Mastering metal roof soldering creates a powerful bond that can withstand the elements for decades. Remember that any moisture trapped in a joint can freeze and expand, breaking the seal and causing leaks down the line. Planning your work around the forecast isn’t just for convenience—it’s a critical step for a long-lasting, durable gutter system.
Related Articles
Frequently Asked Questions
What’s the real difference between a 3-blade and a 5-blade crimper? Think of it in terms of creating a smoother, more perfect circle. A 3-blade crimper gets the job done, but a 5-blade tool creates more indentations closer together. This results in a more uniform, gradual taper on the downspout end. The benefit is a cleaner, factory-like finish that slides into the next section more easily and provides a tighter, more secure seal against leaks. For a truly professional result, the 5-blade is the superior choice.
Is it possible to over-crimp a downspout, and what should I do if it happens? Yes, you can definitely over-crimp a downspout. If you apply too much force or make the crimps too deep, you can actually make the connection too loose or even risk cracking or tearing the metal, especially on thinner aluminum. If the fit is wobbly, the seal won’t be secure. The best and most professional fix is to make a fresh cut just above the damaged section and start over. It’s always better to take a moment to redo it right than to risk a leak later.
Should I use screws or rivets to fasten the downspout connections? Both can create a secure connection, but screws are generally the preferred choice for most jobs. They are much easier to remove if a section of the downspout ever needs to be repaired or replaced in the future. The most important thing, regardless of your choice, is to use high-quality, corrosion-resistant fasteners. This prevents ugly rust streaks from running down the downspout and ensures the connection remains strong for years.
When is the right time to apply sealant during the connection process? For the most effective seal, you should apply a bead of professional-grade gutter sealant to the inside of the larger, uncrimped opening before you connect the pieces. When you slide the crimped end into it, the sealant gets pushed into the joint, filling any tiny gaps and creating a complete, watertight barrier from the inside out. Applying it this way is much cleaner and more effective than trying to caulk the outside of the seam after it’s already connected.
Does the crimping technique change for heavier gauge metals like steel versus aluminum? The basic principle remains the same, but your approach needs to be adjusted. Heavier gauge steel requires significantly more hand strength and a more robust tool to make an impression. You’ll want to use a high-quality, durable crimper with good leverage to avoid straining your hands or the tool itself. It’s best to apply firm, steady pressure to create the indentations, ensuring you don’t warp or damage the thicker material.