
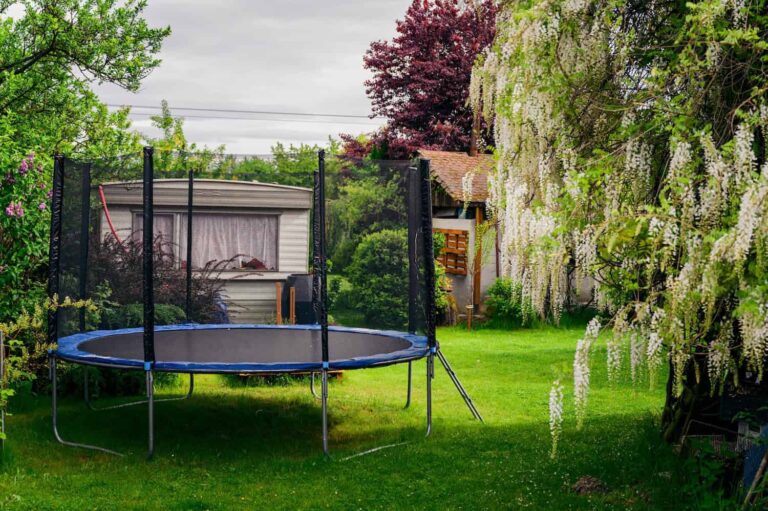
If you have a backyard trampoline, you already know how much space it takes up and how solidly built it is. That is great when kids are jumping around, but when you need to move it to a new home or even a different corner of the yard, that heavy sturdiness becomes an obstacle. Many people assume they can tip or drag it across the grass and call it a day, but the truth is that trampolines are heavier, wider, and more awkward to handle than they look.
The good news is that you can move a trampoline safely with the right prep work. Whether you want to move a trampoline without full disassembly or take it apart step by step, this guide walks you through everything you need to know. By the end, you will know which approach fits your trampoline, your terrain, and your comfort level.
Why Plan Your Trampoline Move Carefully?
Even small trampolines are large enough that you need a clear plan before you start lifting. A standard full-size model can weigh 150 pounds or more, and the frame sections can twist if they are forced through tight spots. The jumping mat and safety net are also easy to damage if they catch on a fence or a branch.
“It is smart to keep a few tarps on hand to cover the ground if it has been raining recently or it’s in the forecast. And if you’re moving your trampoline in high temperatures, try to schedule everything for the early morning hours…”
There is also the physical strain to think about. A trampoline’s frame and mat carry more weight than many people expect. Lifting or tilting that weight the wrong way can lead to a pulled back, strained shoulder, or pinched fingers. Planning ahead, using good form, and having enough helpers around make a big difference in keeping everyone safe while you move it.
You should also watch out for hazards on and around the path you’re taking when moving your trampoline. Taking a minute to map out your route helps you avoid tight turns that can twist the frame or send you slipping on uneven ground.
Gathering Tools and Materials
You do not need any really specialized tools to relocate a trampoline, but a few basics make the job go faster. Most people use a wrench or socket set, a spring puller, masking tape for labeling, moving blankets, straps, and a furniture dolly. A tarp can help if the yard is soft or muddy, and a winch is useful if you are sliding large sections across shorter distances.
Step-by-Step Disassembly Guide
For the safest and most manageable option, taking the trampoline apart completely is the way to go. Here is an outline of each step to take when disassembling your trampoline:
- Label the main parts, so you know which side is which later.
- Remove the net and the poles.
- Take off the springs one at a time as you work your way around the mat.
- When the mat is free, undo the frame sections by loosening the remaining bolts.
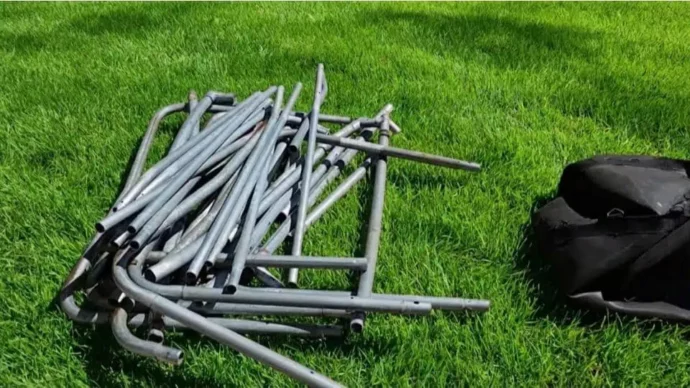
- Keep everything in small groups to make reassembly less of a puzzle.
While this is a good general overview of how to get your trampoline into a manageable state, some parts of the process are more complex and require a little more in-depth explanation.
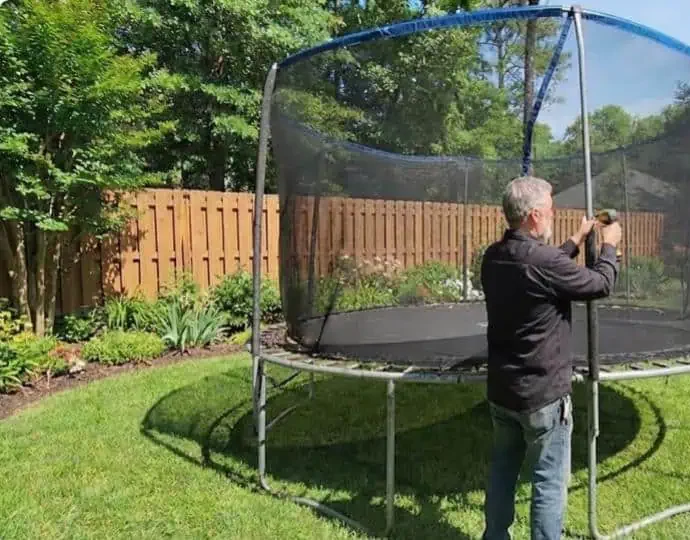
Removing the Safety Net and Poles
Unclip the bottom of the net first, then slide the poles out of their sleeves. Make sure you lay the poles together so they do not roll away in the yard. If you spot a worn strap or a small tear, take a quick picture so you remember to fix it before putting everything back together.
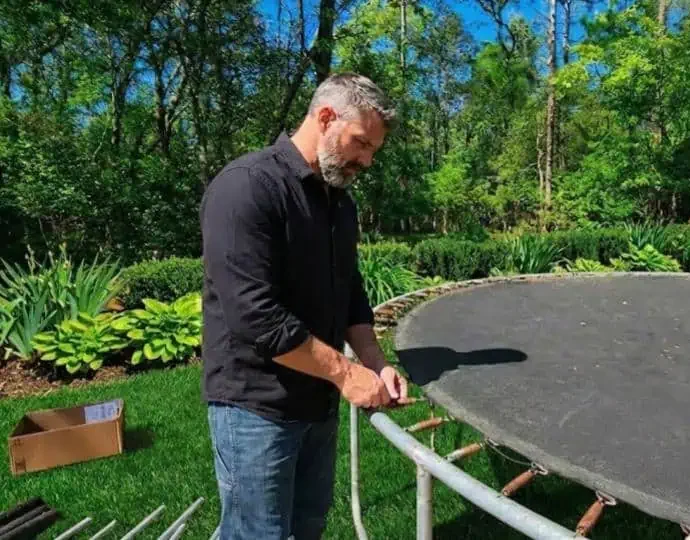
Detaching Springs and Frame Sections
A spring tool keeps your fingers safe. To remove a spring using one, hook the spring, pull toward the center, then let it come loose gently. Drop each spring into a bucket so they don’t disappear into the grass, or you accidentally step on one. Once the mat is off, you can loosen the bolts around the frame. The pieces are lighter than they look and usually stack together nicely.
Transporting Trampoline Parts
In order to get all your parts to where they need to go in one piece, you should first wrap any long metal pieces in moving blankets so they don’t scratch anything in the truck or trailer. You can fold the mat loosely so it keeps its shape. Load the longest and heaviest parts first, then place the smaller and lighter ones on top. Finally, you should use a few ratchet straps to ensure nothing shifts during the drive. If you want a quick refresher on securing items in a truck, HireAHelper has a guide on loading furniture safely that applies to outdoor gear, too.
Before you finish, give everything a shake to make sure nothing rolls around. Even a single frame bar can cause damage to your vehicle and any other items inside if it moves while you are driving.
Moving Without Full Disassembly
There are times when people prefer to move a trampoline in larger pieces, or even in one piece, especially if it only needs to be relocated across the same yard. With 2 or 3 helpers, a smaller trampoline can usually be lifted and walked to a new spot. Tow straps or a winch can also help if the ground is smooth.
However, there are limits to this method. It does not work well on hills, and windy weather can make a trampoline feel unstable. Older frames with rusted joints should not be moved this way, since lifting the whole thing can put too much pressure on weak spots. If you have a longer distance to go, we recommend fully taking your trampoline apart before moving it.
DIY vs Hiring Labor-Only Helpers
Handling a trampoline on your own can save a little money, but it usually means it takes a lot longer. You are taking it apart, carrying each piece, figuring out how to load it, then putting it back together later all on your own. It is doable, but it’s still a lot of effort, lifting, and planning as you go.
“A standard full-size [trampoline] can weigh 150 pounds or more, and the frame sections can twist if they are forced through tight spots.”
Bringing in help through the HireAHelper marketplace makes the whole thing move more quickly. The minimum you can book is usually 2 movers for 2 hours, which is often all you need for a trampoline. They handle the heavy parts while you decide where everything goes. You pay only for the time you book, so it stays pretty flexible. If you want to learn more about how these moves work, you can explore hybrid mover options or browse providers through our guide to hiring movers.
Benefits of Hiring Labor-Only Movers
Having a couple of pros makes the whole job so much easier. They already know how to handle big, awkward pieces, so you are not fighting with the frame or trying to lift more than you should. It also feels safer, since you’re not putting all that weight on your back or hoping the trampoline doesn’t shift while you’re carrying it.
Even better, HireAHelper makes booking this kind of assistance pretty simple. You can compare quotes from several companies, read reviews, and book on our platform 7 days a week. A lot of trampoline moves fit into a 2-movers, 2-hours slot, which keeps the cost low and gets the work done without turning the whole day into a project.
Common Challenges and Solutions
Most people run into the same few problems when it comes to moving their trampoline. Uneven ground is a big one. A small dip in the yard can throw the whole frame off balance, so it helps to put down a board or anything flat to give yourself a steadier surface. Tight gates or corners can cause trouble, too. Sometimes you have to pop a hinge or move a small fence panel just to get enough room to angle the frame through.
You’ll also want to be careful when it comes to the weather. A wet yard makes everything slippery, and hot days wear you out fast. It is smart to keep a few tarps on hand to cover the ground if it has been raining recently or it’s in the forecast. And if you’re moving your trampoline in high temperatures, try to schedule everything for the early morning hours so you can move it before the sun gets too intense.
Safety Checklist for Your Trampoline Move
A few small safety checks make this tricky job a lot less risky. Here are the best steps that keep you from losing hardware or tweaking your back halfway through:
- Take pictures! This will help you during reassembly, so you’re not wondering where a part goes when they all look very similar.
- Wear gloves with a good grip so the springs and frame do not slip out of your hands.
- Keep all bolts, clips, and springs in labeled bags to keep them from getting lost and save time when you put everything back together.
- Look over the frame and mat before reassembly. If you spot rust, cracks, or stretched springs, it is easier to deal with it now than after the trampoline standing again.
- Lift with your legs, not your back, and take your time with the heavier pieces. Slow and steady keeps you from straining anything.
- Wipe off any wet surfaces so you have a better grip while carrying or sliding the parts.
If you follow these basics, the rest of the move tends to fall into place!
Moving Your Trampoline with Confidence
By the time the parts are labeled and laid out, you have already done the hardest part. Putting it back together is mostly matching things up and checking that nothing feels loose or out of place.
If you booked a couple of helpers through HireAHelper, the whole process is even easier, since the pros are efficient at reassembling. You can stand back, point to the spot you want your trampoline, and let them do the work. If you are handling it yourself, it just comes down to patience. Keep the labels nearby, take breaks when you need them, and trust that you will get your trampoline standing again without rushing.
Frequently Asked Questions
How long does it take to disassemble and move a trampoline?
Most standard trampolines take about 1-2 hours to take apart, then another hour to load and transport, depending on how far you’re going. When you book movers to handle the job, the process usually goes a lot faster. Keep in mind that larger trampolines or rusty hardware can really lengthen the timeline.
Can I move my trampoline by myself?
Sometimes, yes, although we do not recommend it. If it is a smaller trampoline that is only a few pieces, one person can usually manage it with the right tools, although it’s still better to get help. Larger and full-sized trampolines are more of a challenge and require several people to move. The frame could shift when you lift it, and that is when the trampoline gets damaged, or you end up straining something or catching a finger.
What’s the best way to keep track of springs and hardware?
The easiest way is to grab a few zip bags and write what’s inside each on a piece of tape. Plus, keeping everything together keeps those tiny bolts from rolling away. It’s also a good idea to take quick photos while you work, so you remember how things were assembled before you took the frame apart.
How much does it cost to hire movers for a trampoline relocation?
Rates depend on where you live, but most people end up booking 2 movers for 2 hours. That is usually enough time for taking the trampoline apart, loading it, and setting the pieces where you want them at the new place. You only pay for the time you use, so costs should be reasonable for a job this size.
What kind of vehicle do I need to transport trampoline parts?
A pickup truck works for most medium trampolines once the frame is in sections. For larger models, a rental truck or small trailer gives you more room to lay out the longer pieces. Keep everything secure with ratchet straps, and it’s usually a good idea to wrap the mat to keep it clean and dry.