
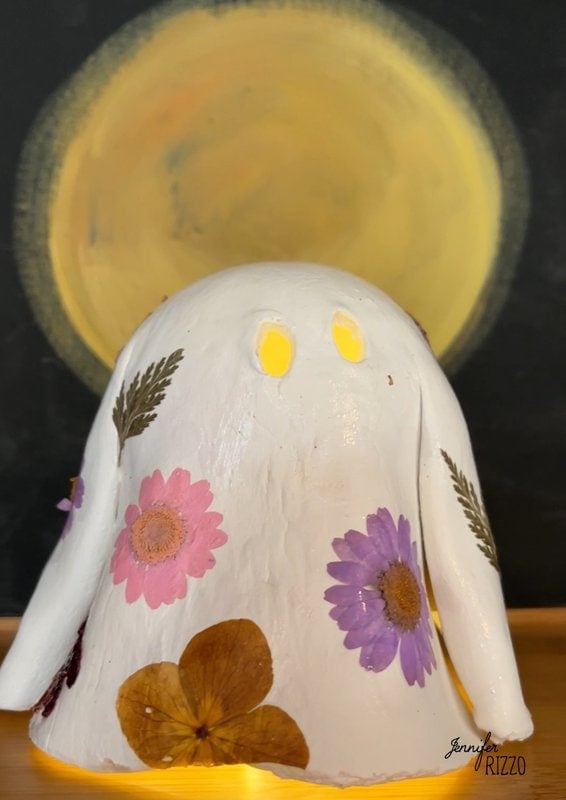
Are you ready for spooky season? While I love a good, traditional Halloween filled with orange and black, there is something about creating a “pretty” Halloween with moss, flowers and not quite as spooky-feeling. I love how pastel Halloween decor is trending! These floral clay ghosts made with air dry clay and embellished with dried flowers are an easy project and the perfect way to make some prettier Halloween decor and a fun craft to make. And these are so cute you can bring them out long before October.

This post contains affiliate links including Amazon affiliate links where we earn a small commission on purchases. See our sponsor and affiliate disclosure here.
You’ll need just a few supplies for this tutorial. The hardest thing about this porject is waiting because depending on the weather, air dry clay can take from 24 hours to a few days to dry completely.

Supplies to Create Floral Clay Ghosts with Air Dry Clay
Purchase the supplies on Amazon
Air dry clay (I used paper clay but other kinds are fine to use)
Rolling pin
Parchment paper
Skewer or plastic knife
Straw
Tweezers
Small container of water
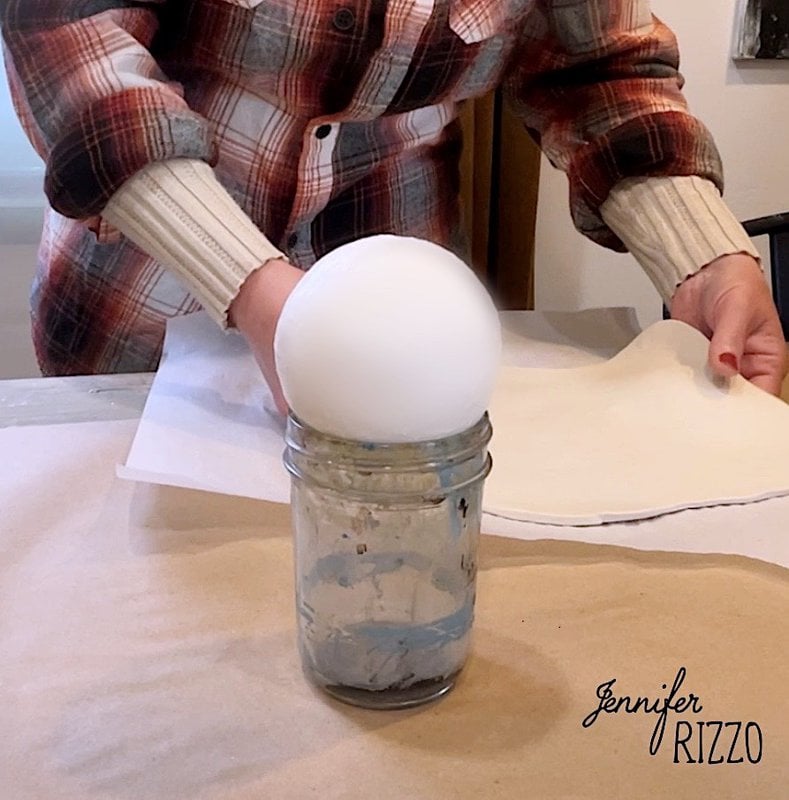
Balloon inflated to the size of a golf ball to baseball (or a styrofoam ball covered in tin foil)
Painter’s tape and item to tape it to such as a disposable cup (if needed)
‘Paint brush or foam craft brush
White acrylic paint-craft paint
Decoupage medium such as Mod Podge
Dried pressed flowers (or napkins with floral images!)
Battery Operated Fairy Lights
Create the Form for Your Ghost
To create the drapey ghost shape, you’ll need something to drape the clay over. I used a small jars with the inflated balloon taped over the top. A disposable plastic cup will also work or a ball of aluminum foil will also work. Use painters tape to hold it on if needed. Set aside.
Roll Out Your Air Dry Clay
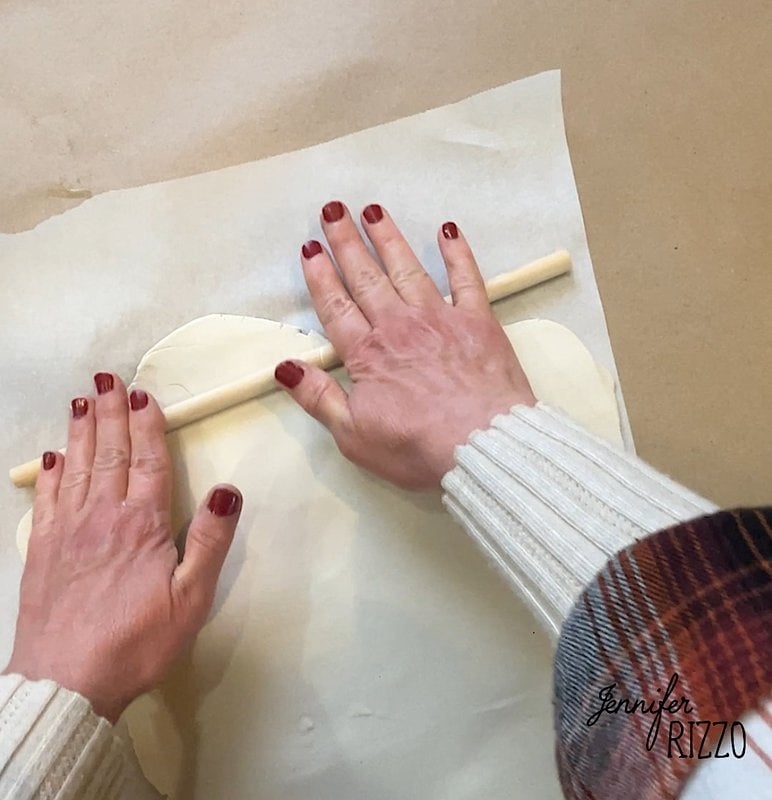
Start by taking about a baseball size of air dry clay for this easy diy project. Roll it out on a piece of parchment paper on a cutting board for ease of moving it around. The amount of clay you use will determine how big your ghost will be. Any remaining clay can be kept in the original container or wrapped in plastic wrap to keep it moist enough to work with. Roll out your air clay until it’s roughly about 1/8 inch thick.
Cut Out Your Circle Ghost Shape
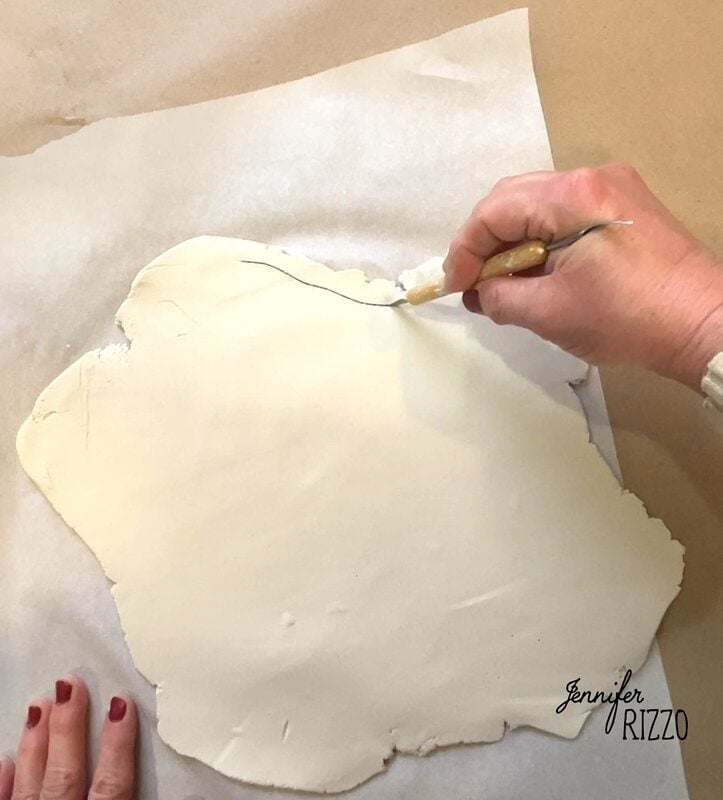
While it’s easiest to cut out a perfect circle, imperfections make it more interesting! I added some swoops to my circular shape cut out clay and then removed the excess. I did end up trimming mine a bit, so keeping it in a more circular shape is a better idea. Use a wet finger to smooth out any rough edges of the clay. If you are a perfect circle person, use a cookie cutter, the lid of a glass jar or even a large mouth cup. A larger diameter circle will yield a larger and/or taller ghost.

Drape Your Clay
Pick up the edge of of the clay and carefully lay the clay over the balloon taped to the jar and let the clay create it’s own folds. Use a wet finger to smooth down any edges and smooth over any cracks that might form on the little ghosts.

Create the Ghosts Eye Holes
Pinch the end of a straw to make it into a slightly oval shape to remove small pieces for the eyes and/or mouth. Dip it in water and use to punch out the eye holes of the ghost. It might be easier to place them after draping your clay circle. In a pinch you can also use toothpicks to make holes.

Let Your Air Dry Clay Dry
This is the hard part! It takes a few days for the clay to dry depending on humidity. Make sure to let it dry out in the open. If any cracks form, use a little bit of the extra clay mixed with a little water to create a slurry to fill in the cracks and let it dry. Discard any extra slurry as it could mold due to the high moisture content.

Paint Your DIY Clay Ghosts
Once your clay is completely dry, carefully deflate and remove the balloon or ball of aluminum foil. If a harder object like a ball was used, remove it before the clay dried very hard and looses it’s flexibility. Mine was still a little damp on the inside, so I propped it in a box padded by paper towel so the inside could dry easier the rest of the way. Once it’s dry, use a paint brush to add a few layers of white craft paint (or a favorite color paint!) and let that dry.


Add Your Dried Flowers with Decoupage Medium
Now the pretty and fun part! Adding dried flowers in your favorite colorsis the cutest way to take these ghosts from spooky to sweet. Use a paint brush to brush on a coat of decoupage medium and add your florals on top of the medium. Use a brush to add another coat as you press the flowers on to keep them in place and the decoupage. medium also seals the air dry clay. Once all of your dried flowers are added, add a final layer of Mod Podge or other decoupage medium over the whole thing and let dry completely. You can also embellish your ghosts with cute bows or other accessories!

Place Your Fairy Lights Underneath
Fairy lights (or battery operated candles) are such a cute way to make your little ghosties light up. It’s an easy craft to create and the perfect addition to a pretty Halloween season! Glow sticks can also work well if these are for kids and you’re worried about button batteries.


These are so adorable and a great beginner’s clay project! We hope you loved learning how to decorate and make an air dry clay ghost! For another pastel Halloween idea, check out these sweet bats and witches hat.
Happy crafting!

