
In metal roofing, the details are what separate the pros from the amateurs. Anyone can lay a panel, but it’s the tricky transitions and penetrations that showcase true craftsmanship. A perfectly executed pocket pan is a mark of quality, demonstrating a commitment to a durable, leak-free system. It’s more than just a metal box filled with sealant; it’s a custom-fabricated solution for one of roofing’s toughest challenges. This guide will walk you through every step of how to form a pocket pan on a metal roof, from selecting the right tools to folding clean, professional corners that protect your work and your reputation.
Key Takeaways
- Use a Pocket Pan for Tricky Penetrations: It’s the go-to method for creating a watertight seal around awkward pipes and supports on low-slope roofs, effectively lifting them out of the main path of water.
- Master the Folds with the Right Tools: Your craftsmanship shows in the details. Use a dedicated pocket pan former to create clean, consistent “pig’s ear” corners for a professional, leak-proof finish that standard hand tools can’t match.
- Seal It Right the First Time: A perfect pan is useless without a perfect seal. Choose a compatible, high-grade sealant, fill the pan completely to avoid creating a water basin, and double-check your work to prevent callbacks.
What Is a Pocket Pan and Why Do You Need One?
If you’ve spent any time working on commercial or low-slope roofs, you’ve likely come across a pocket pan, also known as a pitch pocket. It’s a classic solution for one of roofing’s trickiest challenges: how to waterproof the awkward spots where things like pipes, vents, or support stands poke through the roof deck. Getting these penetrations sealed correctly is non-negotiable for a leak-free job.
While they might seem old-school, pocket pans are still a reliable method for creating a durable, watertight seal around irregular shapes that are tough to flash conventionally. Forming a pocket pan properly requires precision and the right technique, but once you master it, you’ll have a go-to solution for complex roof penetrations. It’s a fundamental skill that separates the pros, ensuring your work stands up to the elements for years to come.
What Does a Pocket Pan Do?
At its core, a pocket pan is a custom-fabricated metal box or enclosure that you build around a roof penetration. Think of it as a small, open-topped container that surrounds the pipe or stand coming through the roof. Its entire purpose is to create a bulletproof, watertight seal. Once the pan is installed, you fill it with a pourable liquid sealant that cures and hardens, forming a solid block that prevents any water from getting near the penetration. This method is especially effective because the sealant conforms perfectly to any irregular shape, leaving no gaps for moisture to sneak through.
When to Use a Pocket Pan
Pocket pans are your best friend on flat or low-slope roof systems where water doesn’t run off as quickly. On these roofs, any penetration can become a potential ponding area, creating a high-risk spot for leaks. A pocket pan solves this by elevating the base of the penetration above the roof surface, effectively lifting it out of the main path of water flow. This is critical on metal roofs, where every transition and seam needs to be perfectly managed to maintain the integrity of the entire system and ensure proper drainage.
Gather Your Tools and Materials
Walking onto a job site with the right gear is half the battle. Before you make a single cut or fold, taking the time to gather the correct tools and materials will make the entire process smoother and ensure the final product is something you can be proud of. A well-formed pocket pan depends on precision, and that precision starts with having professional-grade equipment at your fingertips. This isn’t the place to take shortcuts—using the right tools for the job prevents mistakes, saves time, and delivers a clean, watertight seal that will last for years.
Your Tool Checklist
For a clean and accurate pocket pan, you need tools designed for the task. Your standard hand seamers won’t cut it here. A dedicated pocket pan former is essential; its design gives you the leverage and folding depth needed for crisp bends, especially on heavier gauge metals. You’ll also want a squeeze bar, which is perfect for forming the “pig-ear” corners that are critical for a watertight transition. Of course, don’t forget the basics: a reliable tape measure, marking tools, and a quality pair of snips for making precise cuts. Having these specific tools ready will make the forming process much more efficient and accurate.
Select the Right Metal
The metal you choose for your pocket pan should be just as durable as the roof it’s protecting. In most cases, you’ll want to use the same material as the main roofing panels to ensure compatibility and prevent issues like galvanic corrosion. Steel is a common and reliable choice because of its strength and workability. The professional forming tools on your checklist are built from forged steel specifically to handle the demands of bending these tougher materials without causing stress fractures or imperfections. Always confirm the gauge and type of metal are appropriate for the specific roof system.
Choose Quality Sealants and Accessories
A perfectly formed pocket pan is only effective if it’s sealed correctly. This is where high-quality sealants and accessories come into play. You’ll need a professional-grade, UV-stable sealant that is chemically compatible with your chosen metal. Applying the wrong type can lead to premature failure of the seal or corrosion of the metal itself. For penetrations, you’ll be installing a flanged, open-bottomed enclosure that the pocket pan will flash into. Ensuring every seam and connection is properly sealed is critical for creating a completely watertight barrier that protects the structure from the elements.
Prep for a Safe and Accurate Install
Before you even think about cutting or bending metal, a little prep work goes a long way. Taking the time to get your safety gear in order, clean the roof surface, and double-check your measurements will save you headaches down the line. A clean, well-planned workspace is the foundation for any professional job, and forming a pocket pan is no exception. This initial phase isn’t just about ticking boxes; it’s about setting yourself up for an installation that is efficient, precise, and—most importantly—safe. Getting these three steps right ensures your final product is watertight and built to last.
Safety First: Your PPE
Let’s get this out of the way first: safety is non-negotiable. Before you step onto the roof, make sure you have the right personal protective equipment (PPE). A properly fitted safety harness is an absolute must when working at any height. Beyond that, you’ll want heavy-duty gloves to protect your hands from sharp metal edges and safety glasses to shield your eyes from debris. Depending on the job site, you might also need a hard hat. Taking a few minutes to gear up properly protects you from serious injury and shows your commitment to professional standards on every project.
Prepare the Roof Surface
You can’t get a perfect seal on a dirty surface. Before you start forming your pocket pan, take the time to thoroughly prepare the installation area. This means clearing away any leaves, dirt, or other debris that could get trapped underneath and compromise the seal. The roof surface needs to be completely clean and dry. Any moisture or grime left behind can interfere with sealants and adhesives, leading to potential leaks later on. A quick sweep and wipe-down is a simple step that ensures your pocket pan fits securely and functions exactly as it should.
Map Out Your Measurements
The old saying “measure twice, cut once” is a roofer’s mantra for a reason. Accurate measurements are the key to a successful pocket pan installation. Before you make your first cut, map out the entire panel layout and confirm all your dimensions. This planning stage helps you visualize the final product and catch any potential errors before they turn into wasted material or, worse, structural problems. Using reliable metal cutting tools is part of the equation, but precise initial measurements are what truly set the foundation for a clean, professional fit that won’t require rework.
How to Form a Pocket Pan: Step-by-Step
Once your workspace is prepped and your materials are ready, it’s time to start forming the pocket pan itself. This process requires precision at every stage, from the initial cut to the final fold. Taking your time here ensures the pan will fit perfectly around the roof penetration, creating the foundation for a durable, watertight seal. A well-formed pan not only functions better but also gives your work a clean, professional finish that reflects the quality of your craftsmanship. Let’s walk through the essential steps to get it right.
Cut and Prep Your Metal
Your first move is to cut the sheet metal to the correct dimensions for the penetration. Accuracy is everything. A pocket pan is essentially a flanged, open-bottomed box that fits snugly around a pipe or curb, so your initial cuts will dictate the final fit. Before you bend anything, make sure your piece is cut cleanly and squared up. For detailed specifications and best practices on enclosures, the Metal Roof Installation Manual is an excellent resource. Having the right metal cutting tools for the job will make this step much smoother and more precise.
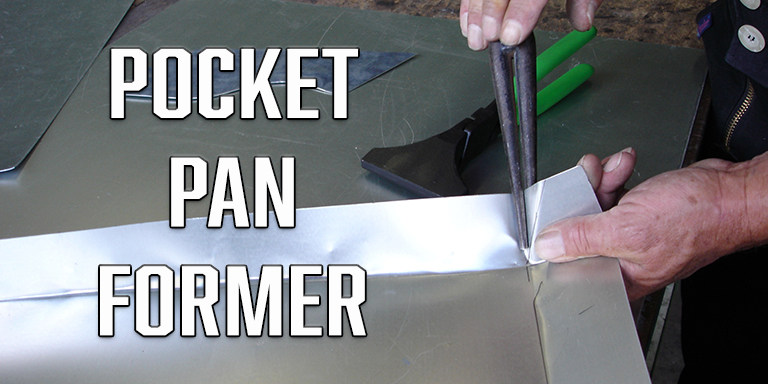
Use a Pocket Pan Former
For clean, consistent folds, a specialized tool is your best friend. While you can use hand seamers or pliers, a pocket pan former is designed specifically for this task, giving you leverage and control that other tools can’t match. For example, the Freund Pocket Pan Former has a 6″ folding depth, which is perfect for creating deep, crisp bends in heavier gauge metals. This tool helps you create the sharp, accurate folds needed for a professional-grade pan, ensuring all sides are uniform and ready for a perfect installation.
Fold Professional Corners
The corners are where your craftsmanship really shows. A proper “pig’s ear” fold is the standard technique for creating a clean, watertight corner without cutting the metal. This method involves folding the corner material over on itself to create a sealed, professional-looking transition. It takes a bit of practice, but mastering this fold is essential for a high-quality job. Using the right metal bending tools gives you the control needed to make these detailed folds neatly and efficiently, preventing buckling or tearing in the metal.
Double-Check Your Measurements
Before you consider the pan complete, take a moment to double-check all your measurements and folds. Is everything square? Are the depths consistent? This is where a tool with a set depth, like the 6” depth on the Freund Pocket Pan Former, really proves its worth over standard pliers. It provides a consistent guide that helps eliminate guesswork and ensures every fold is exactly where it needs to be. A quick final check at this stage can save you from having to fix a poorly fitting pan later on, ensuring a smooth and successful installation.
Install for a Watertight Seal
You’ve done the hard work of forming the pan, and now it’s time to put it all together on the roof. This final installation phase is where your precision pays off, creating a durable, watertight seal that protects the building for years to come. A perfectly formed pan is only as good as its installation, so take your time to get these last steps right. It’s all about proper positioning, using the right materials, and meticulously checking your work to ensure water stays where it belongs—off the roof and away from the structure. This is the moment that separates a good job from a great one. A flawless seal prevents callbacks, protects your reputation, and ensures the roof system performs exactly as intended. Think of it as the final line of defense against water intrusion. Even the most expertly crafted pan will fail if it’s not installed with the same level of care. We’ll walk through how to secure the pan, apply the right sealant for a bulletproof finish, and test your work to catch any potential issues before they become major problems. Getting this part right means you can walk away from the job confident that your work will stand up to whatever the weather throws at it, safeguarding the building and everything inside it.
Position the Pan Correctly
Proper placement is critical for function. The main job of a pocket pan is to lift roof penetrations, like equipment stand legs or pipes, above the primary water level. Think of it as creating a small, contained dam that redirects the flow of water around the obstacle instead of letting it pool up against it. Before you fasten anything, place the pan around the penetration and make sure it sits flat and square against the roof deck. It should be high enough to keep water out during a heavy downpour, effectively helping the roof drain as it was designed to.
Choose and Apply the Right Sealant
Your choice of sealant can make or break the entire installation. Don’t skimp here—select a high-quality, professional-grade sealant that’s compatible with your roofing metal and the penetration material. The goal is to create a simple, monolithic, and completely watertight seal. Apply the sealant generously inside the pan, filling it according to the manufacturer’s specifications. Ensure the sealant fully encapsulates the penetration, leaving no gaps or air pockets. For metal-on-metal seams, proper metal roof soldering techniques can also be essential for creating a permanent, waterproof bond before the final sealant is applied.
Test Your Seal
Once the sealant is applied, your job isn’t quite done. A poorly filled pocket pan is a major liability. If the filler material shrinks, cracks, or pulls away from the sides as it cures, it creates a perfect basin for collecting water. And any spot on a roof where water stands still is a potential leak waiting to happen. Visually inspect the seal from all angles, checking for complete adhesion to both the pan and the penetration. After it has cured, you can perform a simple water test to confirm its integrity. A solid seal means peace of mind for both you and the building owner.
Avoid These Common Installation Mistakes
Even the most seasoned pros know that a small oversight can lead to a big headache down the road. When you’re forming a pocket pan, precision is everything. A well-crafted pan is a testament to your skill, but a few common missteps can compromise the entire system. Let’s walk through the most frequent errors I see on job sites and, more importantly, how to steer clear of them to ensure every installation is solid, secure, and built to last. Taking the time to get these details right from the start saves you from frustrating callbacks and protects your reputation for quality work.
Mismatched Materials
Think of your roofing system as a team—every component needs to work together. Using incompatible materials is one of the quickest ways to create future problems. For instance, pairing certain metals can cause galvanic corrosion, and using an underlayment not rated for high temperatures under metal can lead to premature breakdown. Always double-check that your flashing, underlayment, and sealants are specifically designed for and compatible with your chosen metal. This simple step prevents common installation mistakes that can lead to leaks and costly repairs. Don’t just grab what’s in the truck; verify that every piece is right for the job.
Forming and Measuring Errors
The old saying “measure twice, cut once” is gospel in metal roofing. Inaccurate measurements are the root cause of most pocket pan failures. A pan that’s too small won’t cover the penetration properly, while one that’s too large can be difficult to seal and may interfere with drainage. Use quality metal cutting tools for clean, precise cuts. When you’re bending the metal, ensure your angles are sharp and your folds are consistent. Even slight panel alignment issues can create gaps or low spots where water can pool, putting unnecessary stress on your seams and sealants.
Improper Sealing and Drainage
A perfectly formed pan is useless if it doesn’t create a watertight seal. This is where your attention to detail really pays off. One of the most critical errors is using the wrong type or amount of sealant. Always follow the manufacturer’s guidelines for the specific materials you’re working with. Beyond the sealant itself, ensure the pan is installed to promote positive drainage, directing water away from the penetration. Poorly sealed flashing is a direct invitation for water to get in. Whether you’re using high-grade sealant or relying on traditional metal roof soldering, a flawless seal is non-negotiable.
Pro Tips for a Lasting Pocket Pan
Once you’ve mastered the basic installation, a few extra steps can make the difference between a good job and a great one. Creating a pocket pan that lasts for decades comes down to refining your technique and being diligent about quality control, both during and after the installation. These professional tips will help you build a reputation for durable, leak-proof work that stands up to the elements year after year. It’s about going beyond the fundamentals to ensure every detail is perfect, from the initial fold to the final inspection.
Advanced Forming Techniques
The quality of your pocket pan starts with the quality of your folds. Using specialized metal bending tools is non-negotiable for achieving crisp, accurate bends, especially on heavier gauge metals. A tool like the Freund Pocket Pan Former, with its 6-inch folding depth, gives you the leverage and precision needed for a secure fit. This is crucial for creating clean transitions on the roof. A high-quality former helps you create those perfect “pig’s ears” and ensures every corner is tight and uniform, which is your first line of defense against water intrusion. Investing in the right tool for the job makes the work faster, easier, and far more reliable.
Run a Final Quality Check
Before you even think about reaching for the sealant, take a moment to give your newly formed pan a thorough once-over. Are all the folds clean and secure? Are the corners tight? Is the pan sitting flush and level with the roof surface? This final quality check is your last chance to catch any small imperfections that could turn into big problems later. It’s much easier to make a quick adjustment to a fold now than it is to track down a leak in a few years. Confirming that every detail is correct before sealing it up provides peace of mind for both you and your client.
Maintain and Inspect Your Work
Your job isn’t over once the sealant cures. A truly professional installation includes a plan for long-term maintenance. Educate your clients on the importance of periodic inspections or, better yet, offer an annual maintenance service. A quick visual check can help you spot potential issues like sealant degradation or debris buildup before they compromise the pan. Even the most perfectly installed pitch pocket can fail if it’s not maintained. Regular inspections ensure your hard work continues to protect the structure for its entire intended lifespan, reinforcing your reputation as a roofer who builds things to last.
Know the Signs of Wear and Tear
During inspections, you need to know exactly what to look for. Be vigilant for any signs of wear that could compromise the pocket pan’s integrity. This includes fine cracks in the metal, spots of rust, or sealant that is pulling away from the pan or the penetration. Catching these early warning signs allows you to make minor repairs before water has a chance to get in and cause significant damage. Using high-quality, forged steel metal seaming tools and materials from the start will minimize these risks, but no component is completely immune to the effects of time and weather.
Related Articles
Frequently Asked Questions
Do I really need a dedicated pocket pan former, or can I just use my hand seamers? While you could probably wrestle the metal into shape with hand seamers, a dedicated pocket pan former gives you the leverage and consistent folding depth you need for a truly professional job. It allows you to make crisp, clean bends, especially in heavier gauge metals, without distorting the pan. Think of it as the difference between a good-enough job and a great one that you can stand behind for years.
What’s the most common reason a pocket pan fails? The number one cause of failure is an improper seal. This usually traces back to a few key mistakes: inaccurate initial measurements that create a poor fit, using a cheap or incompatible sealant that cracks or pulls away, or simply not filling the pan correctly. A perfect seal depends on precision at every single step, from the first cut to the final pour.
Why is the “pig’s ear” corner fold so important? The “pig’s ear” fold is the standard for a reason—it creates a seamless corner without cutting the metal. Any time you cut a corner, you create a potential entry point for water, no matter how well you try to seal it. By folding the metal over on itself, you maintain a continuous, unbroken barrier, which is a far more durable and reliable way to keep water out.
How do I know which sealant to use? The right sealant is all about compatibility. You need to choose a professional-grade, UV-stable sealant that is specifically designed to bond with your roofing metal. Using the wrong type can cause the metal to corrode or the sealant to fail prematurely, creating a leak. Always read the sealant manufacturer’s specifications to confirm it’s the right choice for your materials.
Are there situations where a pocket pan isn’t the right choice? Absolutely. Pocket pans are a fantastic solution for irregularly shaped penetrations that are difficult to flash conventionally. However, for a standard round vent pipe, a pre-fabricated pipe boot is often a faster and more reliable option. You should reserve pocket pans for those truly awkward spots where a standard flashing just won’t work.