

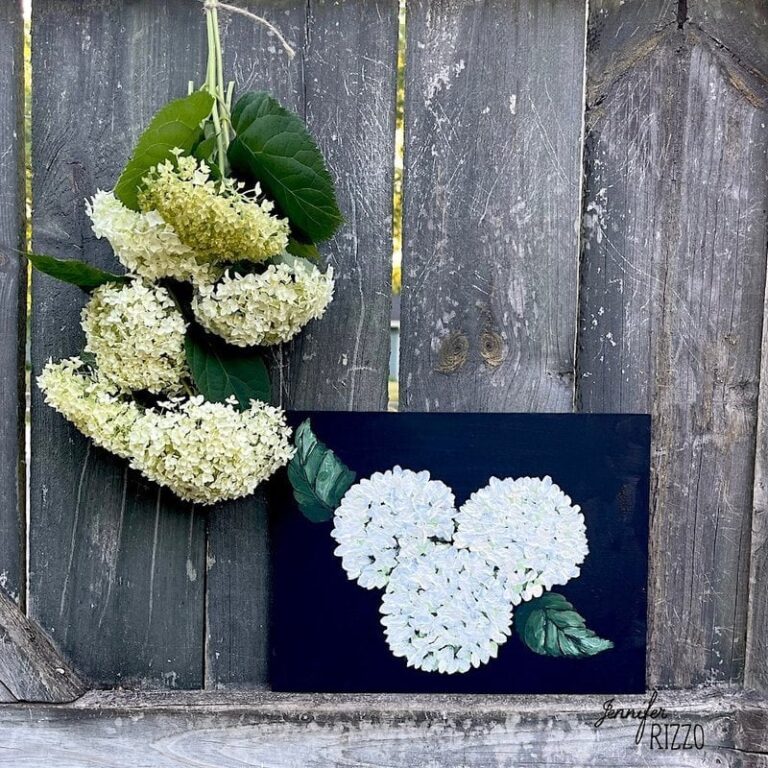

Hydrangea flowers are not only a beautiful summer bloom, but are so easy and fun to paint in acrylics on canvas. Painting hydrangeas is really about creating shapes and repeating the same stroke over and over again and then changing paint colors. I am here to lead you through step by step instructions (or you can watch the video tutorial that plays after an ad) on how to paint a hydrangea in acrylic on canvas below that takes you through the entire process for beginners.

This post contains affiliate links such as Amazon affiliate links. See our sponsor and affiliate disclosure here.
Supplies for Painting Hydrangeas
To paint these easy flowers you are going to need :
-8×10 black canvas (or a white canvas painted black)
-Acrylic paint (craft paint is fine) in dark brown, dark hooker’s or Hauser green, medium sap or light Hauser green, lime green, cream and titanium white
– A filbert brush or round brush and that’s it! (Note: I’m using a 4 filbert brush. For a more delicate petal, pick a small paintbrush, or for a larger canvas to keep it in scale, for larger petals use a larger brush. If you want to paint blue hydrangeas, use Cobalt blue, cerulean blue, lavender purple and titanium white paint).
Grab supplies here for how to paint a hydrangea
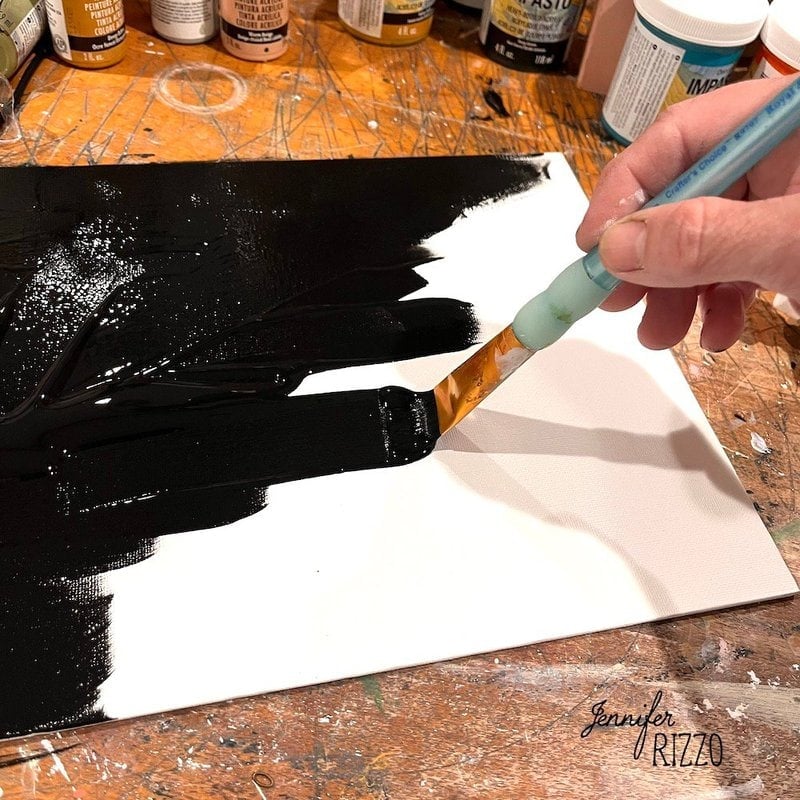
Determine Flower Painting on Canvas and Underpaint the Flower Head
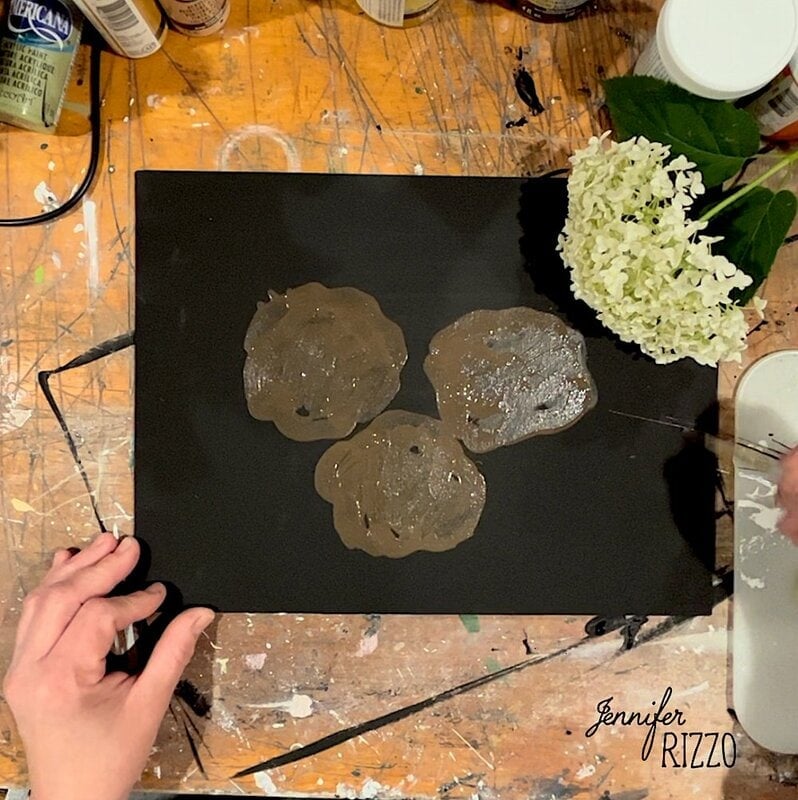
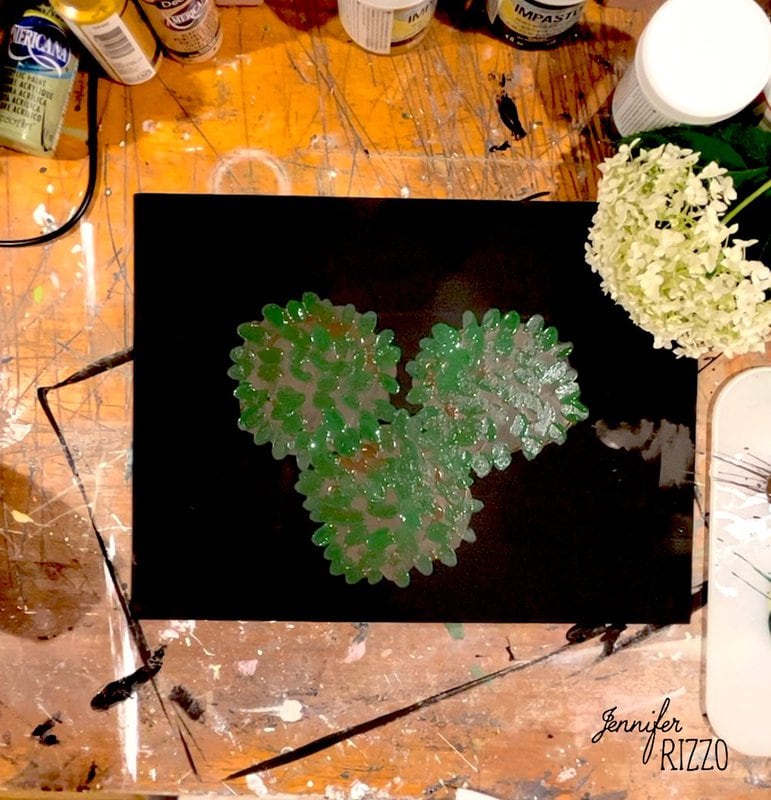
The first step in painting your hydrangea flower heads is determining how many and placement. I decided on three beautiful clusters of flowers and centered them slightly overlapped on the outside edges. You can pre- sketch your placement with a pencil, or just go for it with this easy process. The first step is to use the dark brown paint as a base color to create a blobby outline and then paint it in.
Paint with Green Paint Next
For my painted hydrangeas below, I decided I wanted to paint white hydrangea flowers with a green undertone. Just pick varying shades of paint that get progressively lighter if you want to paint different colors of hydrangeas. I love gathering a bunch of beautiful hydrangea flower for a vase, so this project gave me the perfect excuse! With the dark green paint, use the brush to make short marks all of the way around the outside of the brown blobs. Make them kind of blobby to avoid hard edges.
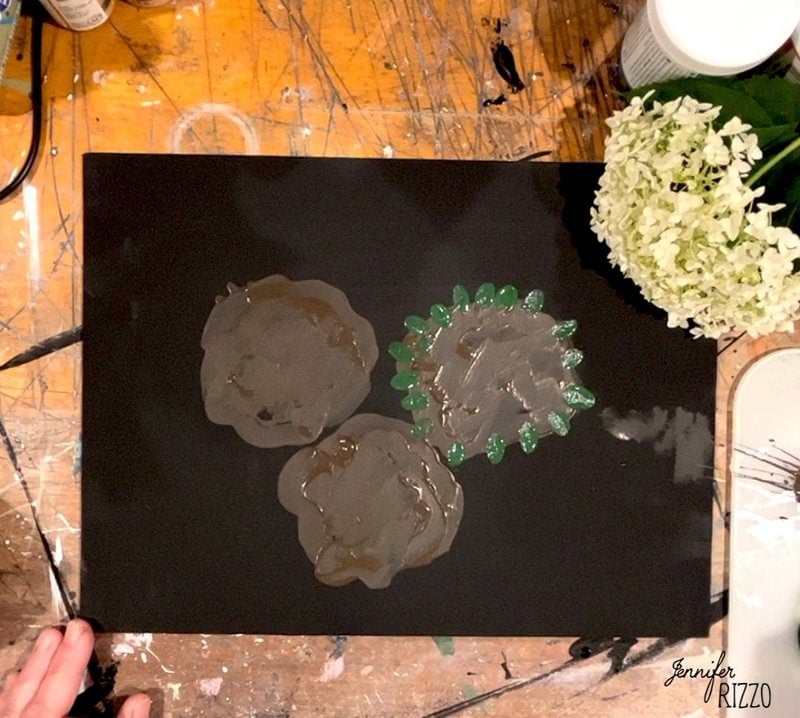
Fill the Center of the Flower with Green Paint Lines
Once the outside of the brown blobs are filled with the green paint lines, fill in the center with more random green paint lines.Make sure to still leave some of the brown paint peeking through. Let dry.
Paint Small X Patterns for Flower Petals
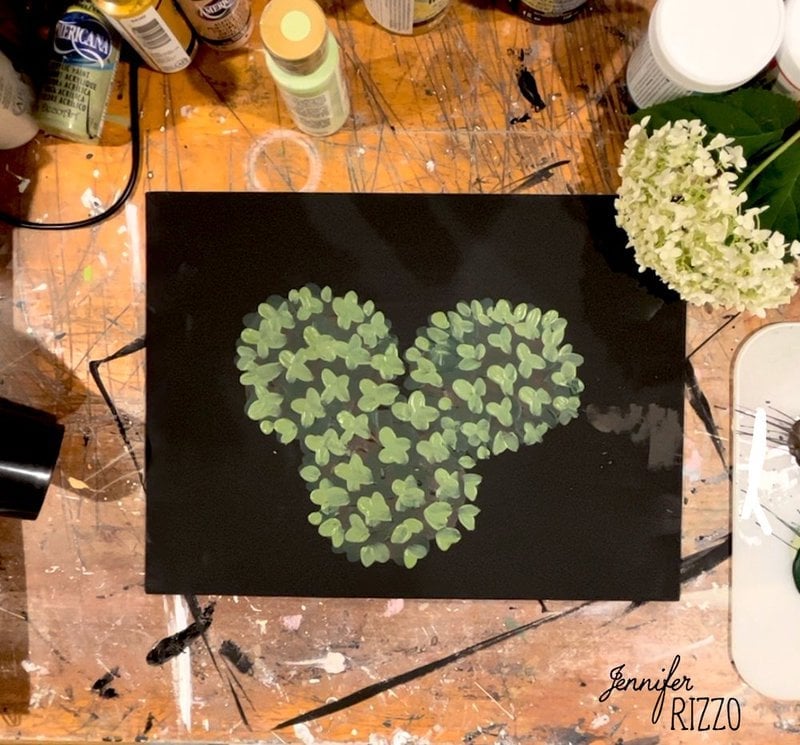
For the first stroke on the next layer, use the medium green paint to make an “x” pattern. make small x’s all over the hydrangea flower , overlapping with the dark green but not completely covering it. Also add some single strokes to create some individual petals with each color around the edges and in the middle to add variation
Repeat with the Light Green Color
Once the medium green is dry, repeat the same process with the light lime green color. Make sure to let the paint dry between each layer of your hydrangea petals so they don’t get muddy. Hard paint edges are better with this project.
Layer a Creamy White Paint on Top of the Green Paint
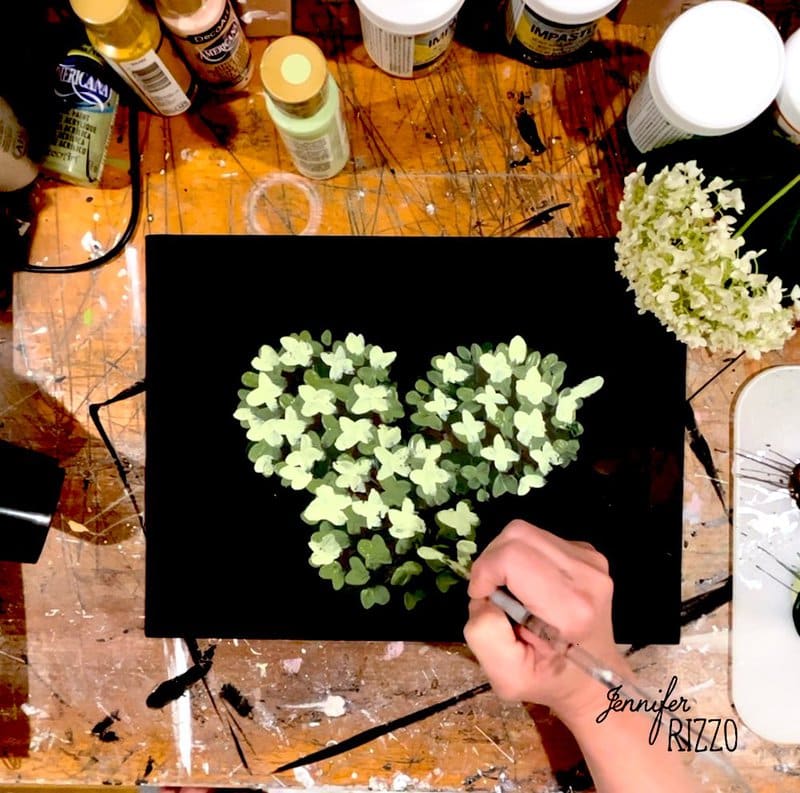
At this point, I wanted to warm my painted hydrangea flower blooms up, so I used a cream paint to repeat the process of painting the petals. If I had wanted to keep them green, I would have stayed in the green color family (same for a blue hydrangea use varying shades of paints in the blue and violet color family ).

Add Highlights with Titanium White
To add highlights to my hydrangea flower head and give them more depth, I then used titanium white paint to make my x-pattern, but I kept them near the top of the flower petals. This will give a slight shadow effect to your flowers.

Paint the Hydrangea Leaves
Once your flowers are painted, you can add you leaves. Hydrangea leaves have serrated edge, so the messier you are with your leaf shape the better. A little trick to painting leaves is to paint a rough leaf shape with thicker paint and then while the paint is still wet, use the other end of your paint brush to scrap leaf lines into the paint. The more imperfect the better! Then you can use those lines to add highlights on the leaves between.

And there you have it! You’ve painted an easy and beautiful cluster of hydrangea flowers! I knew you could!
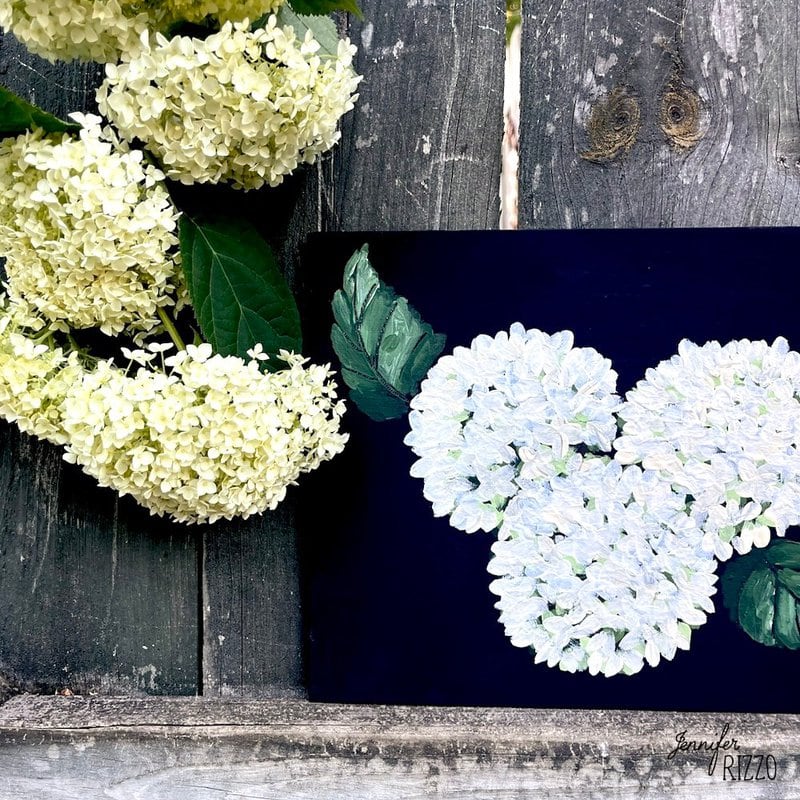
Now that you’ve created a beautiful painting of a bunch of hydrangeas, check out this post on the easiest way to frame them! Do you love real hydrangeas? See how to make them last and dry them here.
For more painting tutorials, see how to paint an easy sunflower with one brush!