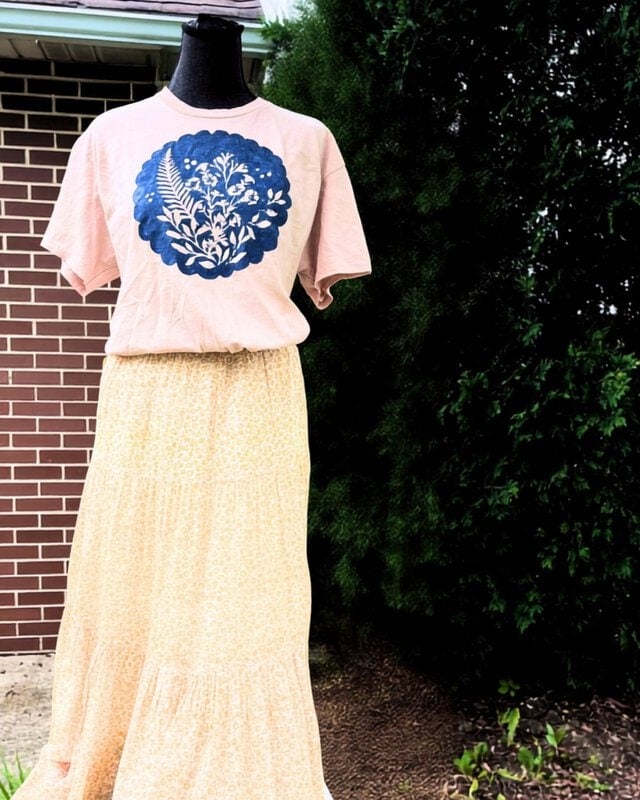
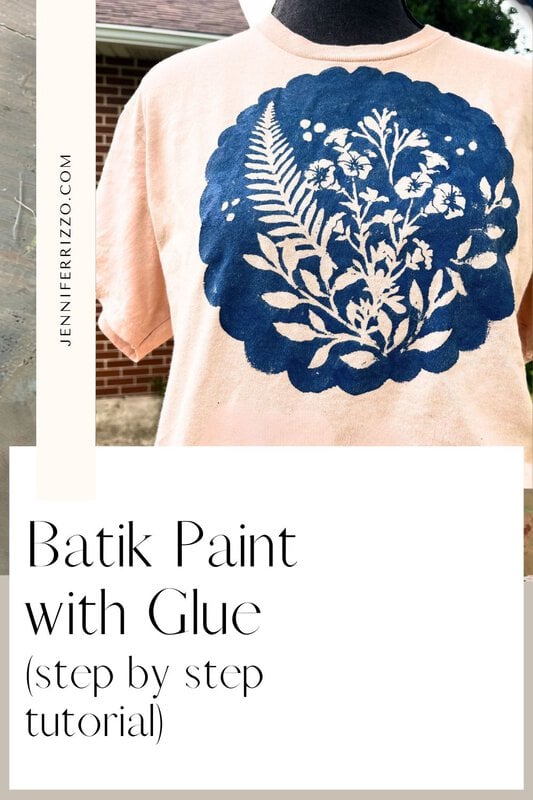
While traditional batik uses wax to create a resist to dye fabric in intricate patterns, this simpler version is a fun way to create wearable art! This version uses an old t-shirt, fabric paint to glue batik and something to make creating a design even easier, stencils! Using stencils is a great way to make a design with clear guidelines and without the stress of having to design something from scratch and it’s a fun project for the kids too with adult supervision! There is a video showing the project that will play after an ad in the video player.
This post contains affiliate links. See our sponsor and affiliate disclosure here.
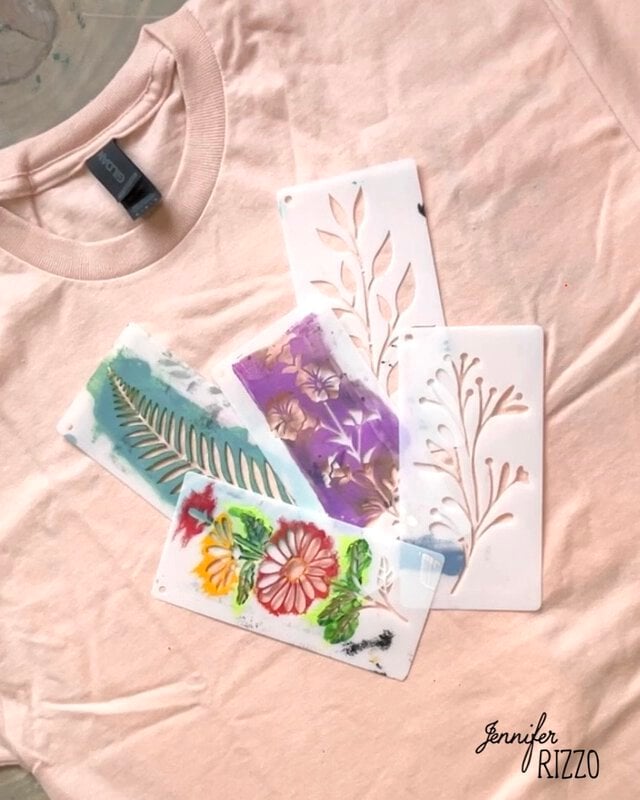
Supplies for Creating Batik with Glue
-T-shirt or fabric
-Paper or scrap cardboard to place between the t-shirt layers
-White kid’s craft glue (washable school glue)
-Stencils
-Paint brush
-Fabric paint or acrylic craft paint and textile medium (we used DecoArt brand)
-A bucket and warm water
-(optional) clean scrubbing sponge to remove the glue
Pre-wash Material of Fabric Items
Whatever material you’ve decided to create on, pre-wash the item to remove any sizing or chemicals that would prevent the fabric paint from sticking, Dry and then lay out on a flat surface. Place either paper or some flat cardboard between the layers of the shirt to prevent the fabric paint from bleeding through to the backside.
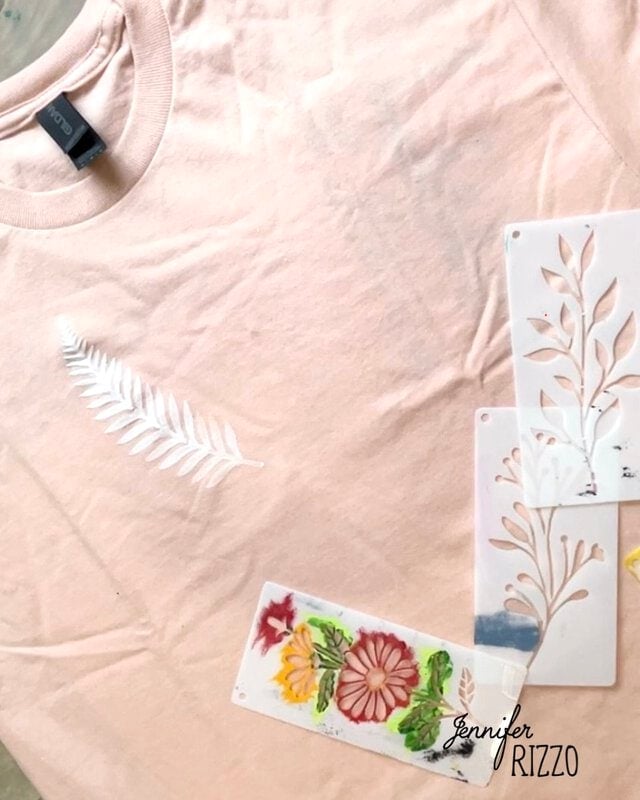
Paint the Glue on with the Stencil Design
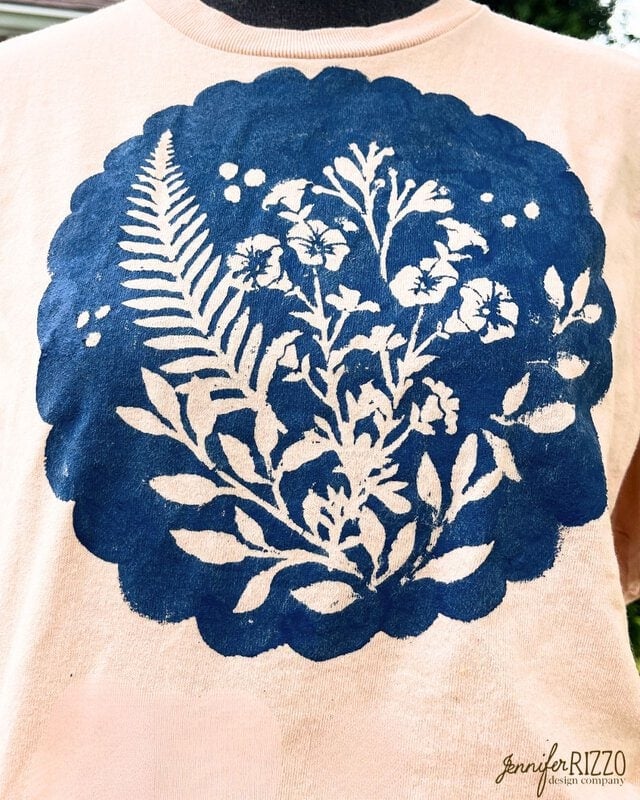
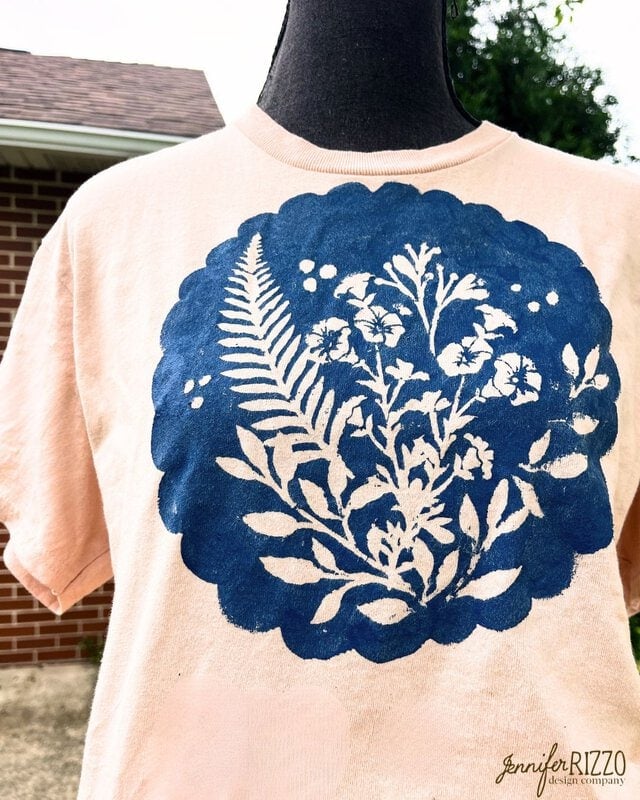
The glue is going to replace the wax that would typically be used for the resist in batik. Dispense the craft glue into a small dish. Place the stencils onto the shirt and use the brush to paint the glue onto the shirt through the stencils.
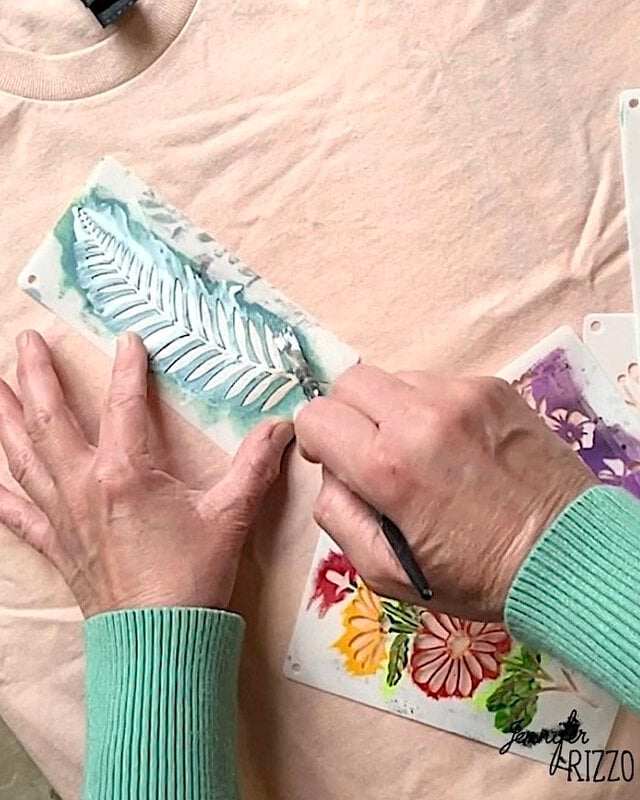
We found it works better to paint on thinner coats and paint inward from different directions until the inner stencil area is completely covered. We collaged our stencils by layering them over each other, using a hair dryer to dry the glue between stencils so they wouldn’t smear the previous layer of glue. Once the stencil areas are “painted in” and once the design is finished, let the glue dry completely before moving onto the next step.

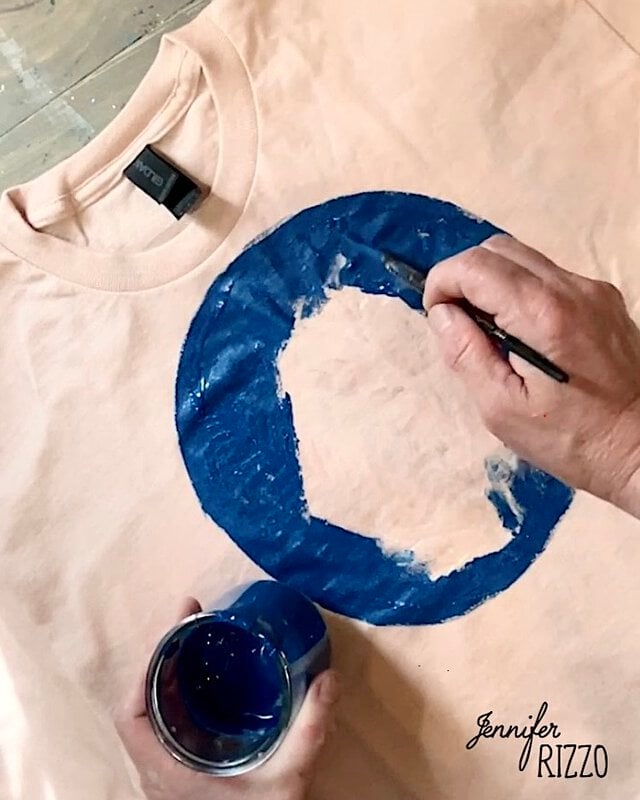
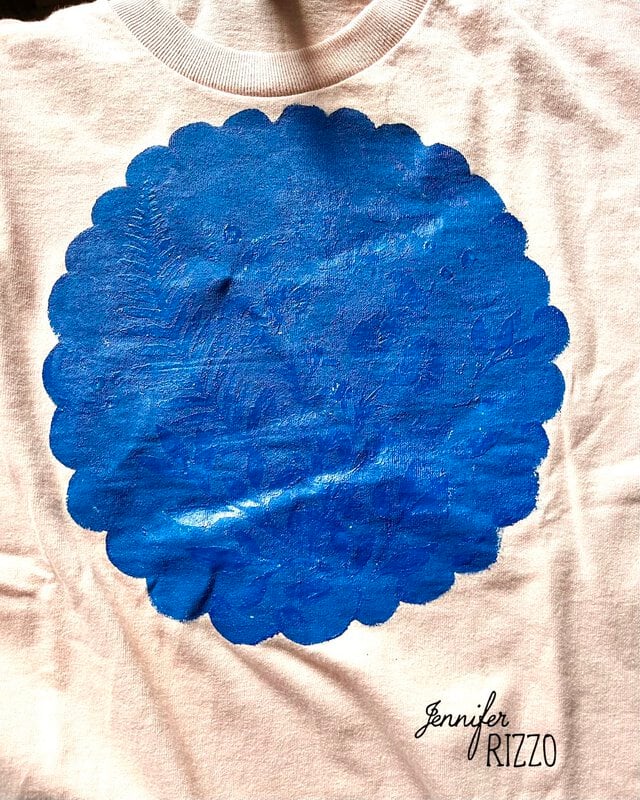
Paint Design with Fabric Paint
We used a. warm blue acrylic craft paint and textile medium mix to create a more sun print style of look, but you can also use one step fabric paint. While we stuck with one color, feel free to use as many colors as desired to create the traditional batik-style look. Paint right over the areas covered in dried white craft glue. We also painted a cute scalloped edge around the design to make it a little fancy.
Follow the Fabric Setting Directions
Some fabric paints need to be heat set to be permanent, some just need extra dry time of 24 hours or more. Make sure to follow the directions for which ever paint was used to make it permanent.
If you love the look of sun printing, see how to make faux sun prints (cyanotype printing) with gel plate printing.
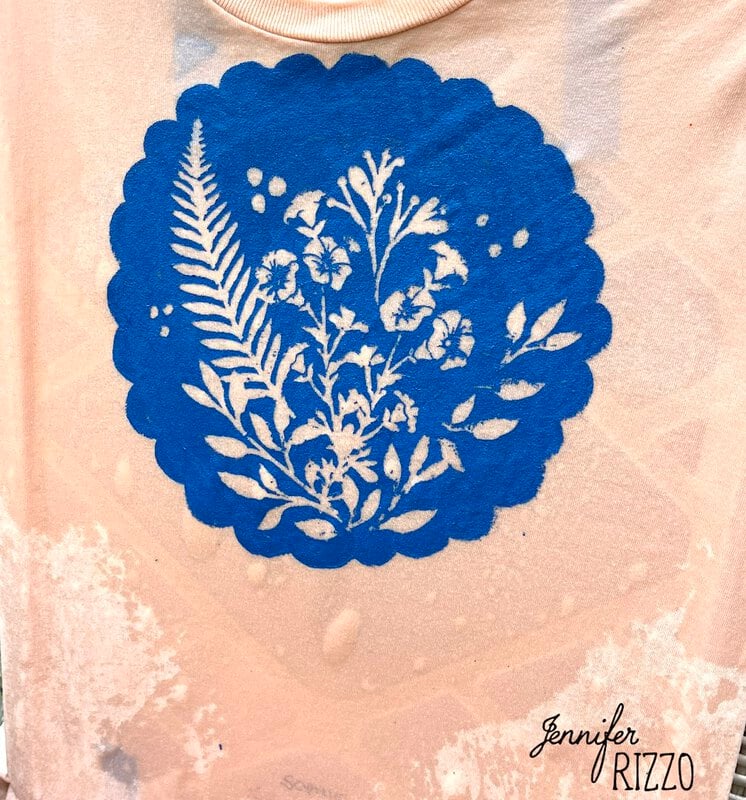
Soak the Shirt and Remove the Glue Resist
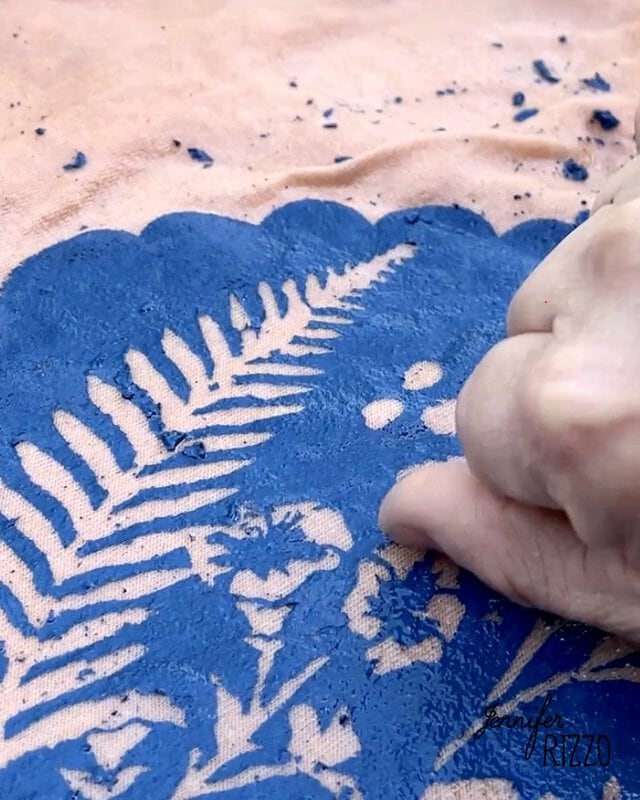
Once the paint is set, soak the shirt in warm water for a few hours to loosen and dissolve the craft glue. It make take a few soaks and a little scrubbing to remove the glue.
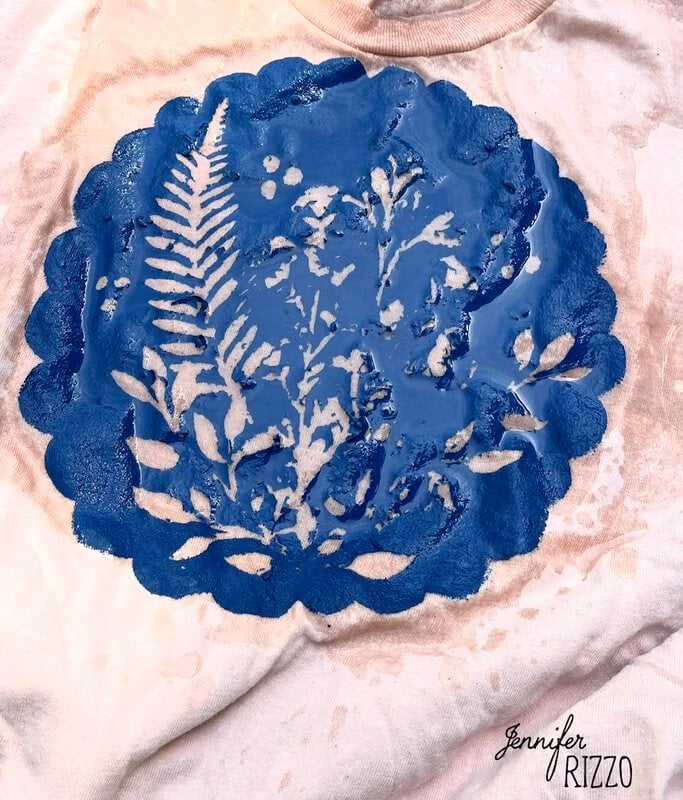
We scraped at it, but a scrubbing sponge or even plastic card or old toothbrush can work. Once all of the glue covered areas are removed, rinse the shirt before laundering. If rinsing over a sink, make sure to place a catcher of some kind in the sink to keep the plasticky pieces from going down the drain, then discard the paint bits into the regular garbage.
Launder The Batik Glue Shirt as Normal
Once the shirt is done and the fabric paint is permanent, the shirt can be laundered as normal and super cute to wear!
Some Other Fun Ways to Use the Batik with Glue Technique
-Use the stencils, but trace them instead of painting them in for a more traditional batik look
-Freehand a design
–Create a banner on canvas fabric
-Trace letters with tracing paper to create text
-Use on sweatshirts, pillows, tea towels and more
Have fun and experiment with this fun and versatile art technique of glue batik