


Painting a winter scene in acrylic can be fun and a great beginner’s acrylic painting project. You don’t need a ton of fancy materials either. Just a canvas, some craft paint and a brush or two. While we’ve painted this smaller size on an 11 x 14 canvas, this tutorial can be painted on any canvas size. Are you ready to learn How to paint a winter scene?
Supplies to Paint a Winter Scene
-a canvas (size of choice)
-white,grey,brown,blue and green acrylic paint
-Brushes (Liner,large flat, and round.)
I painted this on acrylic canvas board, but you can do this on a canvas,a pillow or even a wood board.
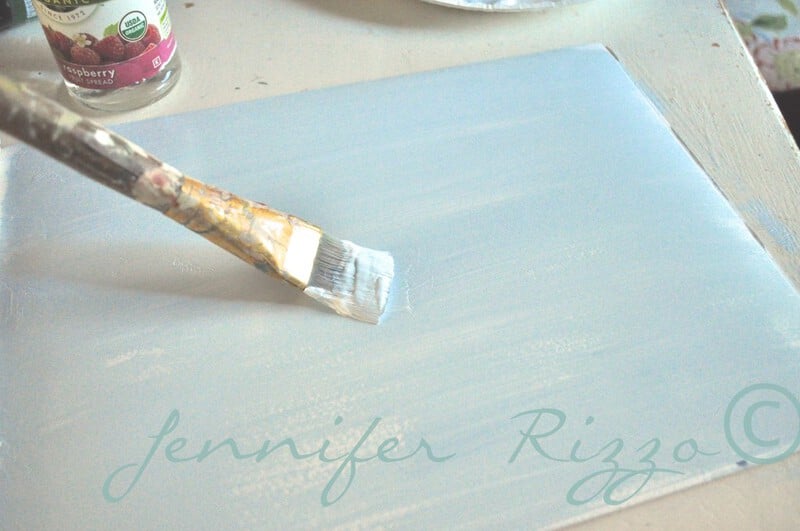
Base Coat the Canvas
First base coat with a blue color. I mixed a blue with some white to get the color I wanted. It’s ok if you don’t have complete coverage over the entire surface.
If you love painting a pretty, holiday-themes canvas, check out more about how to paint a poinsettia in acrylic-link opens in a new tab.

Start Painting in the Scenery
Once that’s dry, take some white and make a hill. It does not have to be perfect, just kind of free-form it and add some bumps.

Take a little grey paint and define your hills by painting it along the edge and blending it while the white paint is still wet. Add more white if the white is a bit too dry.

Just blend it until you are happy with it. If it gets too grey, let it dry and go back over it with white paint. The best part of acrylic paint is that it can be painted over and over.
Paint the Pine Tree Trunk

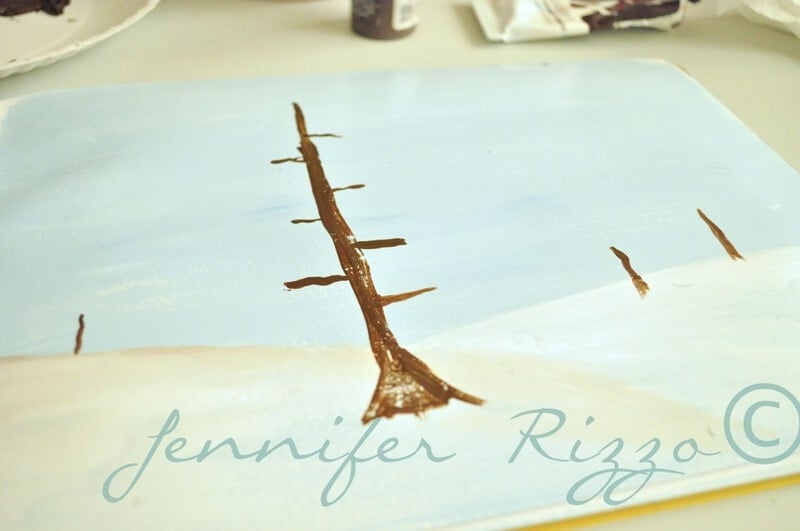
After your white is dry, take your brown paint and a thin liner brush and draw a line down the middle-ish. Make it fatter on the bottom than on the top.

Make the base into a triangle shape for the trunk where it meets the ground. For more another winter painting idea see how to paint birch trees-this link opens in a new tab.

Create the Side Branches
Draw lines out starting at the top and make them slightly longer as you move down. New growth is always towards the top or outside of a tree or plant and will be thinner and shorter and old growth near the bottom will always be bigger.
Paint Little Background Trees
Once you have the tree base done, make 3 little lines in brown paint next to the tree on top of the “snowy hills”. These will be trees in the distance.

Add the Base of Tree Branch Clusters
Take a dab of brown and pounce it on the top of the tree where the lines start.

Work your way down each branch,dabbing our as you go on top of each of the lines in paint clusters. Don’t be afraid to make these messy-looking.

You can even dab across the tree a little, it really doesn’t have to be perfect!

Then make little “dabs” on the other brown lines of the background trees/lines. They should be tiny dabs at the top of the line and get thicker as they move closer to the snowy ground.
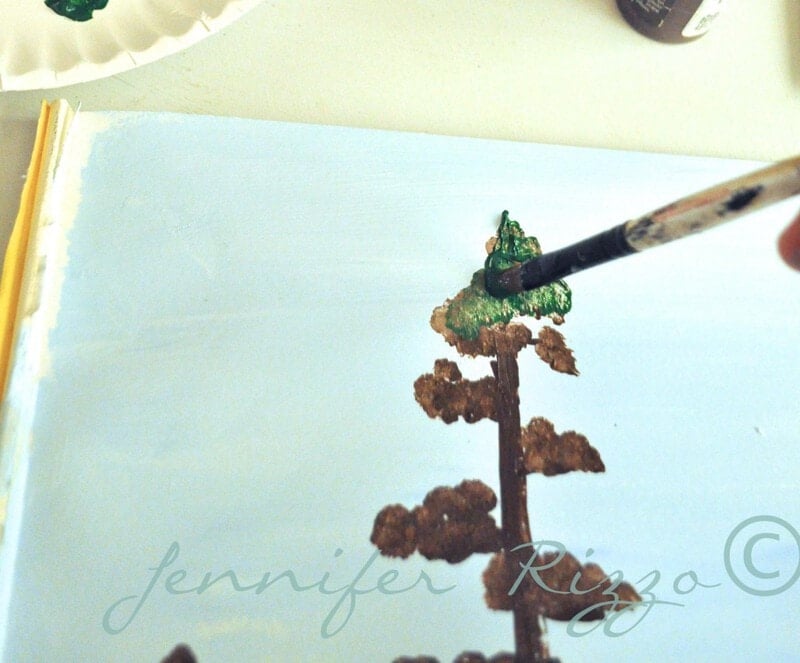
Use Green Paint on the Branches
Then take your green paint and dab it on top of your brown. It’s ok if some of the brown paint peeks through.

Work your way down the tree making pouncing motions with the brush over the brown paint.

Once you finish the big tree, dab some paint on the little trees, again going over the areas already painted.
Add Snow on Trees with White Paint

Then take your white paint and dab that just on the top of your green areas where snow might fall.

Less is more, you can always add go back and add more later.

Then do the same thing to the little trees in the back! Making it patchy looks better and letting some green peek though than making them all white.
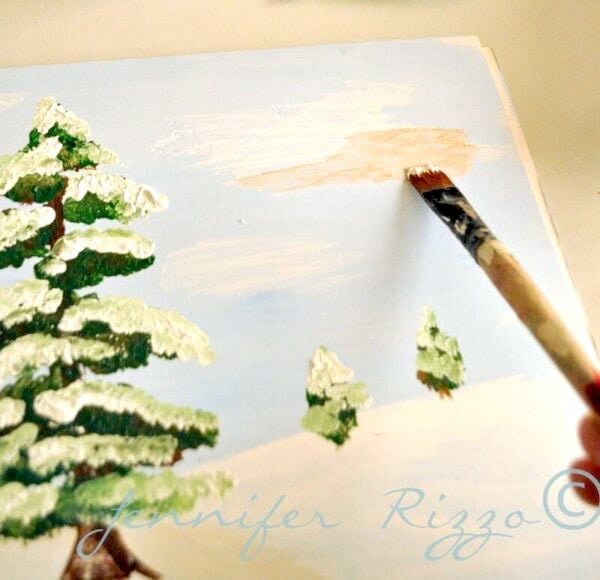
Use White Paint to Add Some Clouds

To make the winter sky, use a brush to spread white paint back and forth across the surface in a rubbing motion. This is called “scumbling”.

While the white paint is still wet, scumble some grey underneath and blend them.

Add Other Painted Elements to the Canvas
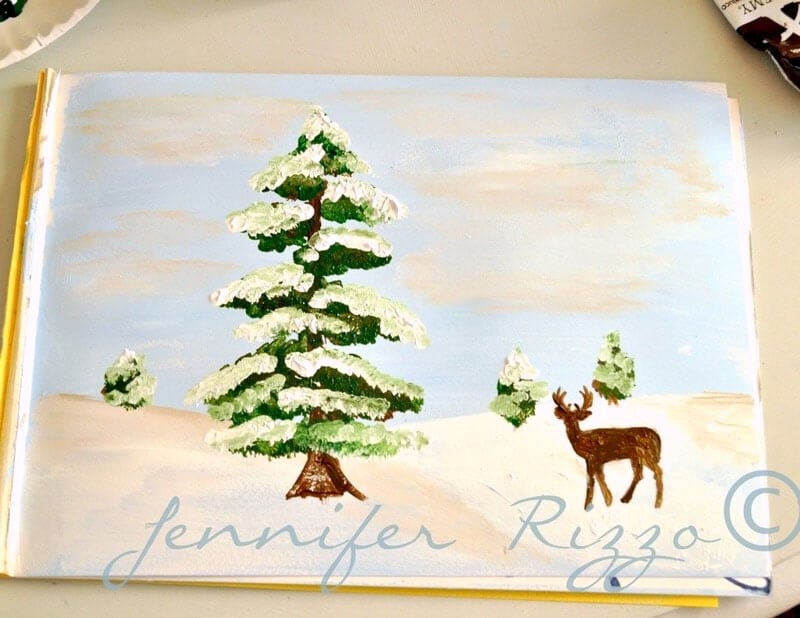
Once you’ve added winter to your sky, you can leave it how it is, or you can take it a step further and add a deer like I did. This is much easier than you think! You can also add more trees or fun items like a snowman! See how to paint a snowman with this tutorial-link opens in a new tab.

We printed out a deer image and transferred the silhouette to the canvas with a pencil.

Once your image is transferred, use your brown paint to start filling in the lines of the deer silhouette.

Once you have you deer painted, let dry and frame your picture!
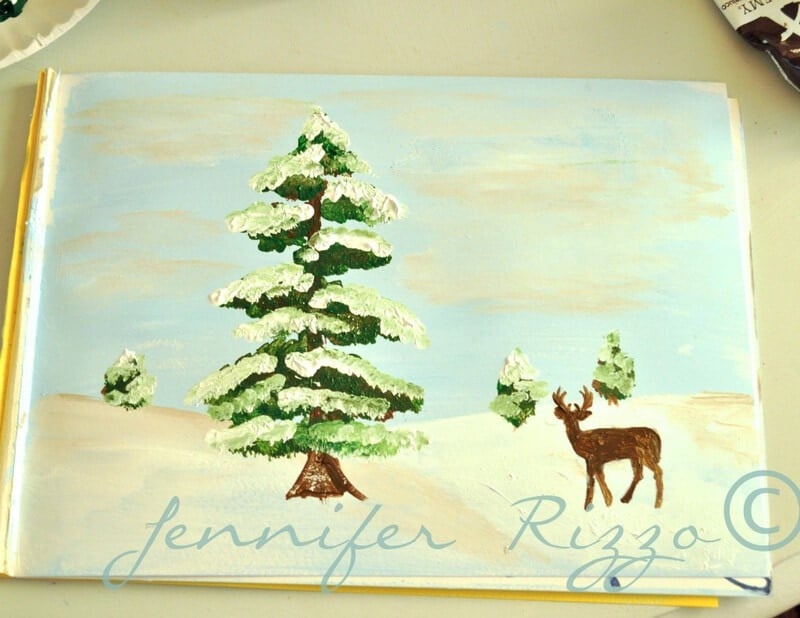
Let me know if you have a painting party or paint this picture, I would love to see your work! I have another treat for you too! I cropped this picture down so you can print it and frame it. I really hope you try to paint it yourself too.

Just save to your computer and print!
