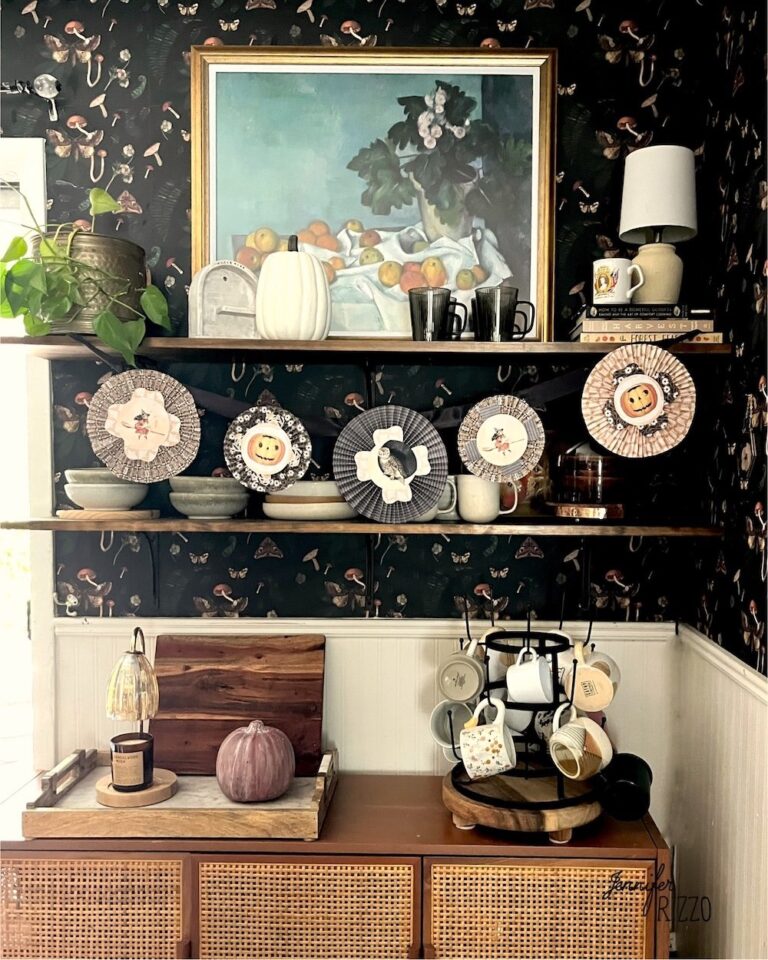
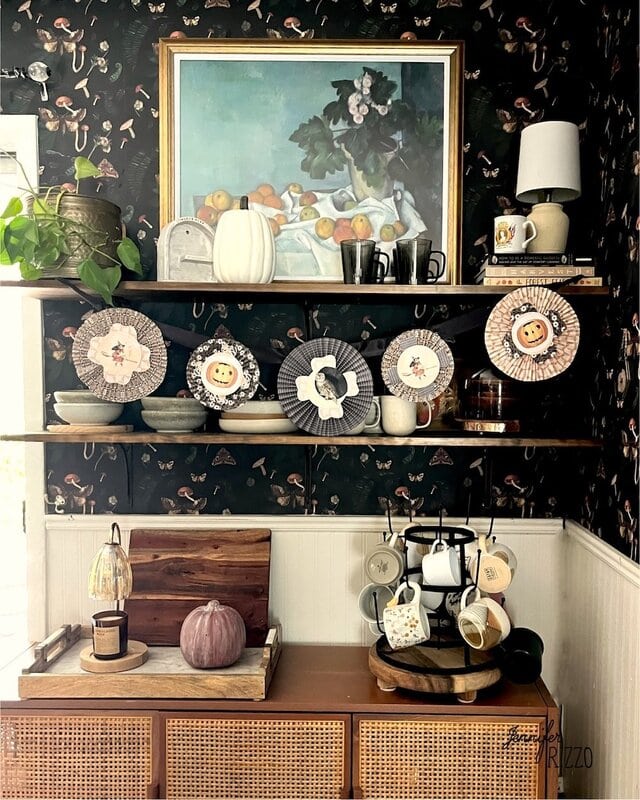
Paper rosettes are a vintage folk art that has even deeper roots in the origins of paper making that go as far back as the 2nd century. Today they are a whimsical and fun way to decorate for any holiday or event. Using scrapbook paper and vintage images, it’s easy to create a sweet and nostalgic paper rosette Halloween Banner. We have the free printables for the images and templates at the end of the post if you would like to recreate this fun project! You can even get the kids involved in the paper folding portion!
General Supplies to Create a Paper Rosette Halloween Banner
(This will create approximately 5 inch rosettes. For larger or smaller rosettes use a smaller or larger center circle, and more or less folded paper)
12 x 12 Scrapbook Paper of Various Patterns and Motifs
White Craft Glue
Vintage Printed Images on Cardstock
Scissors
3″ Round Paper Punch (optional)
Cardstock (color of choice, we used black cardstock)
Paper Scoring Board and Bone Folder (optional or a popsicle stick and ruler can be used)
Ribbon Color of Choice
Glitter ( optional )
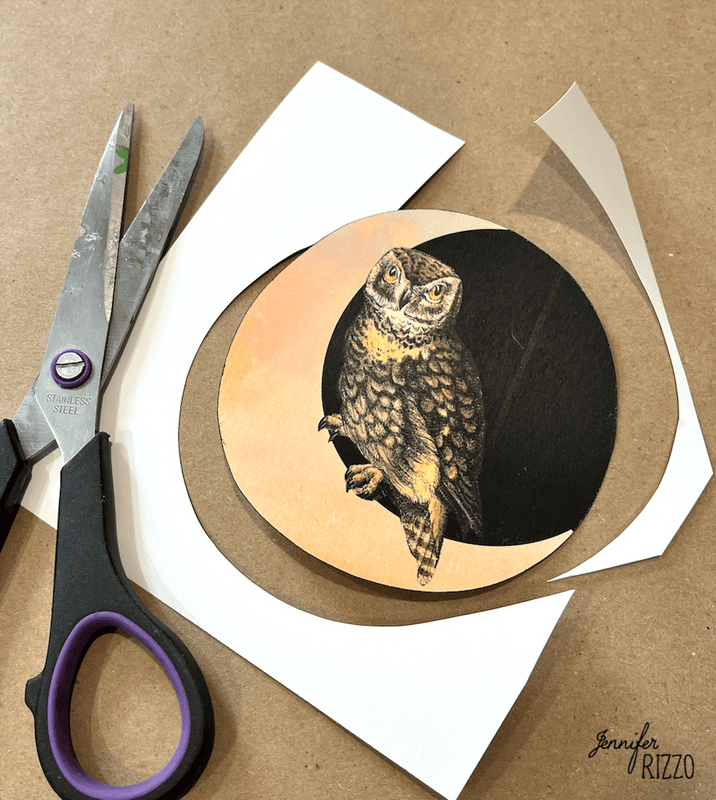
Begin By Cutting Out All of the Elements to Put Together
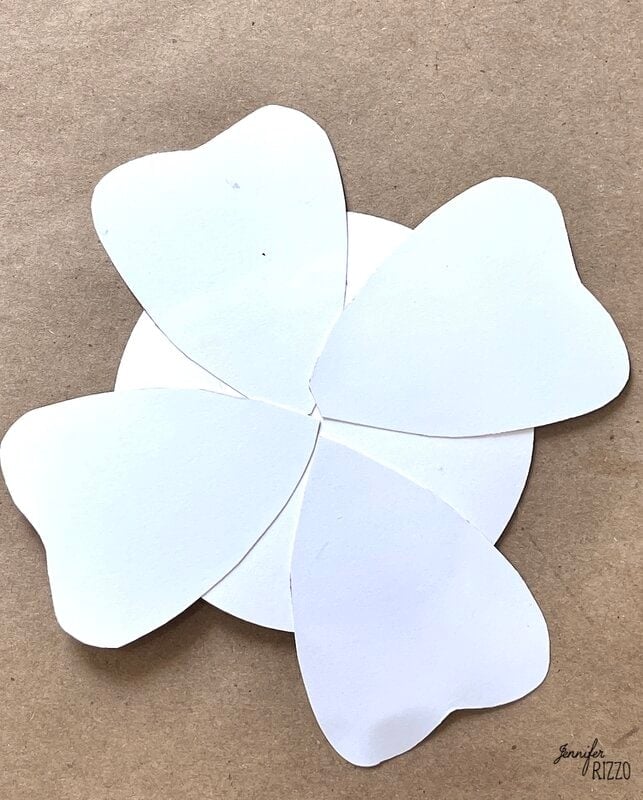
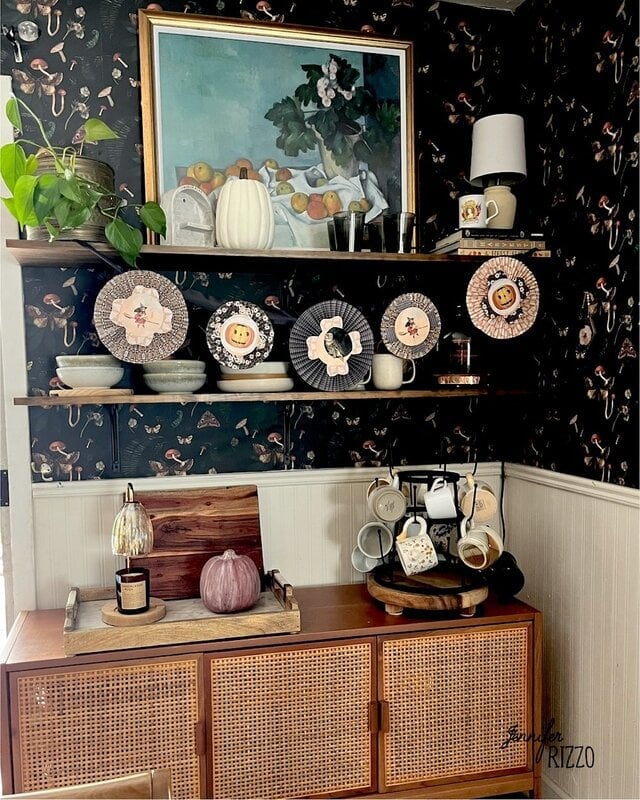
Each rosette needs folded paper strips, two 3″ circles, 4 heart shaped pieces, the center circle vintage image printed and cut out. It’s much easier to pre-cut these before assembling.
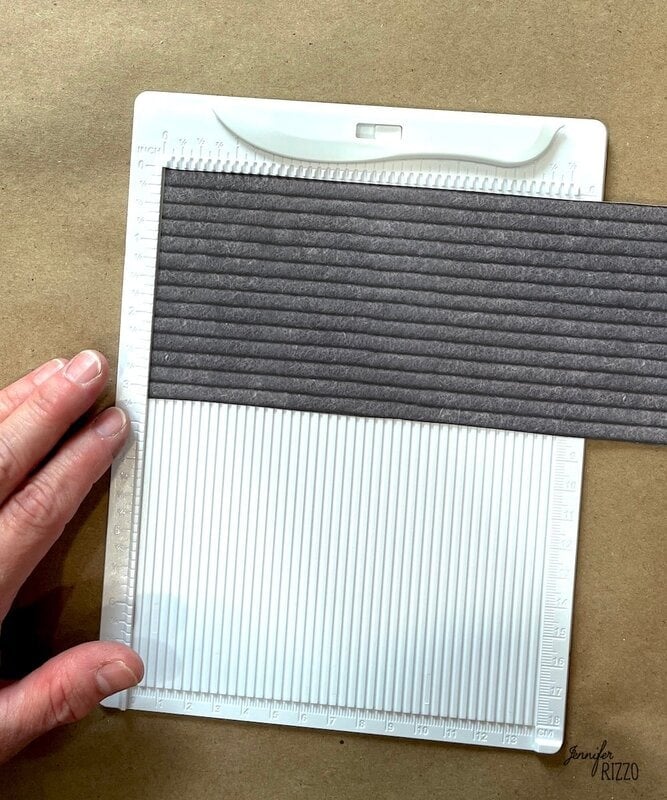
Creating and Cutting Paper Strips for the Rosettes
Choose the base rosette paper and start cutting into approximately 2 inch strips. It takes 2-3 strips of folded paper to create one rosette. Once the strips are cut, a paper scoring tool can be used to make even marks for easier folding. Without a paper scoring tool, a popsicle stick and ruler can be used to measure even spacing for folds on the back side of the paper, and the popsicle stick used to run along the ruler with a little pressure to create a sight indention on the paper (This makes it easier to fold.).
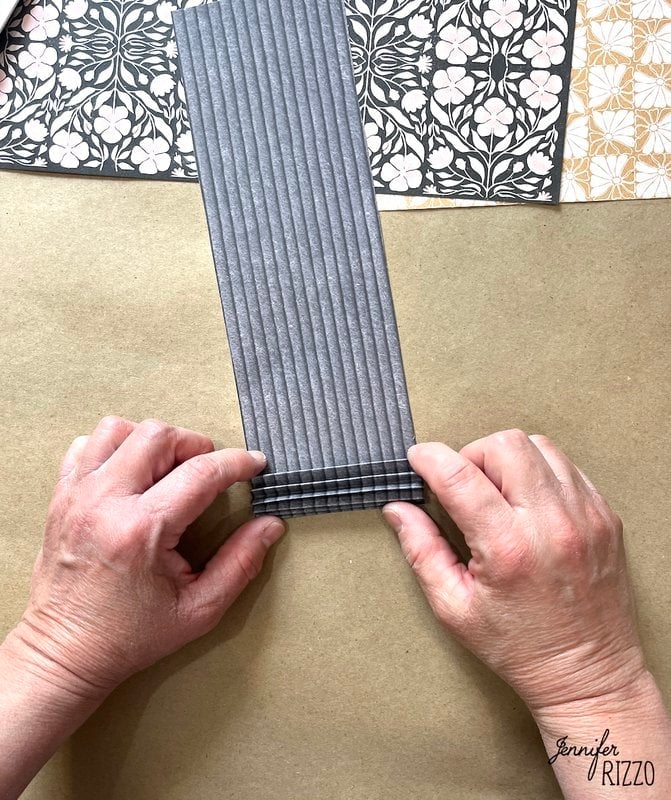
Pinch it in the center and fold paper strips, glue all of the ends together so it forms a circle, glue the ends together and set aside. It may need a weight like a book to help it stay flt while drying.

Start to Assemble Paper Rosettes
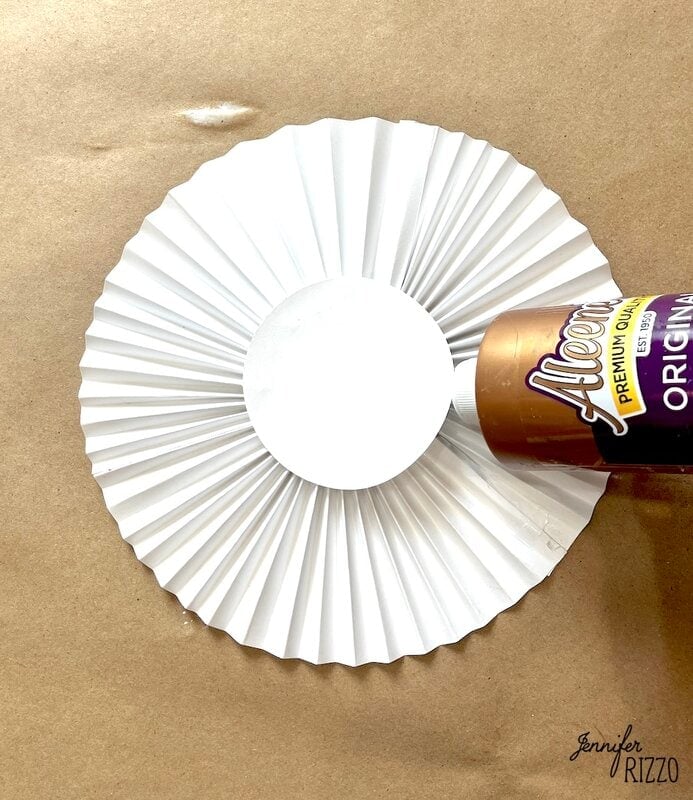
On the back of the cut out 3′ plain card stock circles, add a generous amount of white craft glue and let it sit in the open air until the glue feels extreme tacky to the touch. This will help it stick together much easier. Take the glued circle of folded paper and press it in the middle until it flattens. This may take a little finagling to get it to lie flat. It should scrunch together in the middle and fan out on the outside. Press the scrunched middle onto the tacky glue surface of the 3 ‘ round paper cut out and hold. Flip the other cardstock circle with glue over and press it on top, sandwiching the folded rosette between the two 3 ” cardstock circles. Use something as a light weight such as a roll of tape to hold it in place until everything dries.
Assemble the Front Decorative Piece
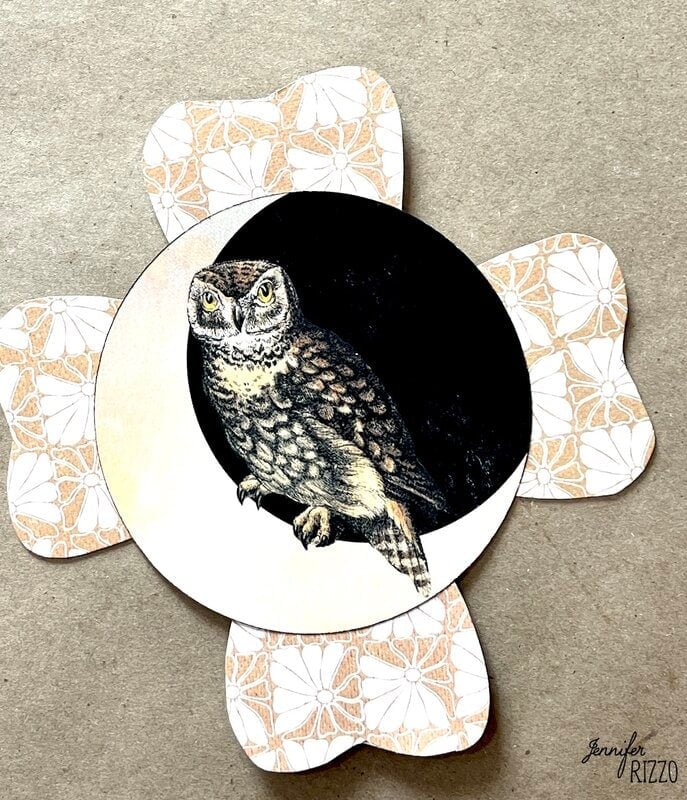
Glue 4 heart shaped pieces onto the back of the vintage circle image and let dry. A glue stick works really well for this.
Add the Vintage Embellishment
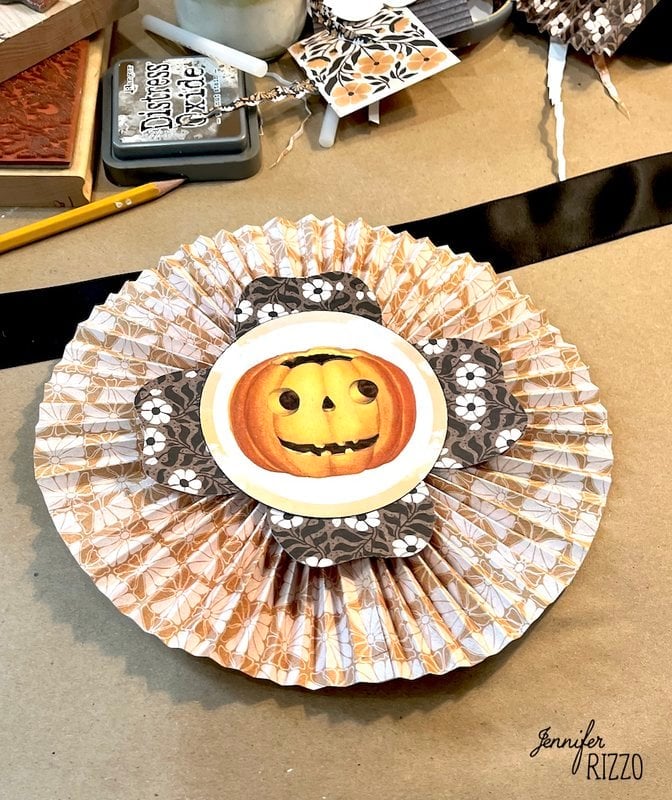
Once the glue on the paper rosette is dry, it’s time for the fun part, adding the paper embellishment and the decorative vintage image. If desired, add glitter around the edge with some glue before assembling. A stick can also be added to the back for vase display or a glued ribbon on the back to make it a hanging decoration! These are so easy to personalize by changing out the scrapbook paper or the image. Make them Fall, Winter, Christmas or even birthday! These are also fun individually as a gift topper tag! Once you get the hang of making them , it’s hard to stop!
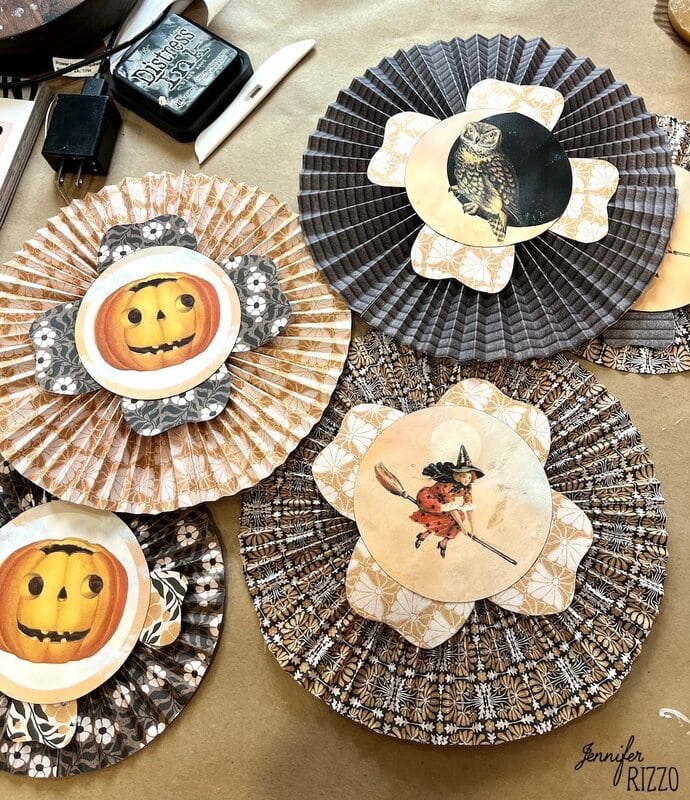
Create a Paper Rosette Halloween Banner with a Ribbon
Once all of the paper rosettes are dry, flip them all over and add glue to the backside. Place a ribbon across and let dry. Once the glue is dry, it is reafy to display! These are so fun and cheerful! And as always keep away from kids, pets and open flame.
If you love a fun Halloween project, try making these lacy and spooky vases.
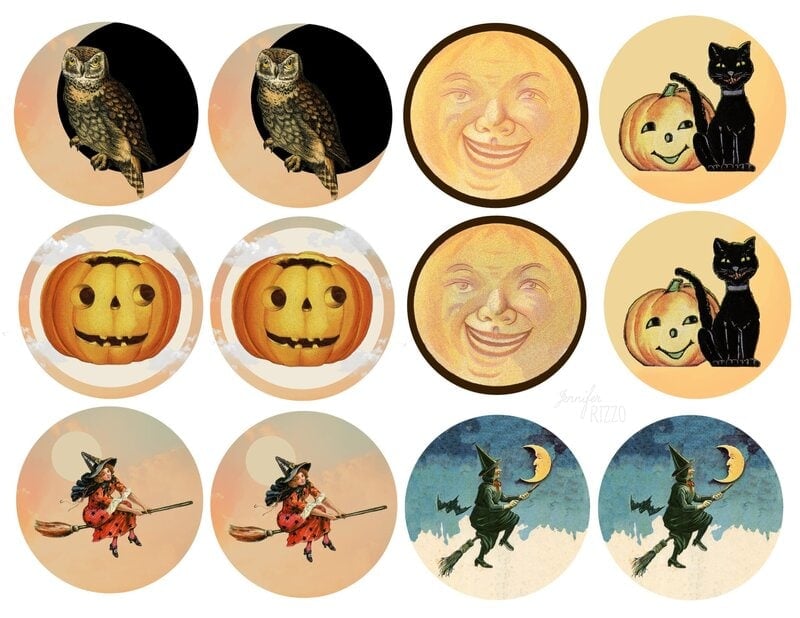
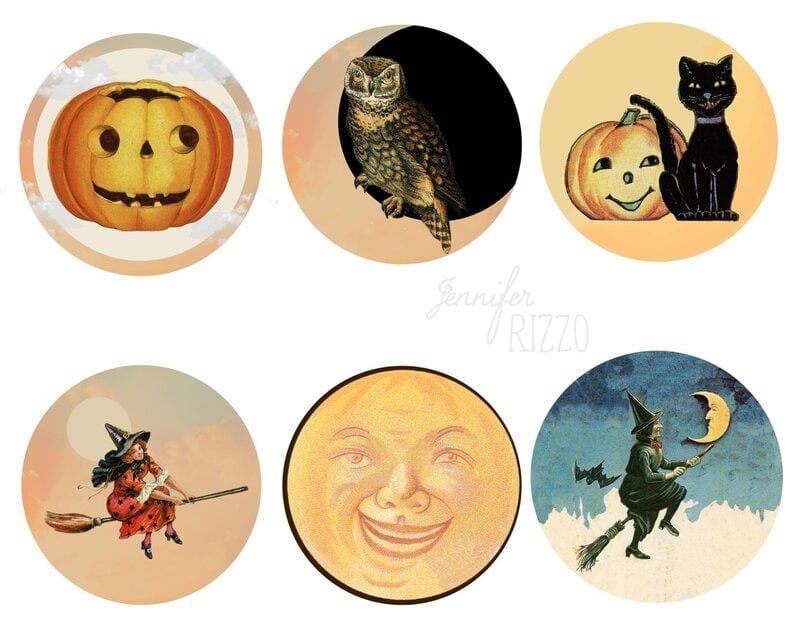
Grab the Free Vintage Halloween Rosette Images (for personal use) in 2 sizes here ↓ Just open and save to your computer as you would save a regular image.