
After a long day, nothing feels as good as a hot shower, but what happens when the shower keeps dripping long after you’ve gotten out? A leaking faucet can be a huge annoyance and may even increase your water bill, but fortunately, this repair can be done simply, and often without the assistance of a plumber. Read on to learn more about fixing or replacing a showerhead.
How to Fix a Leaky Showerhead
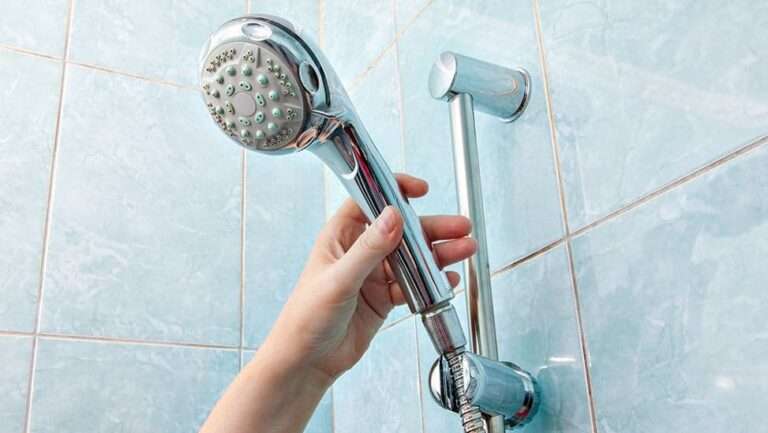
Water could be leaking from your showerhead for a variety of reasons. The first—and most obvious—place to start is within the showerhead itself. For this and all showerhead repairs, first turn off the water supply. Then locate the nut on the shower arm, just behind the head itself. You may need to use a wrench to gently loosen the nut, but if you are concerned about scratching or damaging the finish of the shower arm, you can place a washcloth over the nut as you turn it. Then, rotate the shower head counter clockwise until it’s removed.
Once the showerhead is detached from the shower arm, turn it over to inspect the inside. The first thing you may notice is mineral buildup on the screen and nozzles. If so, you’ll find instructions to unclog your showerhead in the next section. Otherwise, you’ll want to take a close look at the O-rings inside the showerhead. Over time, these rubber rings can become worn and eventually break. If you find a broken O-ring, take it to a local hardware store to find a replacement of the exact size. Before you reassemble the showerhead, however, you may want to wrap the threading of the shower arm with water sealant tape like Teflon tape. This will help to form a water tight seal and reduce leakage in the future.
If new O-rings and water sealant tape don’t seem to stop the dripping, the issue may lie within the faucet handle. Compression faucets have two handles, one for hot and one for cold, and a faulty washer in one of the faucets could prevent it from shutting off, allowing water to make its way up to the showerhead. The first step to this repair is to determine which faucet handle is causing the leak. This can be done by checking the temperature of the water leaking from the showerhead. Once you’ve figured out which faucet handle to repair, disassemble it by removing the small screw beneath the handle. Next, remove the nut and washer, replace the washer with a new one, and reassemble the faucet handle.
For showers with a single handle control, the issue may be due to a broken cartridge in the valve body. Locate the small screw beneath the handle, and then remove the handle, decorative faceplate, and the cap covering the valve body. Inside is a plastic cartridge. If it’s broken, first remove the nut or clip that’s securing it, then use pliers to gently pull the cartridge out. Replace the cartridge with a new one and reassemble the faucet.
How to Unclog a Showerhead
Over time, the mineral deposits in your water supply could create a buildup on the inside of your shower head. This is especially true for homes with hard water. The mineral buildup could decrease water pressure, clog nozzles, and eventually create leaking at the back of the showerhead, as water must find another way out. Showering with reduced water pressure and listening to the constant drip of the showerhead is certainly frustrating, but fortunately, the solution is quite easy.
This repair can be done without removing the showerhead itself, but it’s more effective when the head is detached. Follow the directions above to remove the showerhead. Then, soak the entire showerhead in a cleaning solution for at least an hour, or as long as overnight. Often, a soak in white vinegar is all that is needed, but occasionally, more heavy-duty cleaning solutions may be necessary. If you cannot remove your showerhead, fill a plastic bag with the cleaner and attach the bag to the showerhead using a zip tie or rubber band.
After the showerhead has soaked, remove the fixture from the cleaner and use an old toothbrush to scrub every nozzle thoroughly. You can also use a toothpick to gently remove mineral buildup within each nozzle head. Once the showerhead is free of buildup, rinse it with clean water and reattach it to the shower arm.
Upgrade Your Showerhead
Even if your showerhead is working fine, you may feel it’s time for an update. Whether you want to update the finishes in your bathroom or you’re looking to create a more spa-like experience with a rain showerhead, replacing your showerhead is a quick project with a big impact. First, turn off the water supply and remove the showerhead following the directions above. You will most likely need to remove the shower arm as well, especially if the finishes are different. Simply turn the shower arm counter clockwise until it is removed from the pipe in the wall. Next, follow the directions to reassemble your new showerhead and enjoy the updated look and feel of your bathroom.
Repair or Replace Your Shower Head
A leaking showerhead repair may seem like a job for a plumber, but often, you can do the repair on your own quite easily. First, remove the showerhead and replace any broken O-rings or unclog it if mineral deposits have built up. If that doesn’t keep your showerhead from dripping, you may need to look downstream from the showerhead itself to the faucet. For compression faucets, the problem may lie in a broken or worn washer within the faucet handle. Single handled showers may have a broken cartridge within the valve body. While these solutions will help most homeowners fix leaking showerheads, if you still see water trickling out when the shower is off and you’re in need of shower repair, it may be time to call your local licensed plumber. A drip-free shower is right around the corner!
Alan Smith is the Marketing Coordinator of Spartan Plumbing, Heating & Air Conditioning. Spartan is a leading plumbing /HVAC company that assists all types of businesses and residences throughout the Washington D.C. region and parts of Maryland. Spartan has an A+ rating by the Better Business Bureau and was voted Best Plumber in D.C. for four years in a row.